Building a SaaS, marketplace, or internal tool in Bubble.io? Sooner or later you’ll need to generate a PDF or an image from your app data – an invoice for a paid order, a certificate when a user completes a course, a branded social card for a new listing, or a weekly report mailed to your customers.
Bubble.io doesn’t generate PDFs or images natively. You have two paths: an on-page plugin that renders documents in the browser (limited, prone to page-break issues, hard to scale), or a server-side PDF and image API that handles rendering, storage, and delivery for you.

This guide shows you the API approach using APITemplate and its native Bubble.io plugin. By the end, you’ll have a working Bubble app that generates dynamic PDF invoices and social media images from real user data, then emails them automatically.
1. Getting Started with Bubble.io
If you’re not familiar with Bubble.io, it’s a no-code app development framework that lets you build web and mobile apps without writing any code. Bubble apps are made up of a series of pages and workflows that you connect together visually.
There are a number of ways to get data into a Bubble app, but the most common is probably via a spreadsheet. You can also use Bubble’s built-in database, or connect to an external database via an API.
To get started, you have to visit Bubble.io and sign up for an account. Once you’ve signed up and logged in, you’ll be prompted to create a new app. Give your app a name and description, and then click Create App. That’s it! You’re now ready to start building your app.

2. Setting up
Now that you have a Bubble app, you need to set up Accoun so that it can generate PDFs and images from your app data.
2.1 Login or register an account
First, create a new account and log in.
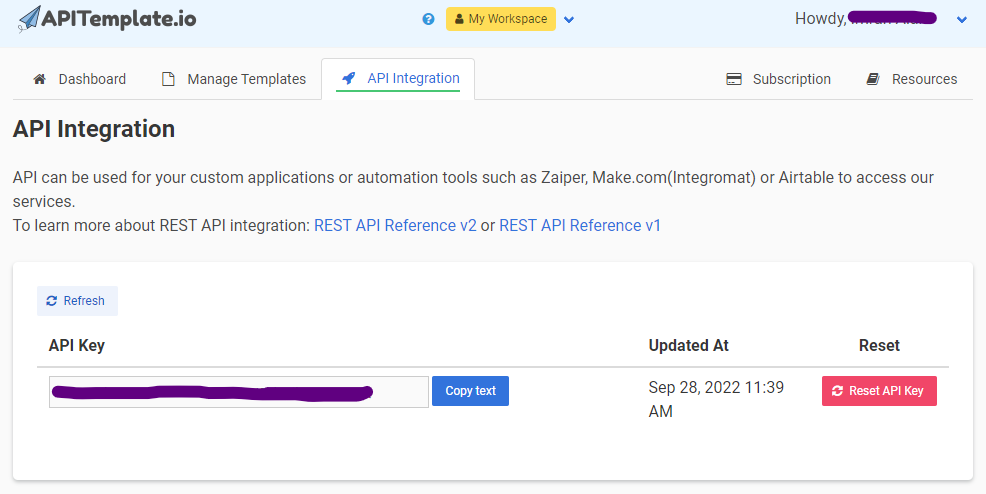
2.2 Obtain the API Key
Once you’re logged in, click on the API Integration tab and copy the API key for your Bubble app.
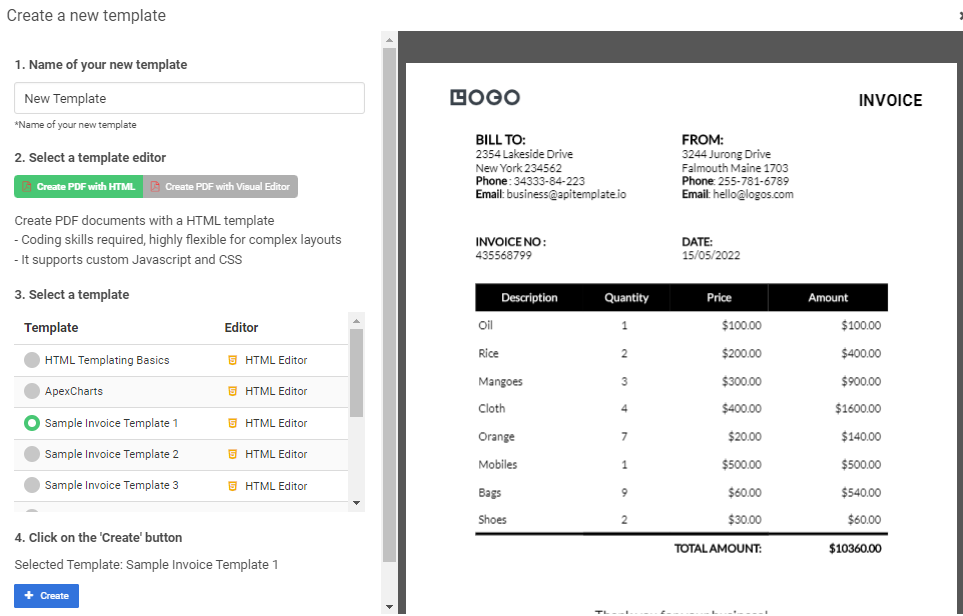
2.3 Create a PDF Template
Next, go to Manage Templates and click New PDF Template to create a new PDF template. Give your template a name and select Sample Invoice Template 1 as the template then click Create. That’s it! Your PDF template is now ready to use. You can copy the template ID from the Manage Templates page.
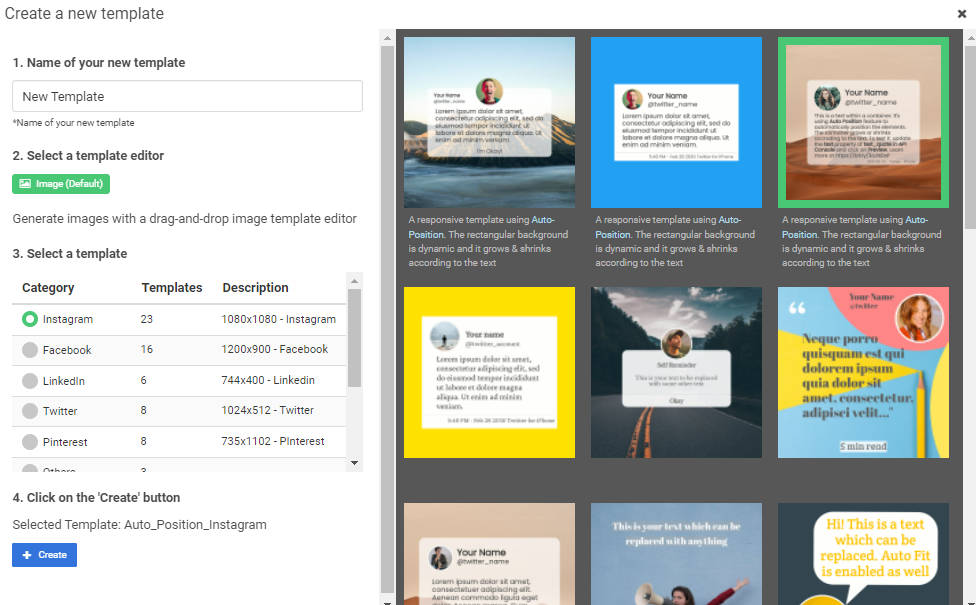
2.4 Create an image template
Now we’ll also have to create an Image template. For that, click on New Image Template and give it a name. We’ll be using Instagram so select that as the template. Then click Create. You can also copy the template ID from the Manage Templates page.
Now that your templates are set up, you’re ready to start generating PDFs and images from your Bubble app!
3. Creating Bubble.io App
Now that you have a Bubble app and APITemplate set up, you’re ready to start generating PDFs and images.
3.1 Elements used in the App
In bubble.io, we use elements to design our app. We’ll be using the following elements in this tutorial:
- Multiline TextFields: A multiline text field allows the user to input multiple lines of text.
- Buttons: Buttons are used to trigger an action, in this case, to generate the PDF or image.
- Text: Text is used to display labels, instructions, or other static text in the app.
- Input Feild: The input field is used to get the user’s email, we’ll send the generated PDFs or images to this email.
3.2 App design
Our app will have two sections, one to generate PDFs and the other to generate images. Each section will have a multiline text field to get the data from the user, an input field to get the user’s email address (we’ll send the generated PDFs or images to this email), and a button to generate the result.
To design this app, create a new page and add two Section elements. In the first Section, add a Multiline TextField, an Input Field, and a Button. In the second Section, add another Multiline TextField, another Input Field, and another Button.
Your app should look something like this:
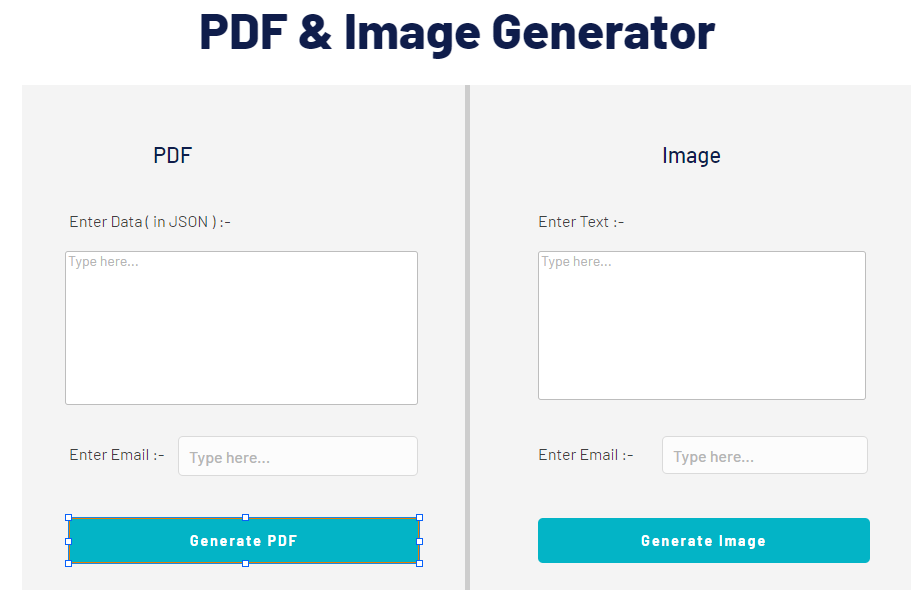
We’ve also added some text to each section to explain what it’s for.
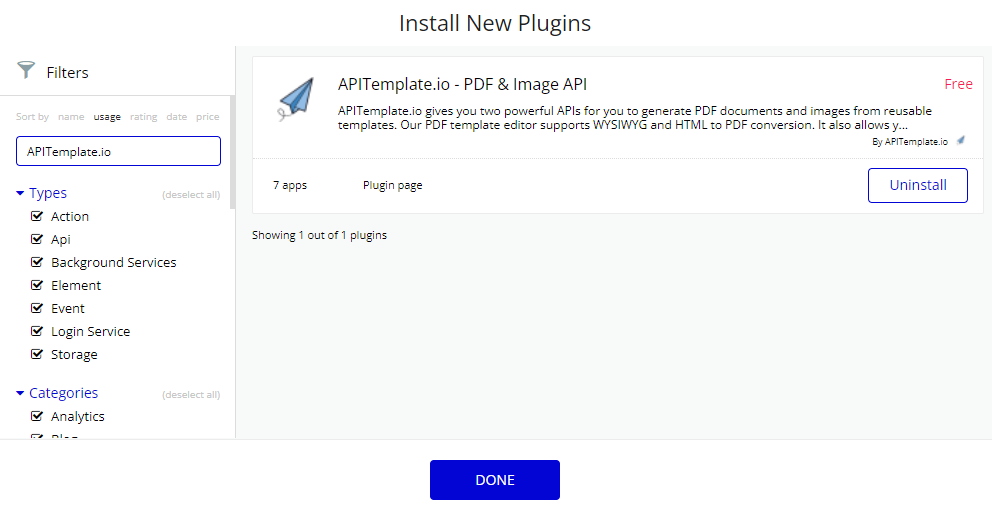
3.3 Install Plugin
The first thing you need to do is install the APITemplate plugin. To do this, go to the Plugins section of your Bubble app, and search for “APITemplate“. Install the plugin, and then go to the API Keys section on the plugin page and paste in the API Key that you received from APITemplate.
3.4 Generate PDF
Now that our app is designed, it’s time to add some functionality. We’ll start by generating a PDF whenever the user clicks on the Generate PDF button.
To do this, double-click on the Generate PDF button and click on the Start/Edit Workflow option. This will take you to the Workflow section. Here, click on the Click here to add an action button to add an action. This will open a popup.
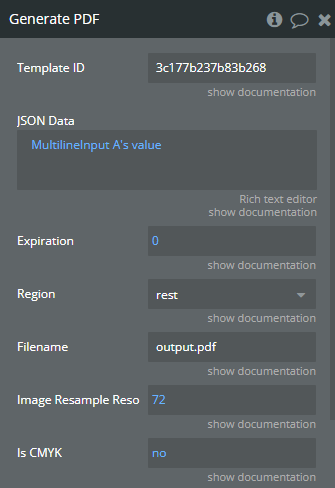
Go to the Plugins section in that popup, and click on the Generate PDF action. This will open the Generate PDF action settings. Here, you need to enter the following information:
- Template ID: This is the ID of the template that you want to use to generate the PDF. You can find this ID in the URL of the template page or in the Manage Template section on APITemplate.
- JSON Data: Here we’ll get the data entered by the user in the first Multiline TextField. To do this, first select MultilineTextField A and then click again and select ‘s value. This will fill the value of the MultilineTextField into this section.
- Expiration: This is the number of days that the generated PDF will be valid for. After this number of days, the PDF will expire and will no longer be accessible.
- Region: This is the region that you want to use to generate the PDF. You can find this in the URL of the template page or in the Manage Template section on APITemplate.
- Filename: This is the name that you want to give the generated PDF.
- Export Type: There are two options here, URL and File. For this example, we are selecting URL.
After you’ve entered all the information, close the popup and add a new action. This action will send an email with the generated PDF.
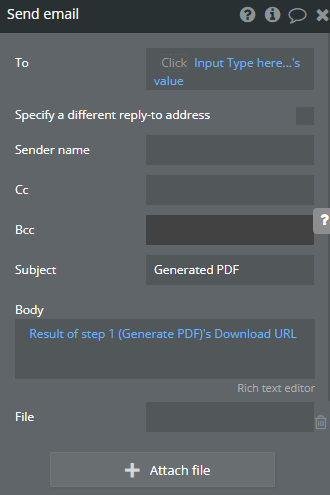
To do this, select the Send Email action and fill in the following information:
- To: This is the email address of the recipient. Here we will use the email entered by the user in the email input field. To do this, first select InputField A and then click again and select ‘s value. This will fill the value of the InputField into this section.
- Subject: This is the subject of the email.
- Body: Here we will add the link to the generated PDF. To do this, click on the body field, then select Result of step 1 (Generate PDF)’s and then select Download URL.
And that’s it! Now when the user clicks on the Generate PDF button, a PDF will be generated and emailed to the address that they entered.
Output:

3.5 Generate Image
Now let’s add the ability to generate an image. This works exactly the same as generating a PDF, but we’ll use the Generate Image action instead of the Generate PDF action.
To do this, double-click on the Generate Image button and click on the Start/Edit Workflow option. This will take you to the Workflow section. Here, click on the Click here to add an action button to add an action. This will open a popup.
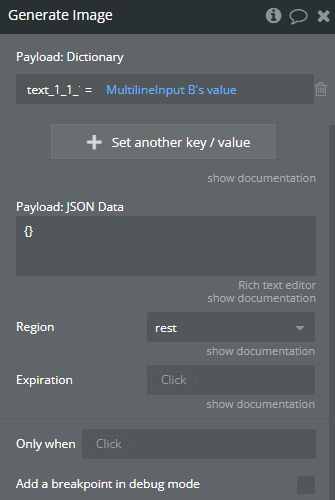
Go to the Plugins section in that popup and click on the Generate Image action. This will open the Generate Image action settings. Here, you need to enter the following information:
- Template ID: This is the ID of the template that you want to use to generate the image. You can find this ID in the URL of the template page or in the Manage Template section on APITemplate.
- Payload Type: There are two options here, JSON and Dictionary. For this example, we are going to use the dictionary.
- Payload ( Dictionary): Here we will add the key and value pair for the data. You can get the key name by navigating to the Edit template option on the Manage Template section of APITemplate. We will get the value from user through the multiline input field. You can add as many key and value pairs as you want.
- Expiration: This is the number of days that the generated image will be valid for. After this number of days, the image will expire and will no longer be accessible.
- Region: This is the region that you want to use to generate the image. You can find this in the URL of the template page or in the Manage Template section on APITemplate.
After you’ve entered all the information, close the popup and add a new action. This action will send an email with the generated image.
To do this, select the Send Email action and fill in the following information:
- To: This is the email address of the recipient. Here we will use the email entered by the user in the email input field. To do this, first select “InputField A” and then click again and select ‘s value. This will fill the value of the InputField into this section.
- Subject: This is the subject of the email.
- Body: Here we will add the link to the generated image. To do this, click on the body field, then select Result of step 1 (Generate Image)’s and then select Download URL.
And that’s it! Now when the user clicks on the Generate Image” button, an image will be generated and emailed to the address that they entered.
Output:

4. Conclusion
You now have a working Bubble.io app that generates PDF documents and images from real user data and delivers them automatically by email – no custom backend, no rendering libraries, no infrastructure to maintain.
The same workflow scales beyond invoices and Instagram posts. Swap the template ID and JSON payload, and you’re generating signed certificates, branded reports, contracts, shipping labels, social cards, or QR-coded tickets – all from data already sitting in your Bubble database.
If you’re building a SaaS, marketplace, or internal tool on Bubble.io, server-side document generation is one of those features that’s painful to build yourself and trivial to wire in through an API.
Sign up for a free APITemplate.io account and install the Bubble.io plugin to start generating documents in minutes.