Code/HTML Template Editor
The Code/HTML Template Editor gives you full control over your PDF layout using HTML, CSS, and JavaScript. It's the go-to choice when you need pixel-perfect output or complex formatting.
Video Tutorial
Watch this walkthrough to see how to build dynamic PDFs with the HTML editor, customize templates using Jinja2, and generate the final output via the REST API:
Getting started
- Go to Manage Templates > New PDF Template
- Select Create PDF with HTML, choose a starter template, and click Create
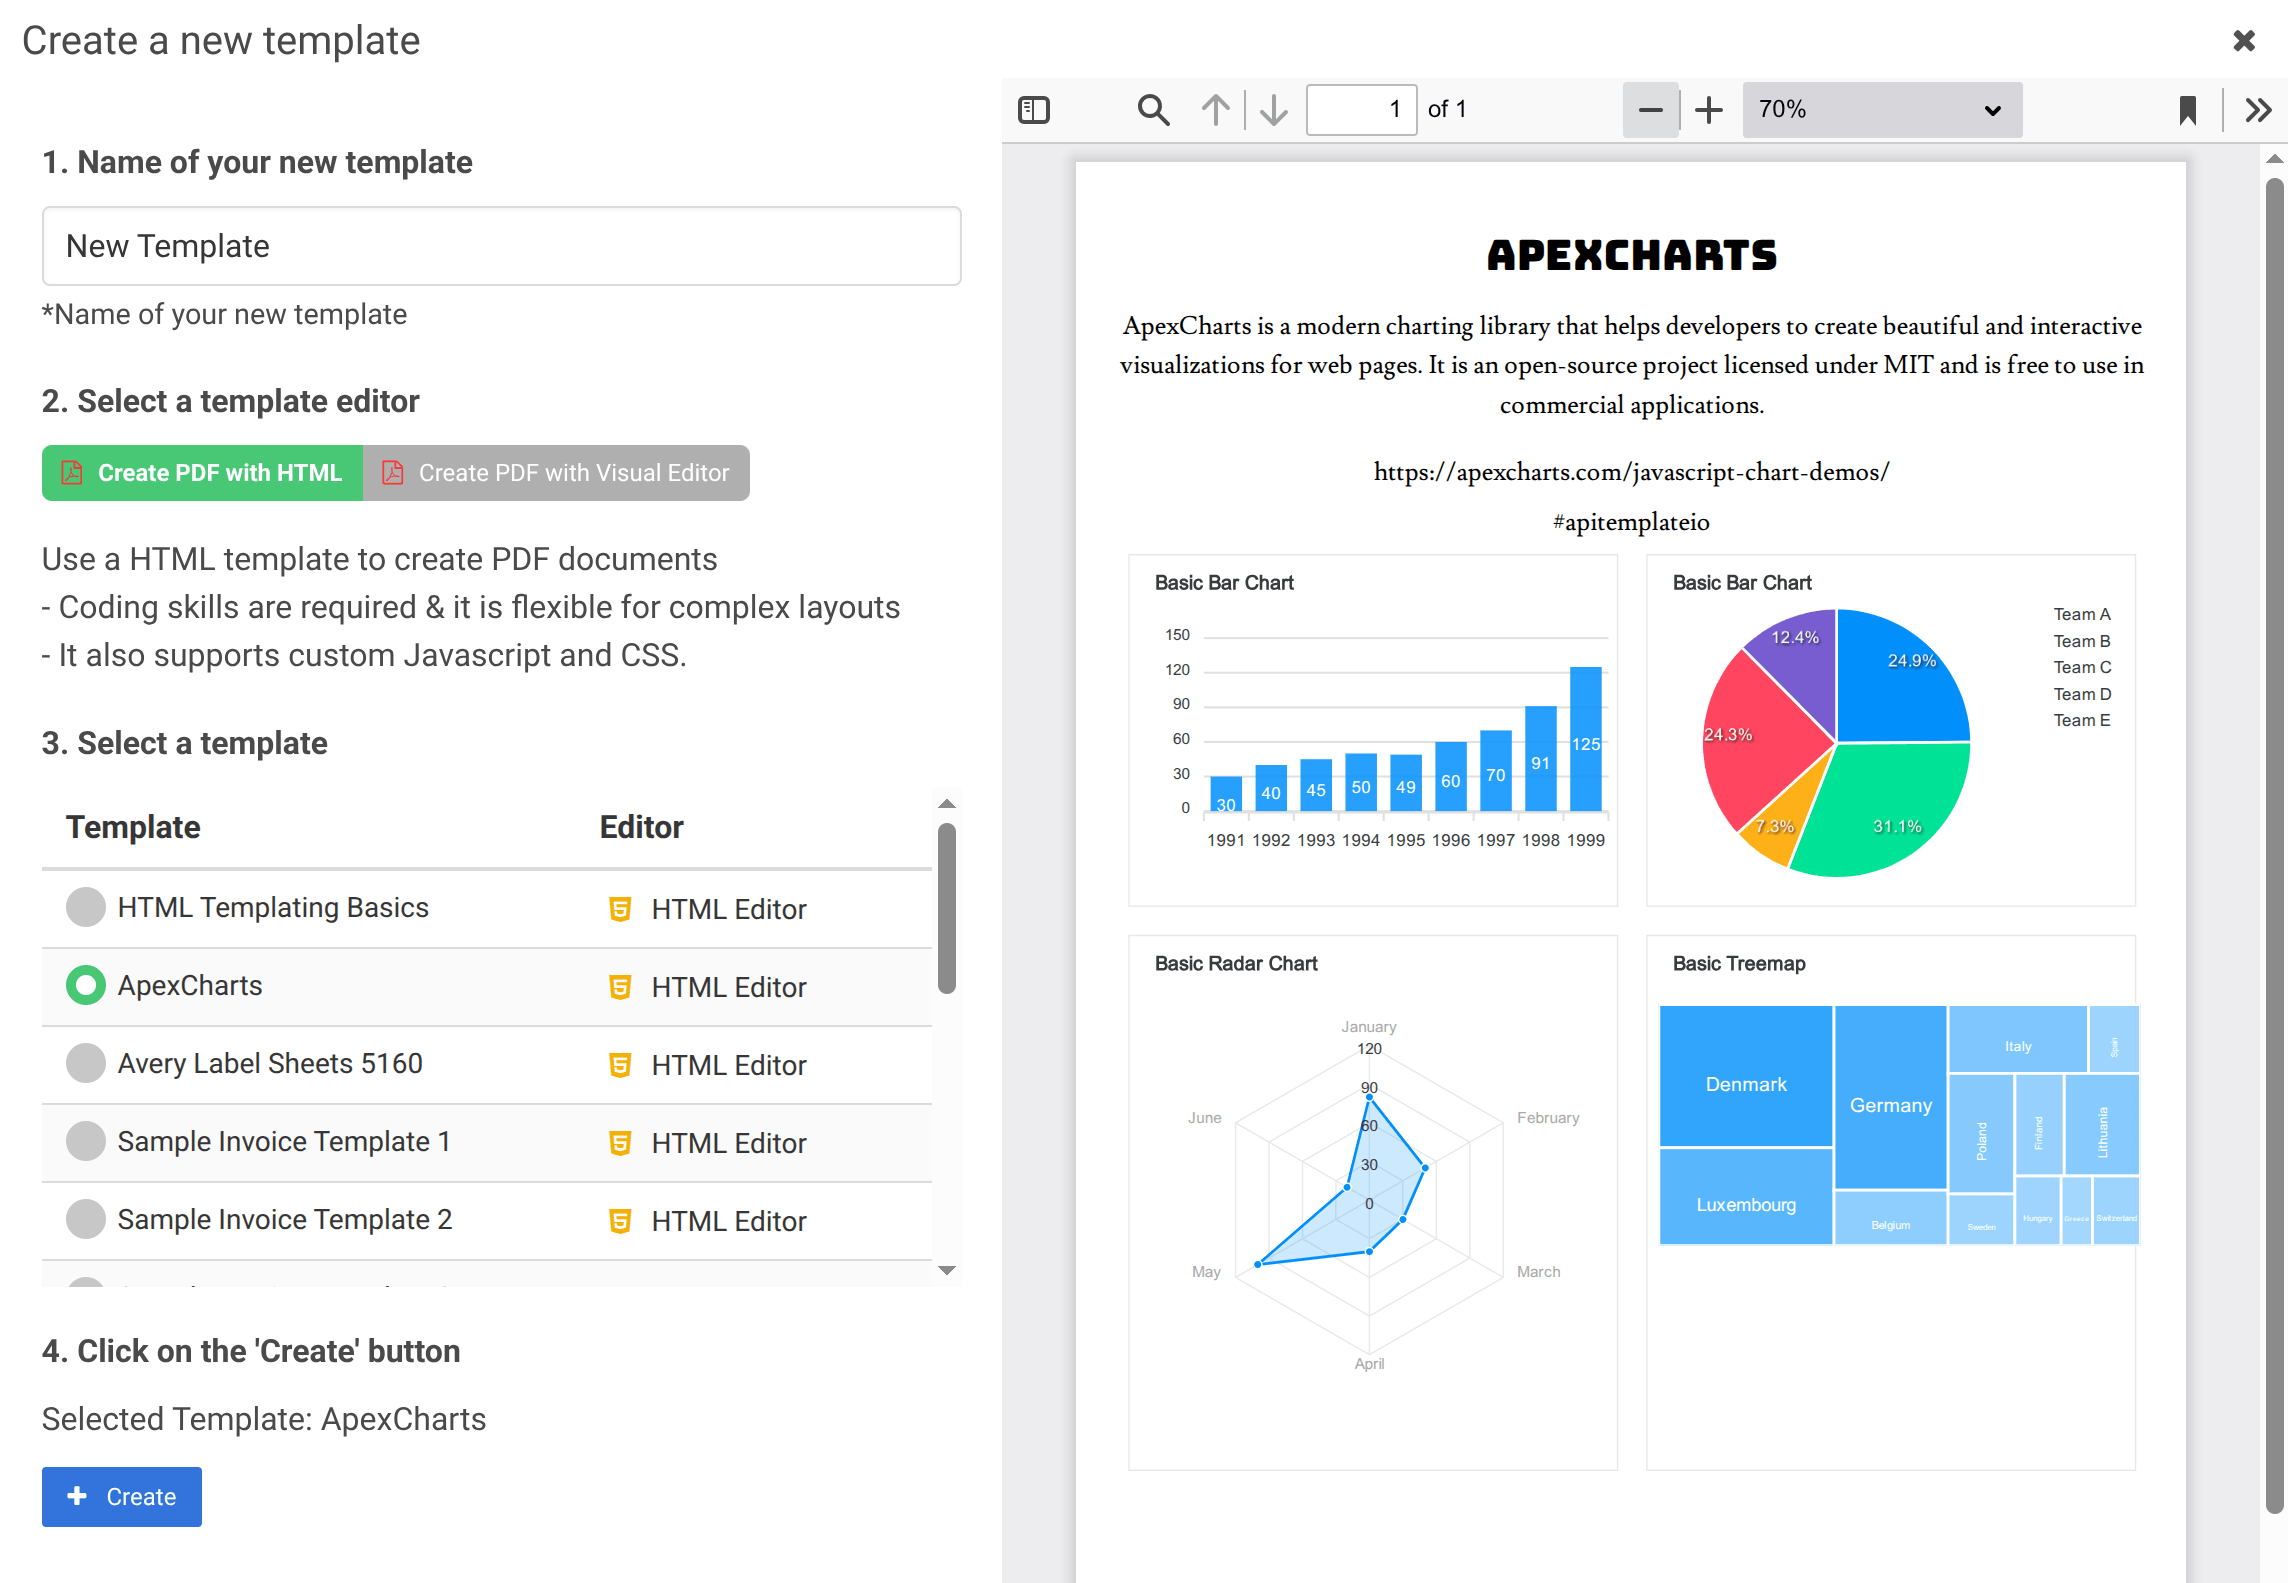
- Back on the Manage Templates page, click Launch Editor on your new template
The editor tabs
The editor has four main tabs:
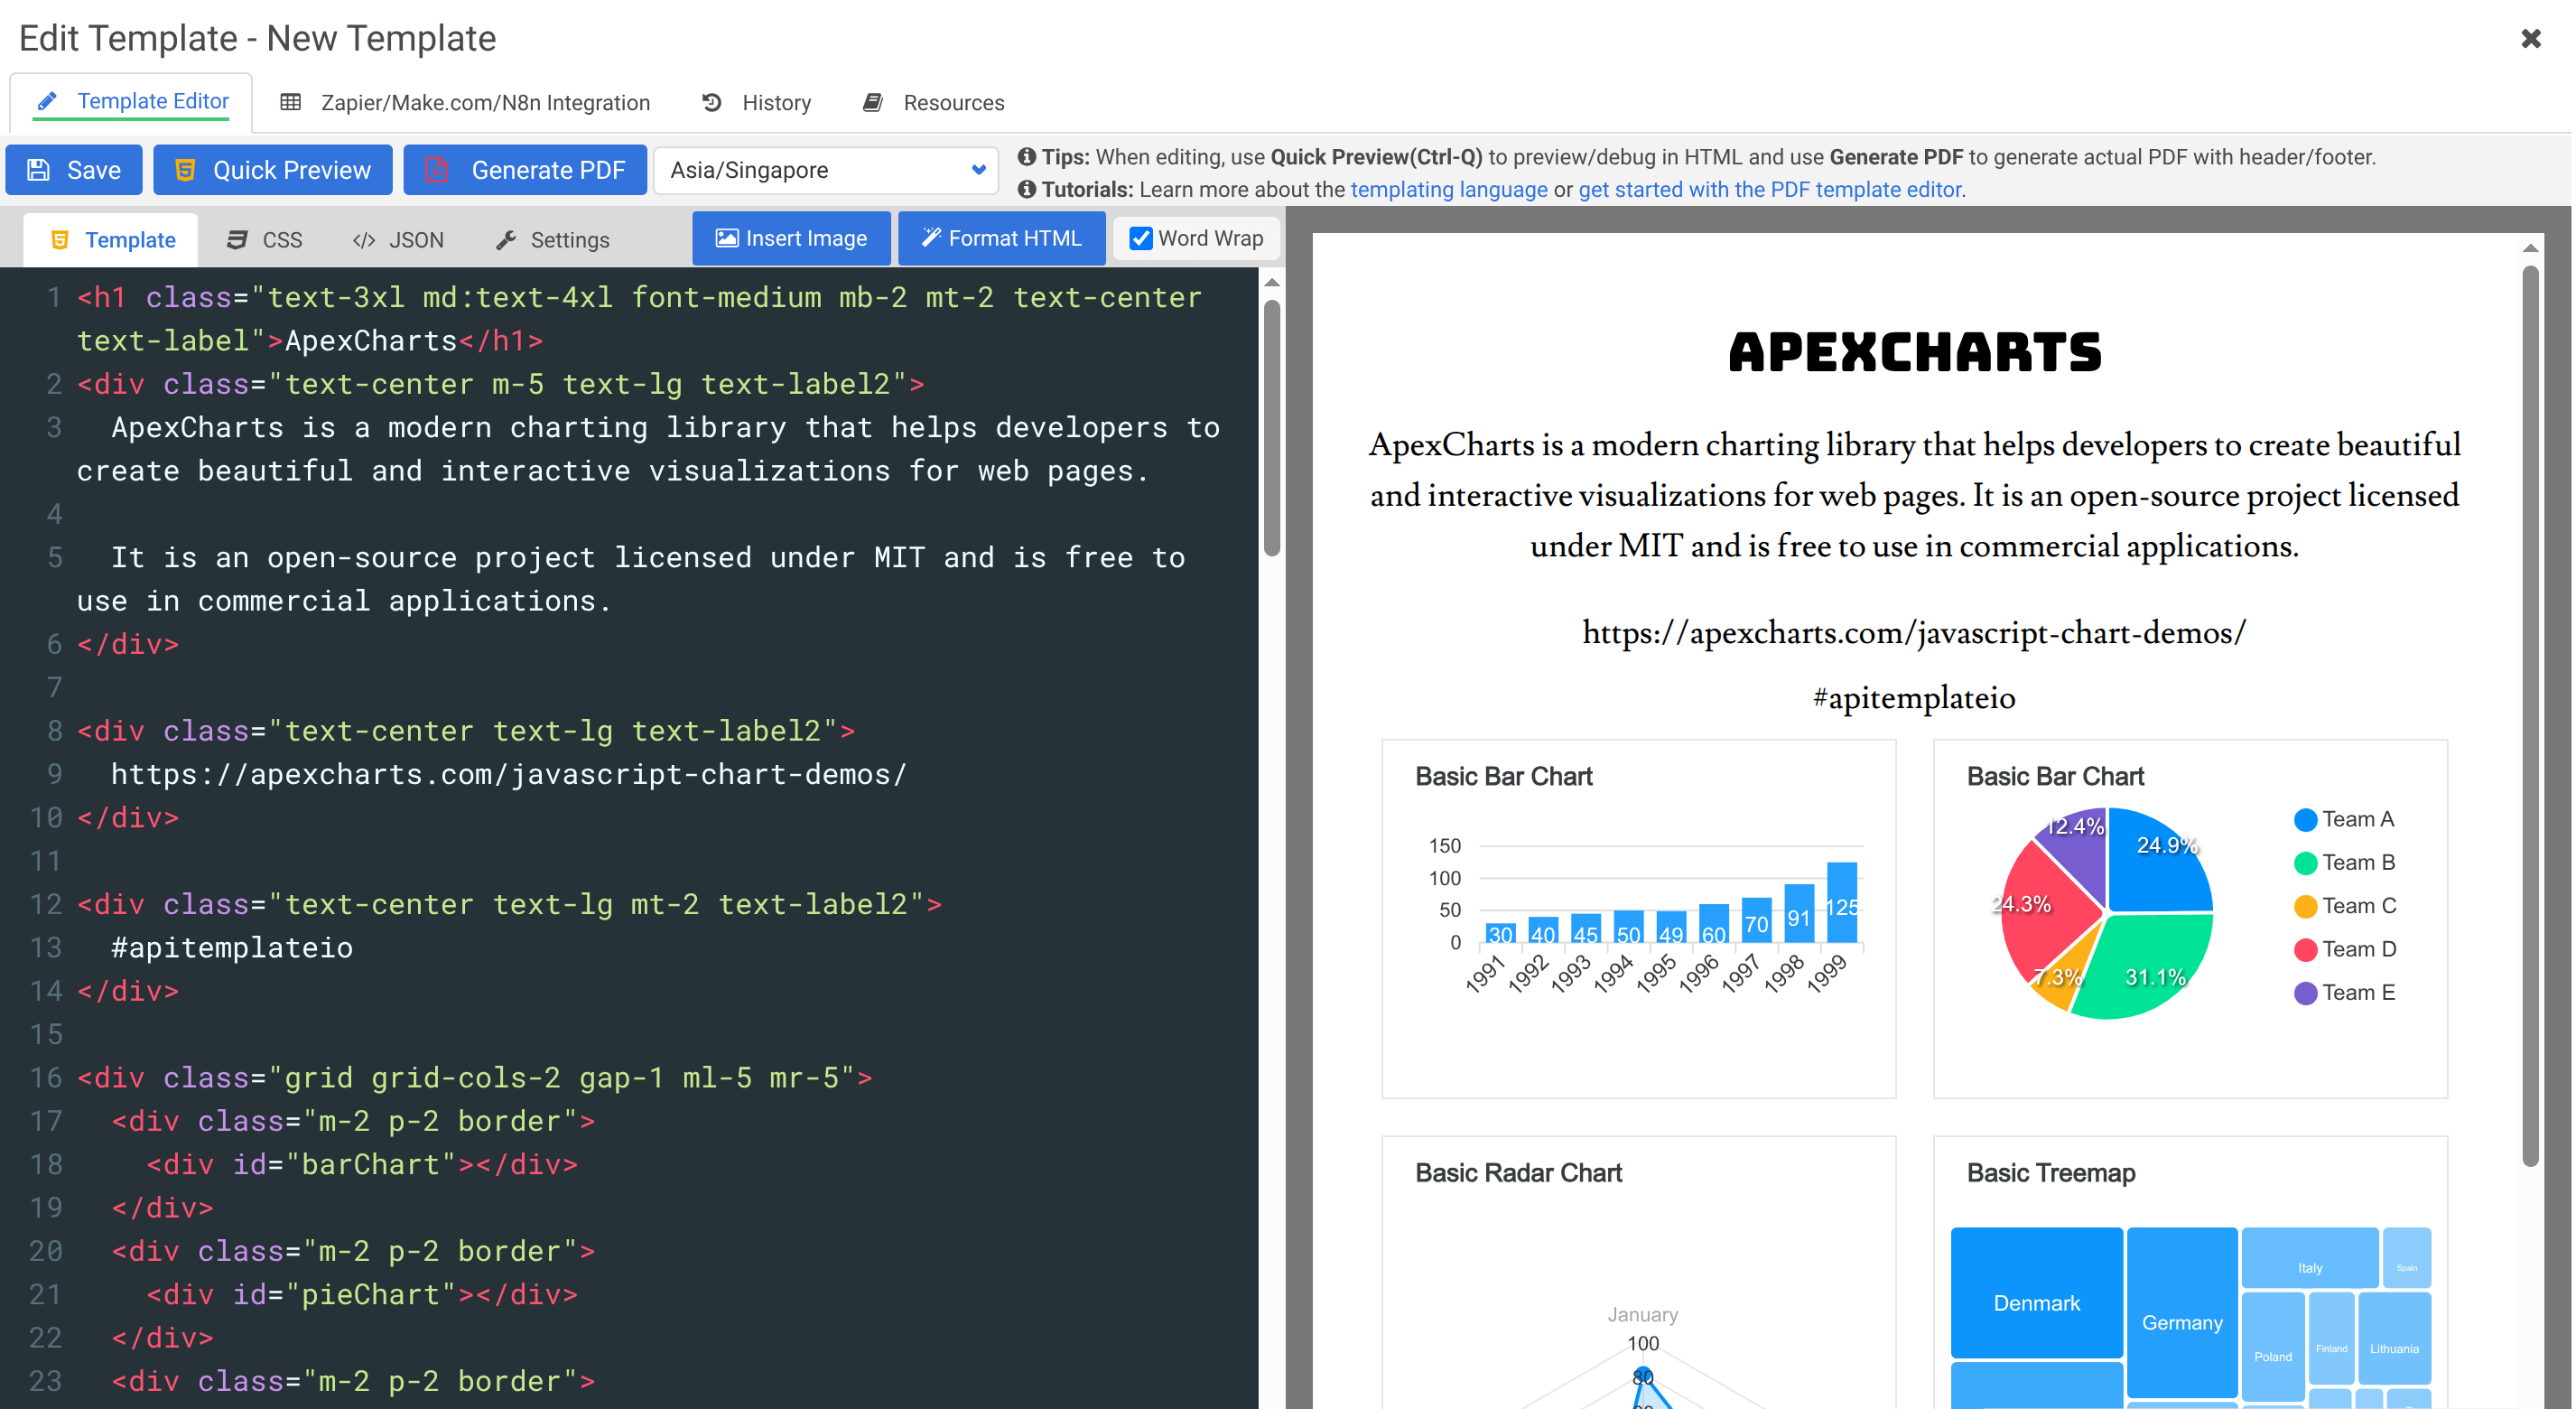
Template
This is where your HTML goes. You write standard HTML and use Jinja2 as the templating language to insert dynamic content. Jinja2 lets you use variables ({{variable_name}}), loops ({% for item in items %}), conditionals ({% if condition %}), and filters to transform your static HTML into data-driven templates. At generation time, the engine merges your template with the JSON data you provide via the API.
<div class="invoice">
  <h1>Invoice #{{invoice_number}}</h1>
  <p>Bill to: {{customer_name}}</p>
  <table>
    <thead>
      <tr>
        <th>Item</th>
        <th>Qty</th>
        <th>Price</th>
      </tr>
    </thead>
    <tbody>
      {% for item in items %}
      <tr>
        <td>{{item.name}}</td>
        <td>{{item.qty}}</td>
        <td>{{item.price}}</td>
      </tr>
      {% endfor %}
    </tbody>
  </table>
</div>
CSS
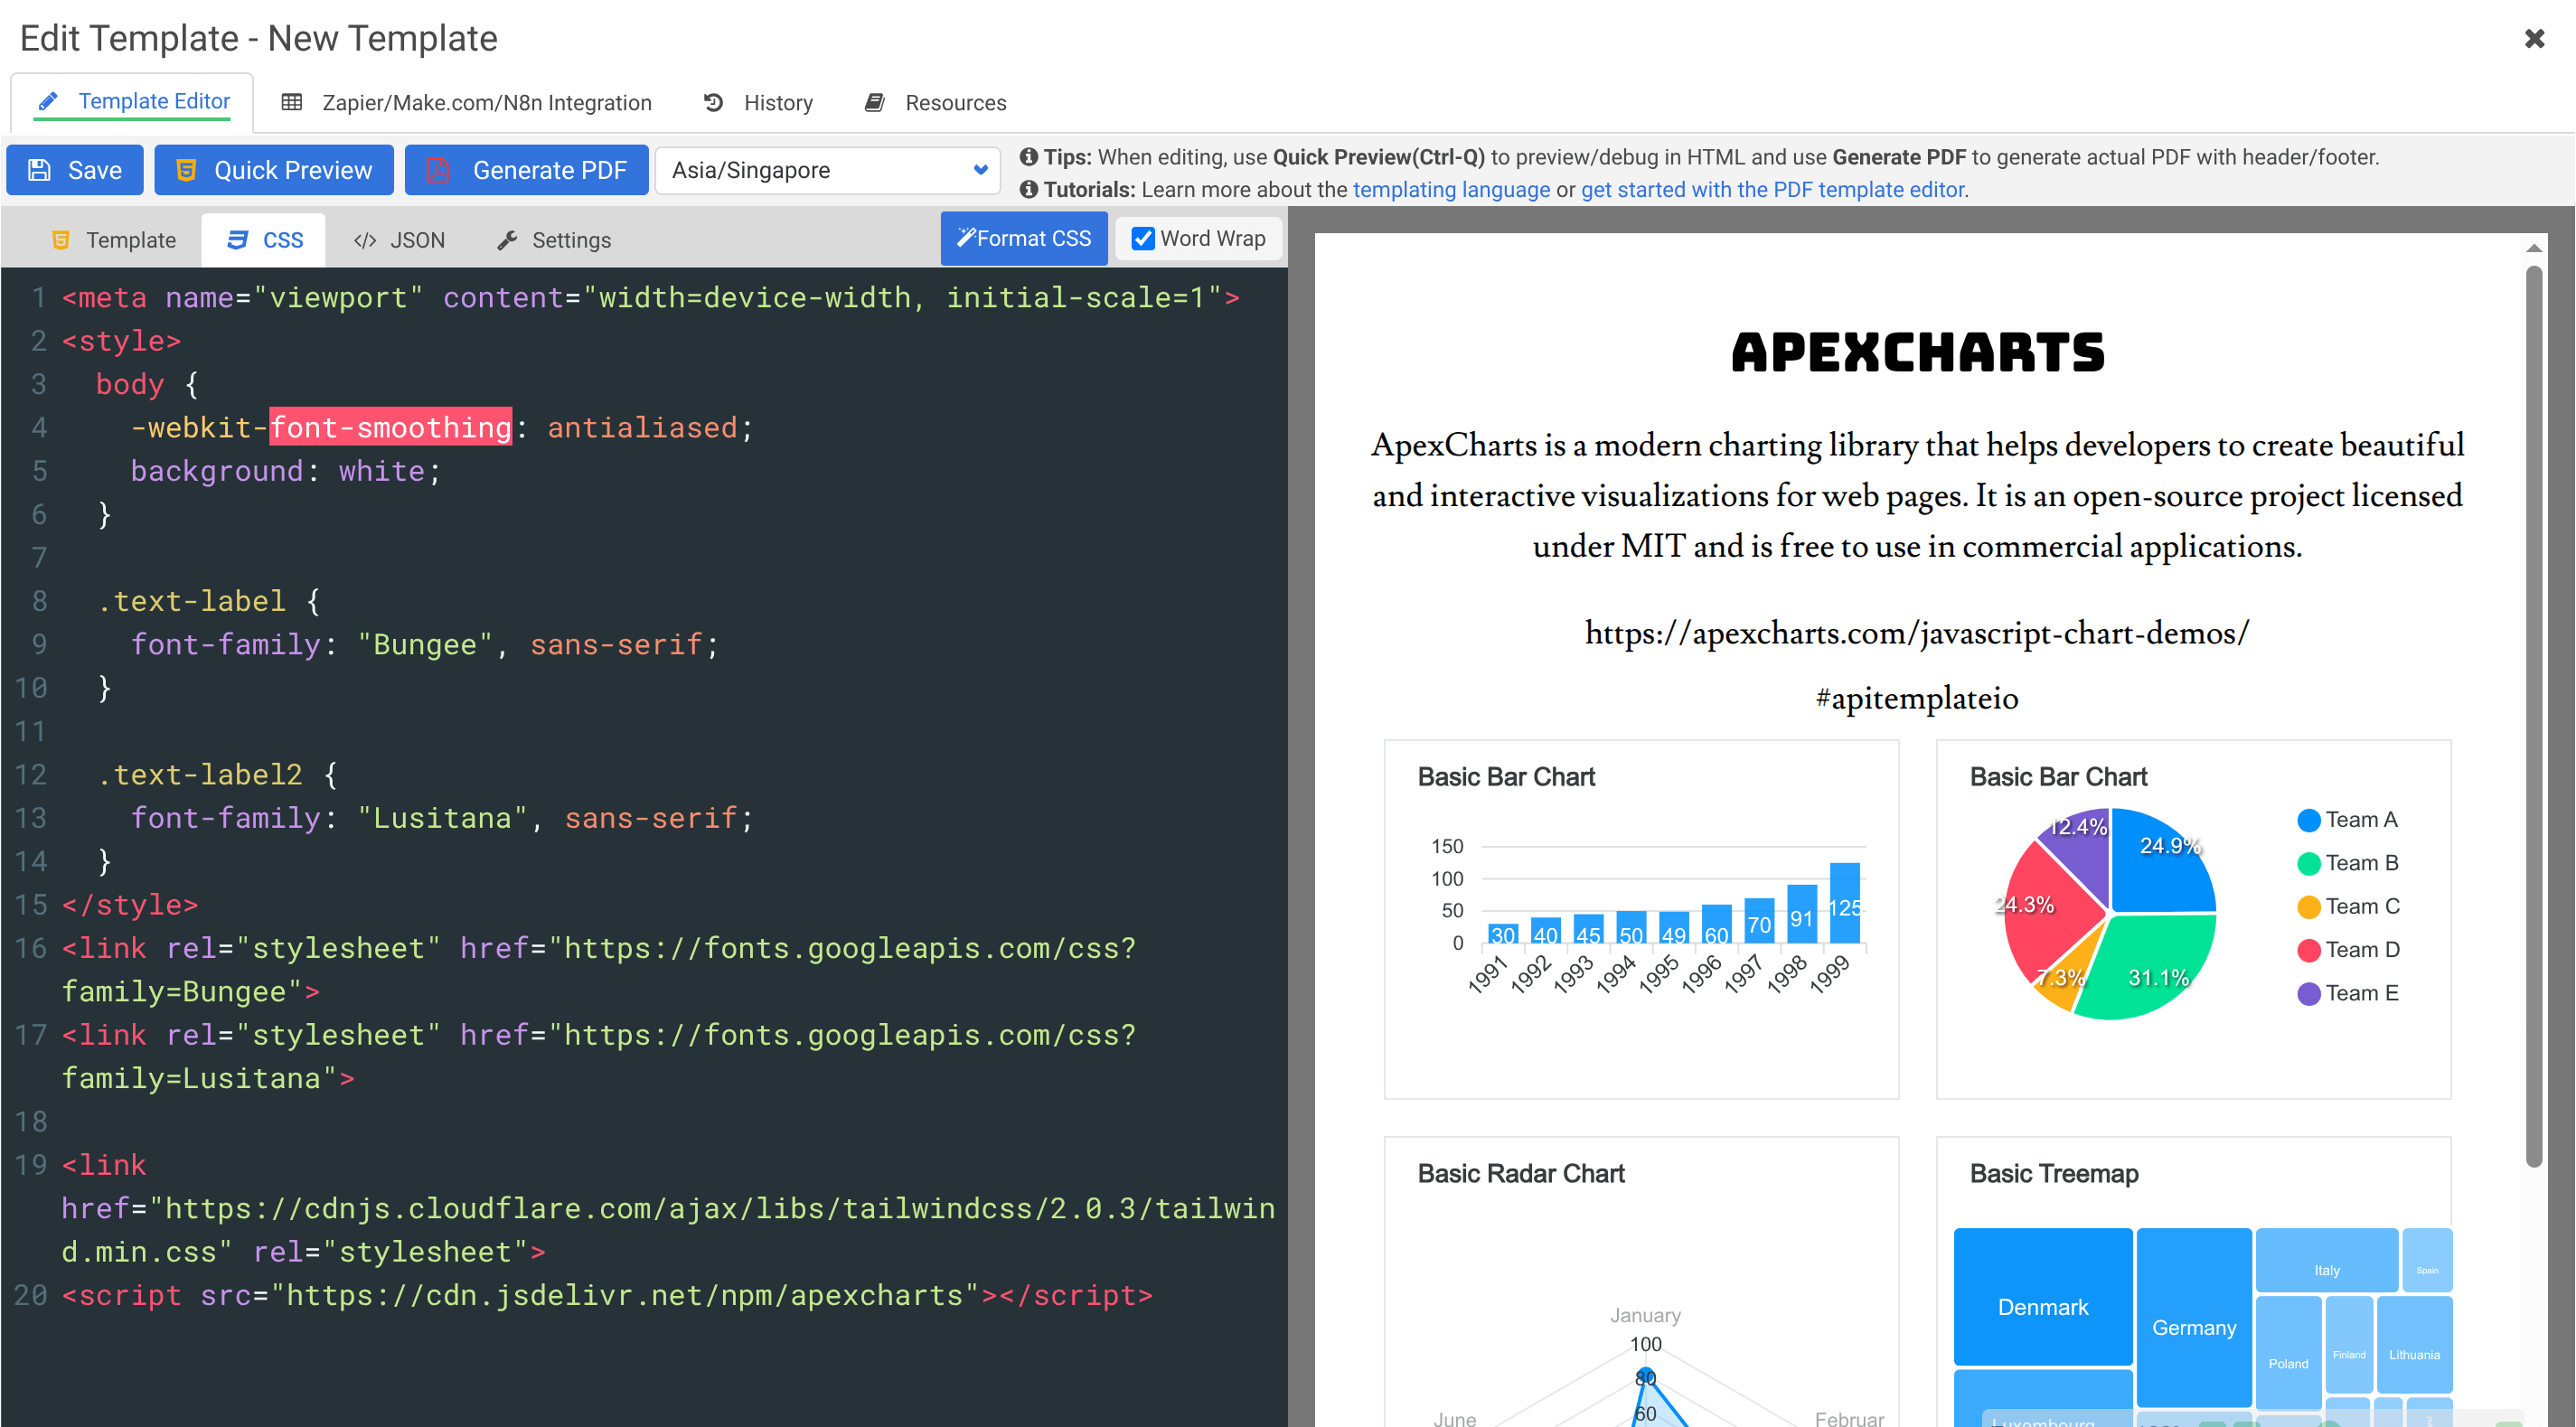
Add your styles here. You can also include external fonts, JavaScript libraries, and other resources.
body {
  font-family: 'Helvetica', sans-serif;
  padding: 40px;
}

.invoice h1 {
  color: #333;
  border-bottom: 2px solid #2563eb;
  padding-bottom: 10px;
}

table {
  width: 100%;
  border-collapse: collapse;
  margin-top: 20px;
}

th, td {
  padding: 8px 12px;
  border: 1px solid #ddd;
  text-align: left;
}
Sample JSON
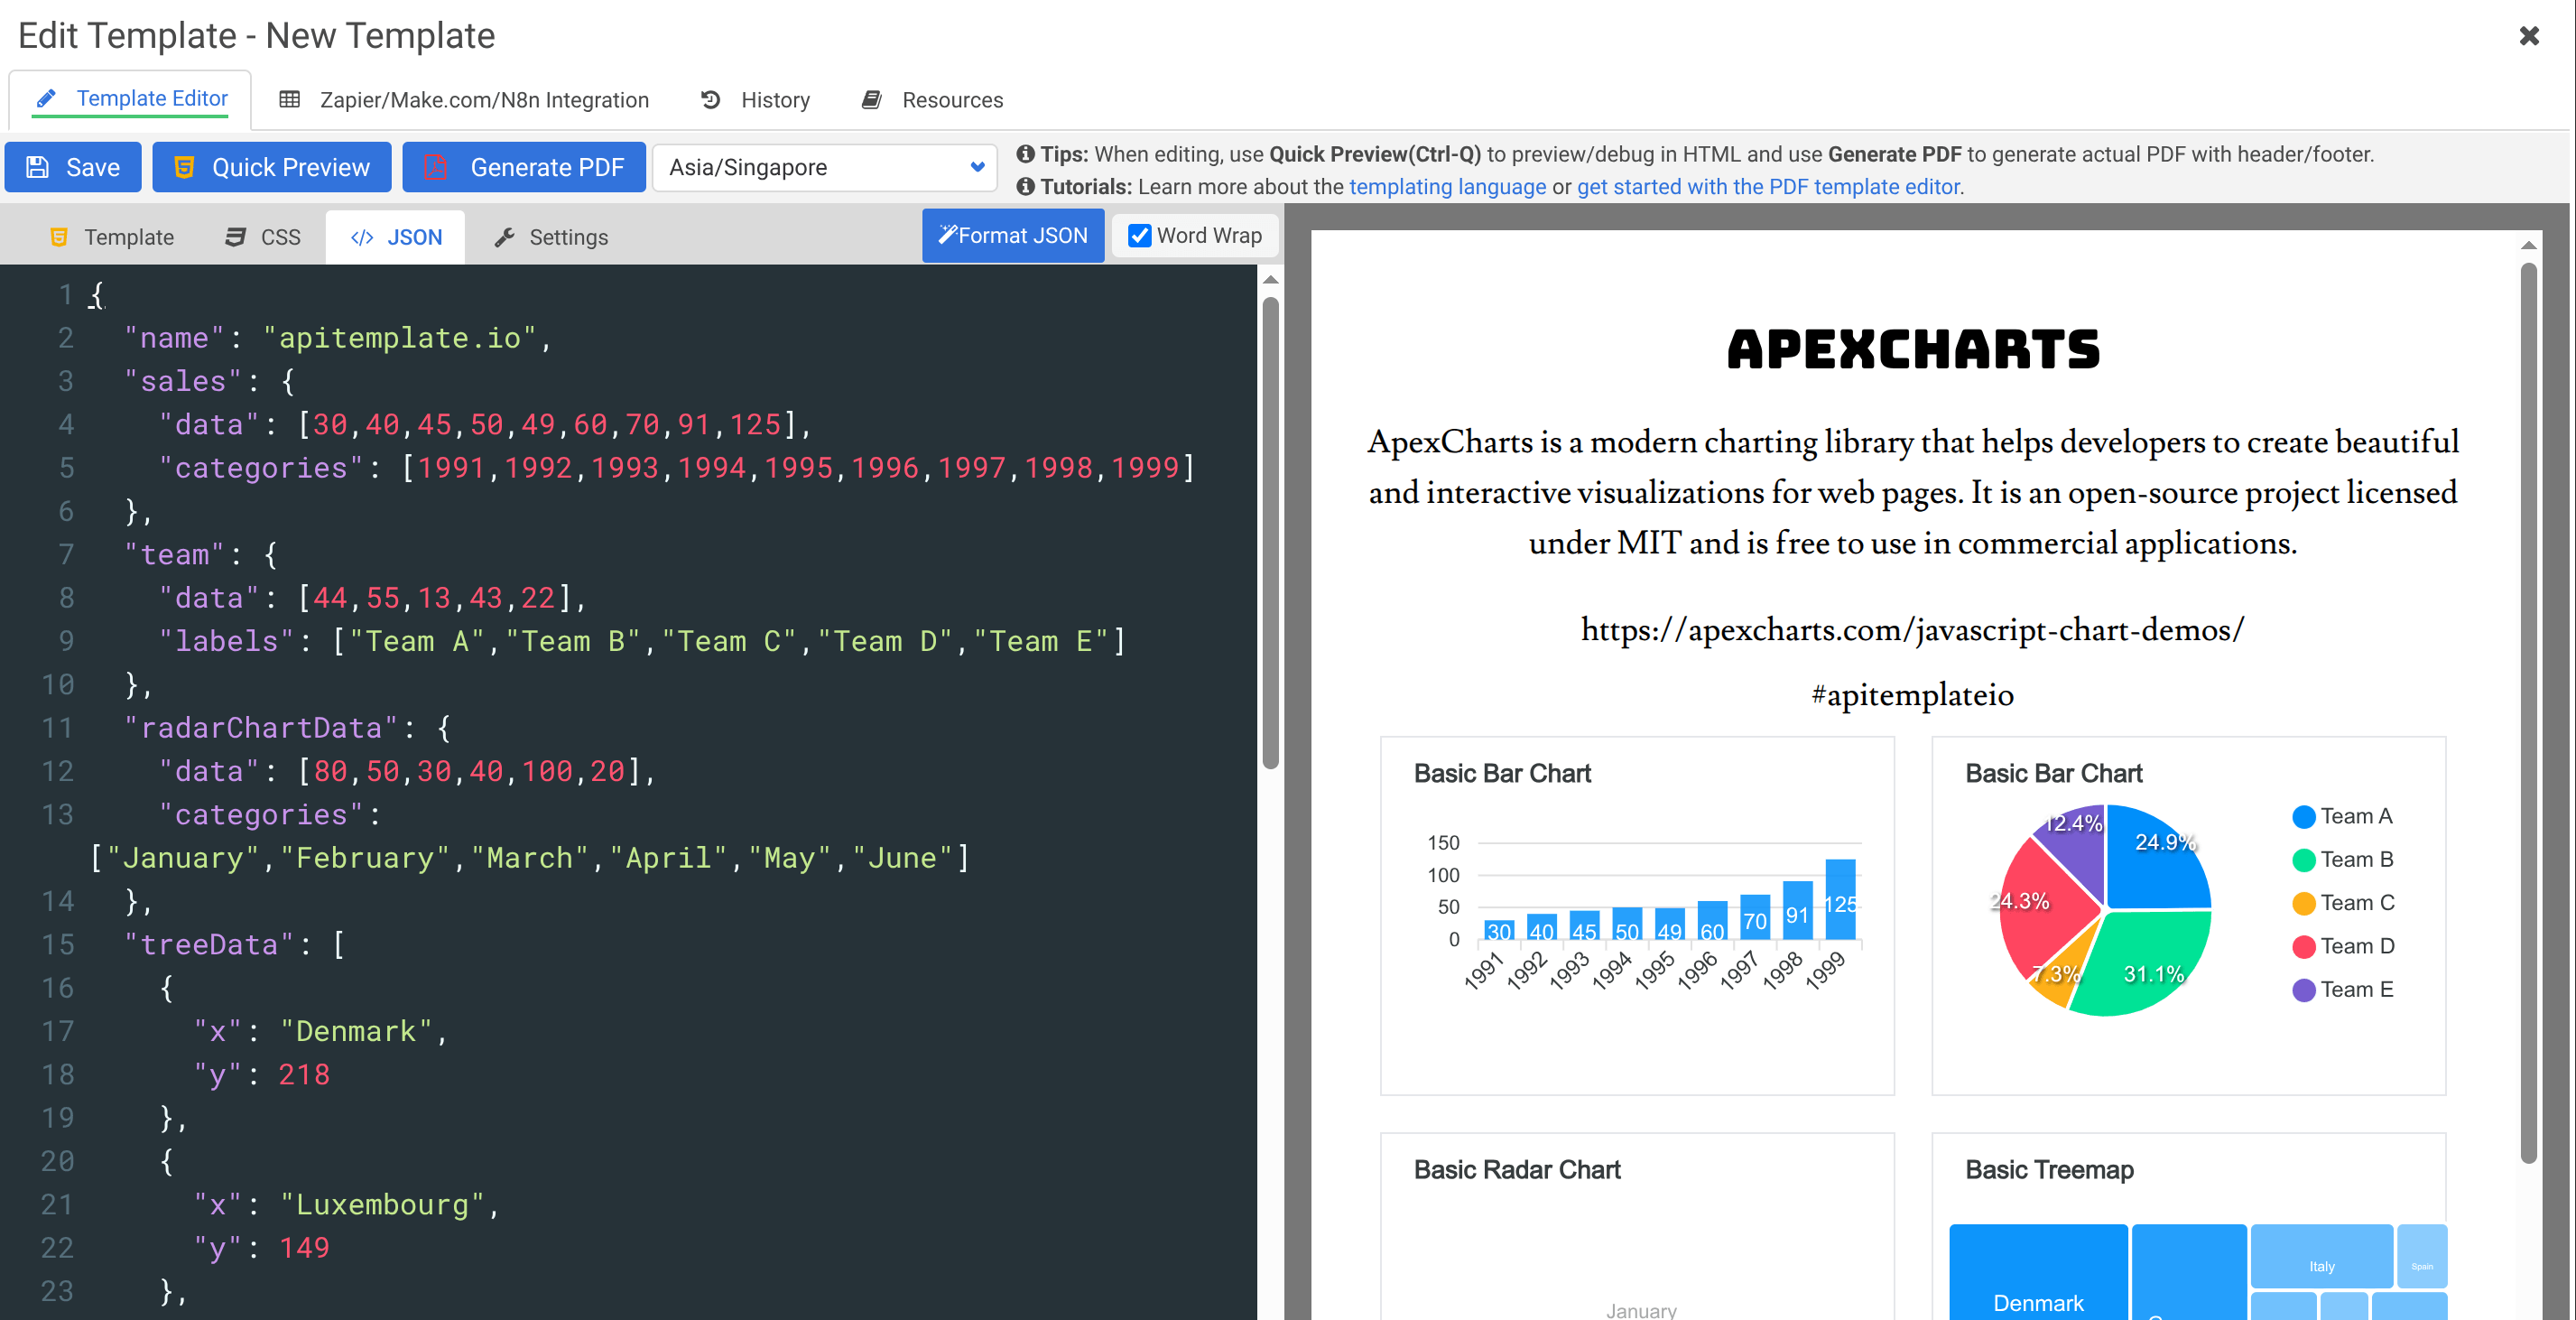
Provide test data here for previewing your template:
{
  "invoice_number": "INV-001",
  "customer_name": "Acme Corp",
  "items": [
    {"name": "Widget A", "qty": 5, "price": "$10.00"},
    {"name": "Widget B", "qty": 3, "price": "$25.00"}
  ]
}
Settings
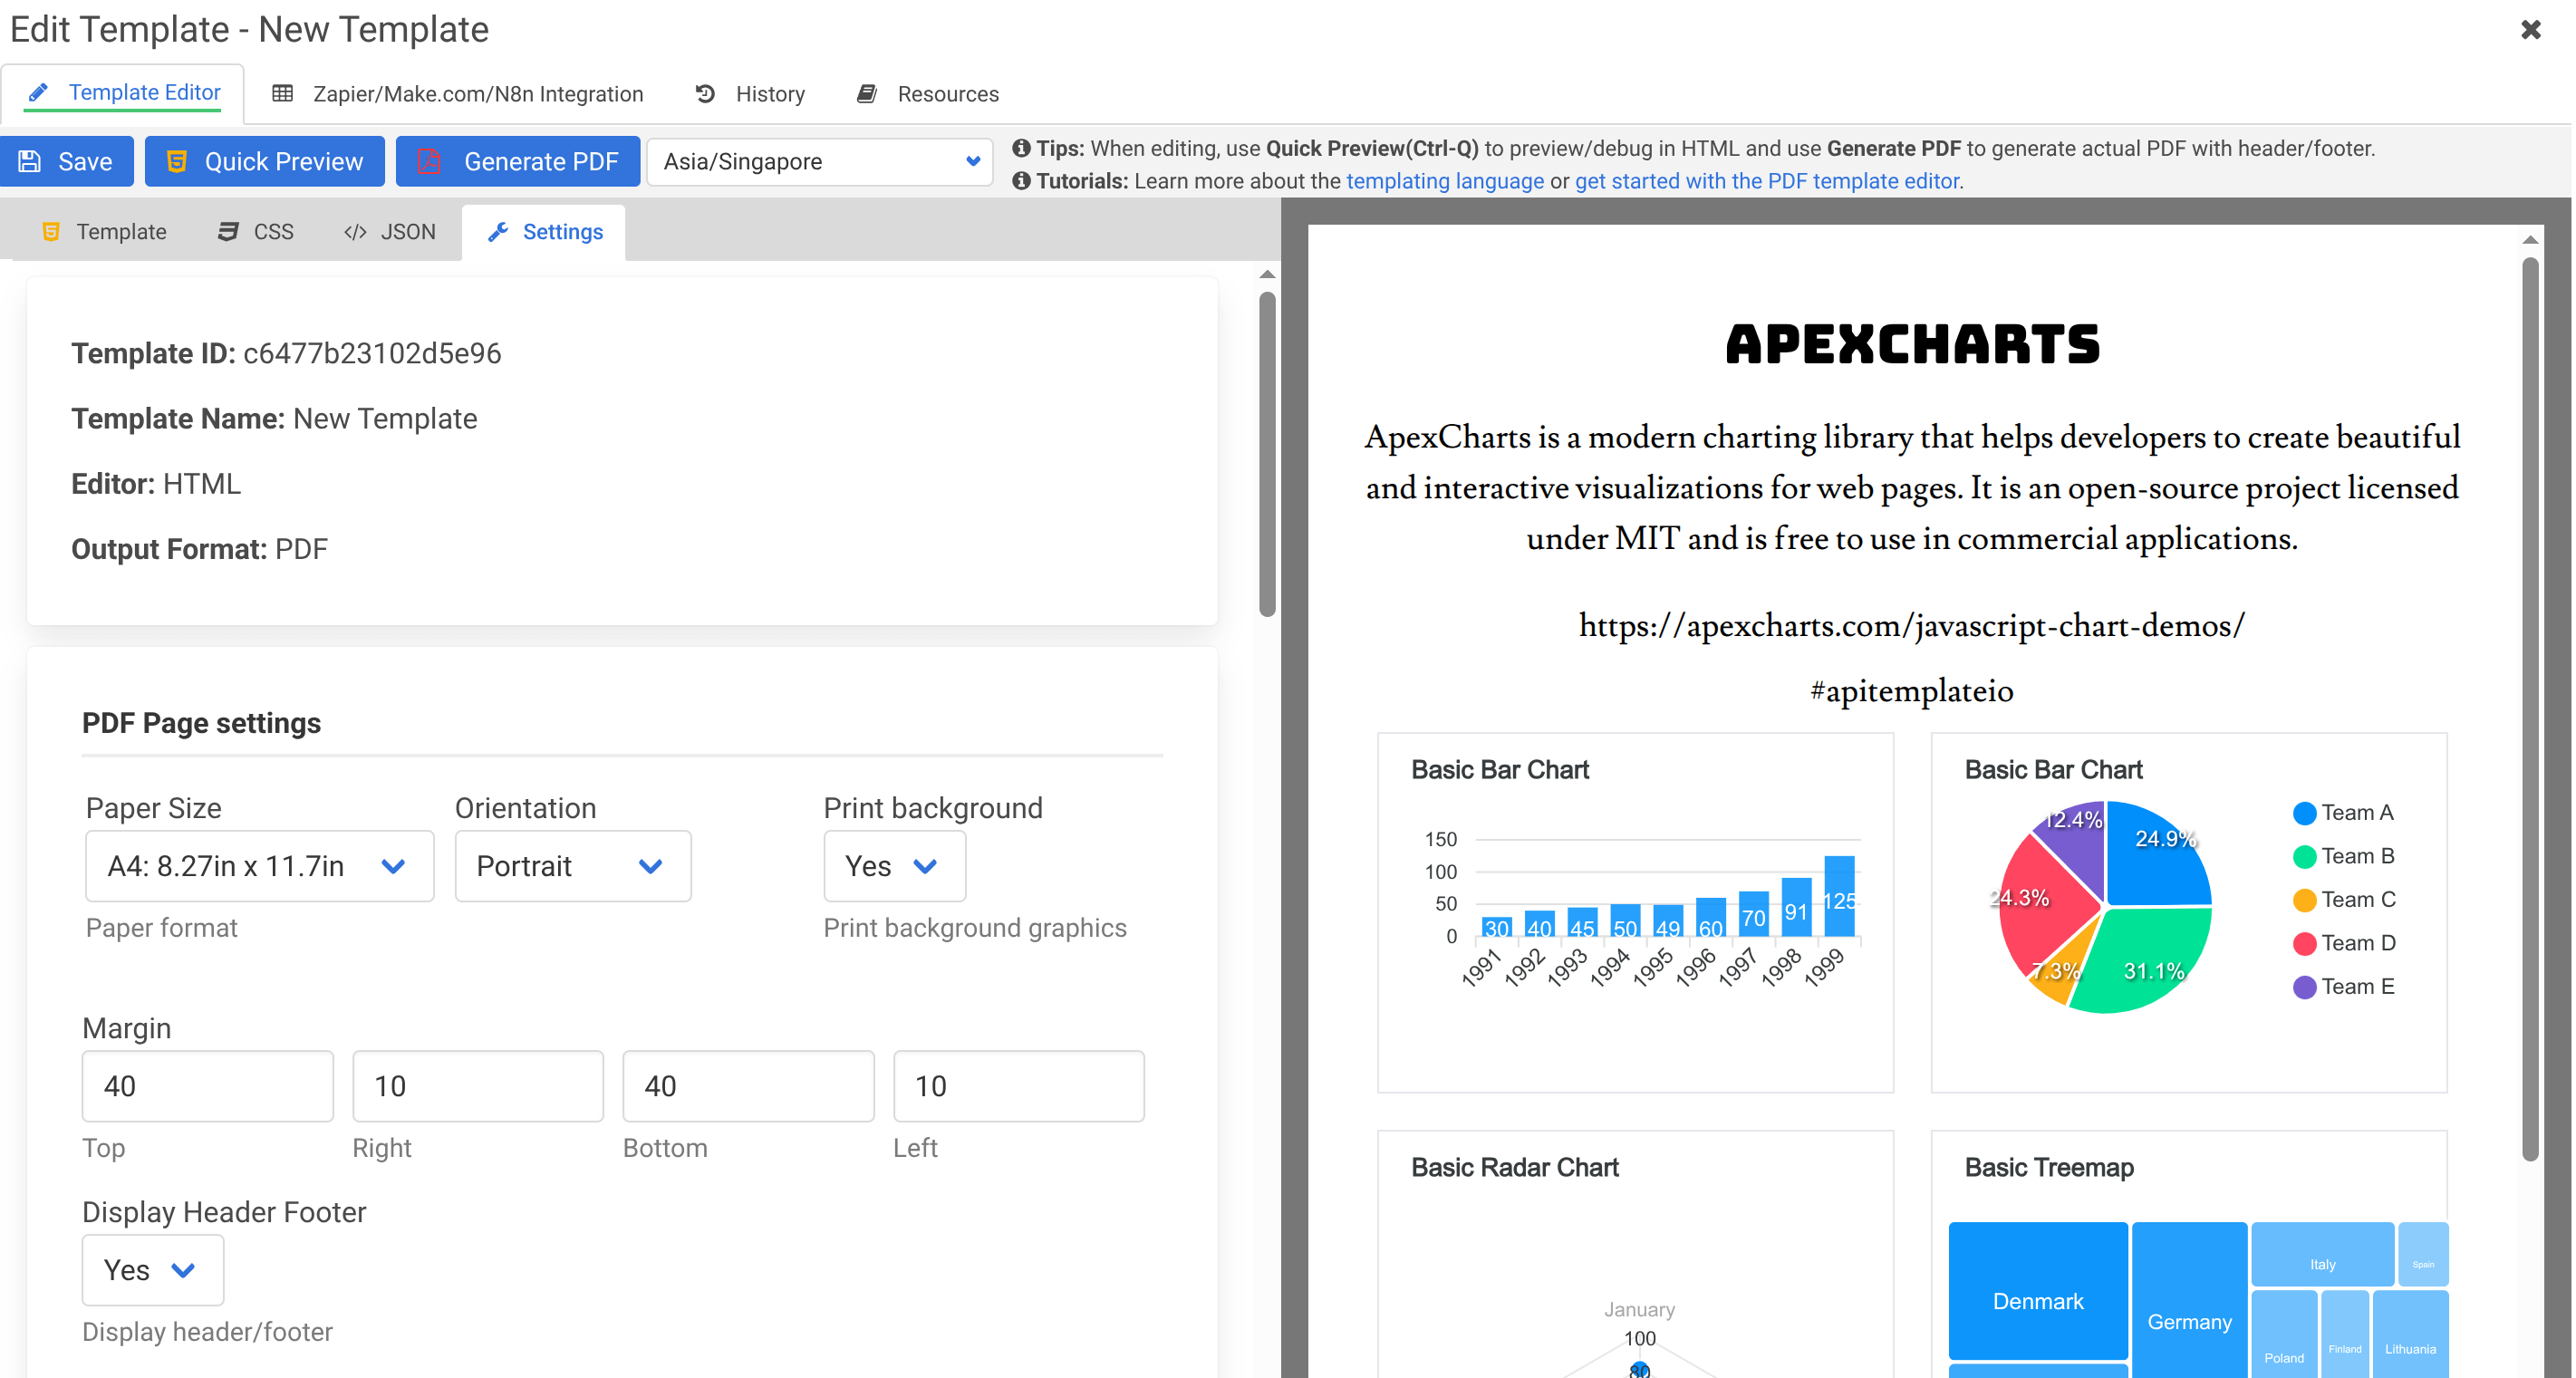
Configure your PDF output:
- Paper size — A4, Letter, Legal, and custom sizes
- Orientation — Portrait or Landscape
- Margins — Top, bottom, left, right
- Header and Footer — Custom HTML for headers and footers (see Headers and Footers)
Previewing
- Quick Preview (Ctrl+Q) — renders the HTML instantly in the browser (no header/footer)
- Generate PDF — produces the full PDF with all settings applied
Tips
- Use
page-break-before: alwaysto force page breaks between sections - Use
page-break-inside: avoidto prevent elements from being split across pages - Include external fonts with
@importor<link>tags in the CSS tab - Use the browser's developer tools to debug layout issues before generating
Further reading
- Template Language (Jinja2) — learn the syntax for dynamic content
- Advanced PDF Topics — page breaks, backgrounds, emojis, and more
- Full tutorial: Generate a PDF from HTML