Zapier Integration
Zapier lets you connect APITemplate.io with thousands of other apps to automate PDF and image generation: no coding required.
With the APITemplate.io Zapier integration you can:
- Create PDFs from templates based on data from other apps
- Create images from templates whenever a trigger fires (new spreadsheet row, form submission, etc.)
- Use the generated
download_urlin subsequent Zap steps (send via email, upload to storage, post to social media, etc.)
Section 1: Automate PDF Generation
This section covers creating PDFs automatically using Zapier and APITemplate.io.
Watch the video below for a step-by-step walkthrough of automating PDF generation with Zapier and APITemplate.io:
Step 1: Create a PDF template on APITemplate.io
- Log in to app.apitemplate.io and navigate to Manage Templates
- Click New Template to create a new PDF template (or select an existing one)
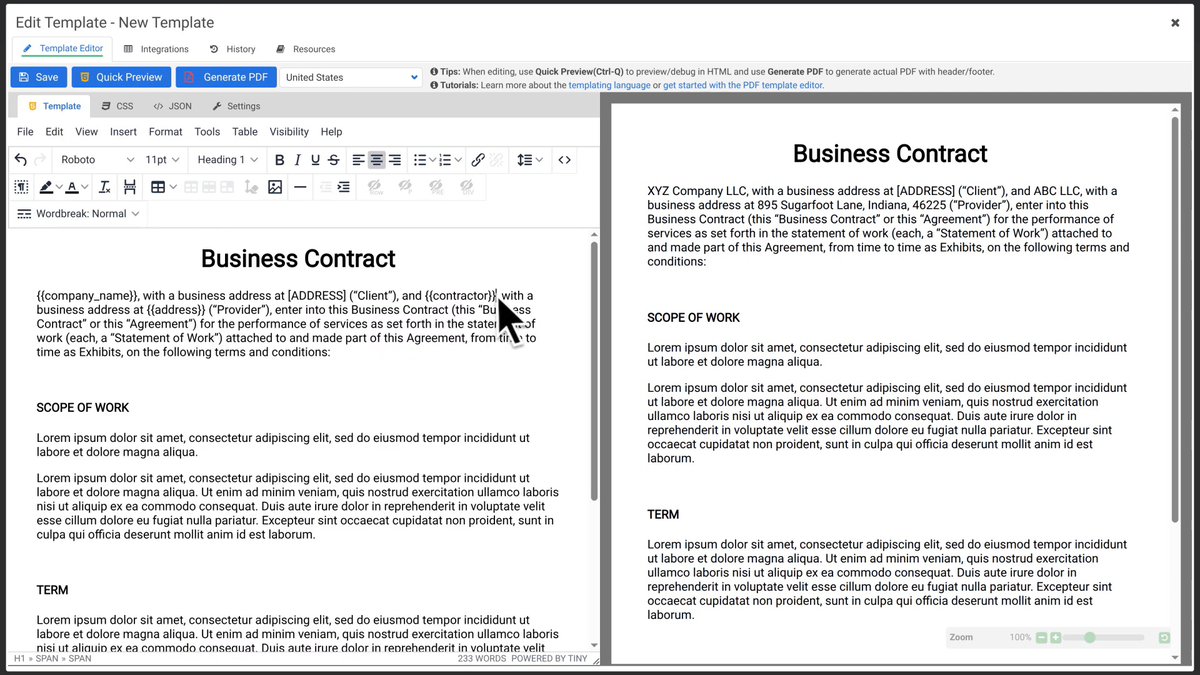
- Use the format
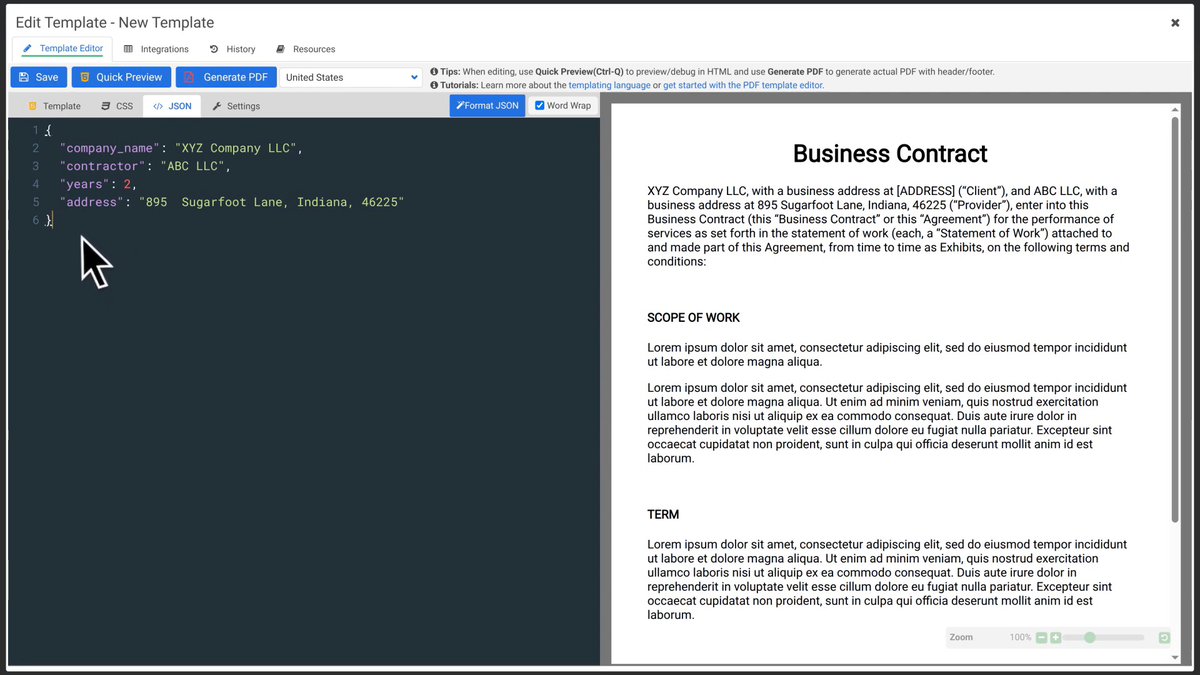
{{variable_name}}for dynamic values: for example,{{company_name}},{{amount}},{{date}} - Update the JSON values in the Sample JSON tab and preview with Quick Preview (Ctrl-Q) or Generate PDF
Step 2: Create a Zap with the Create PDF action
- Log in to Zapier and click Create Zap
- Set up a trigger based on your use case (e.g., new Google Sheets row, new form submission, new payment in Stripe)
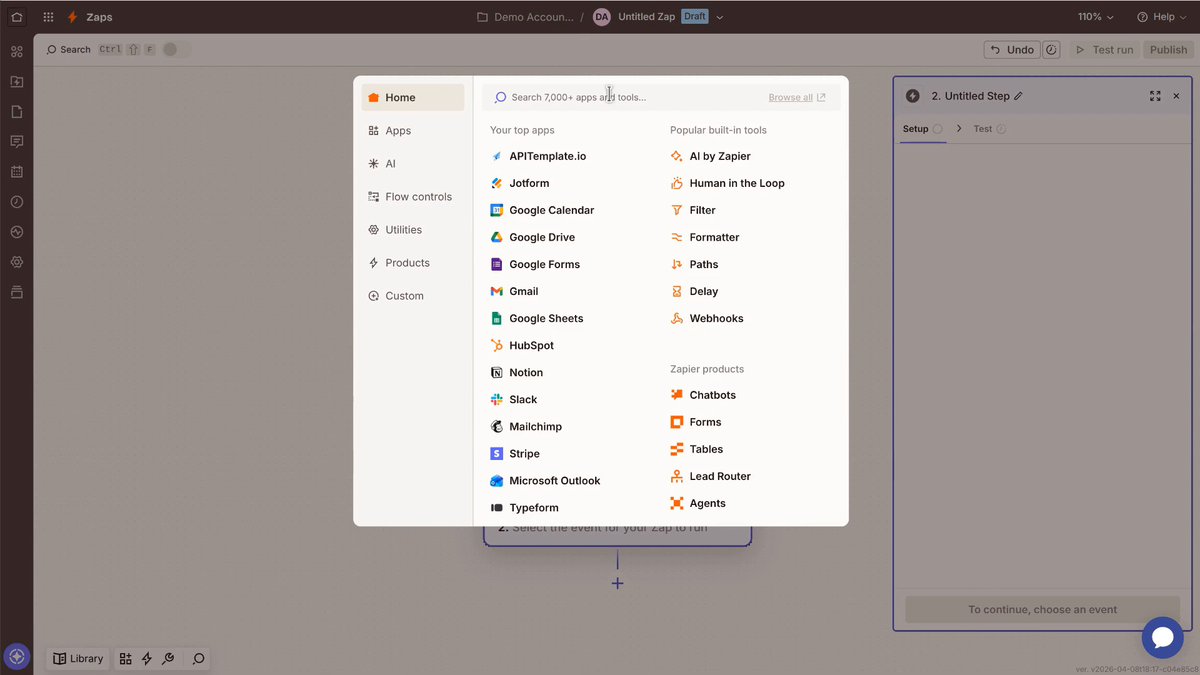
- Add an action step and search for APITemplate.io
- In the Action Event, select Create PDF
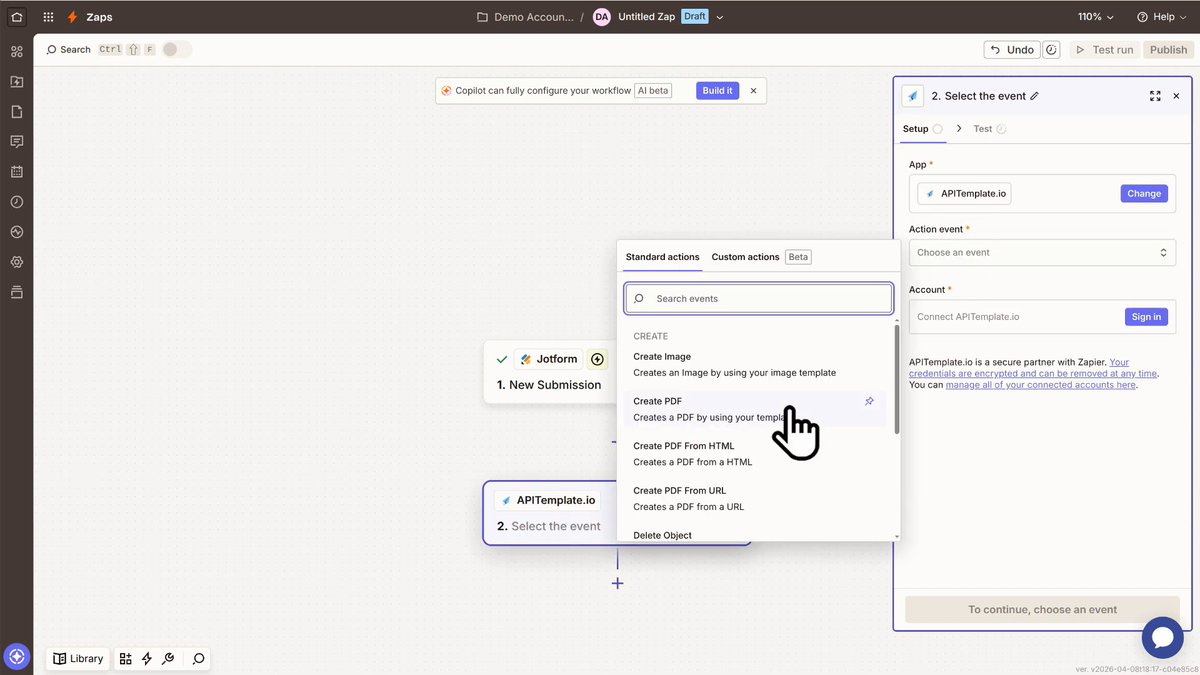
- Connect your APITemplate.io account using your API key (find it at API Integration)
Step 3: Configure the action and map data
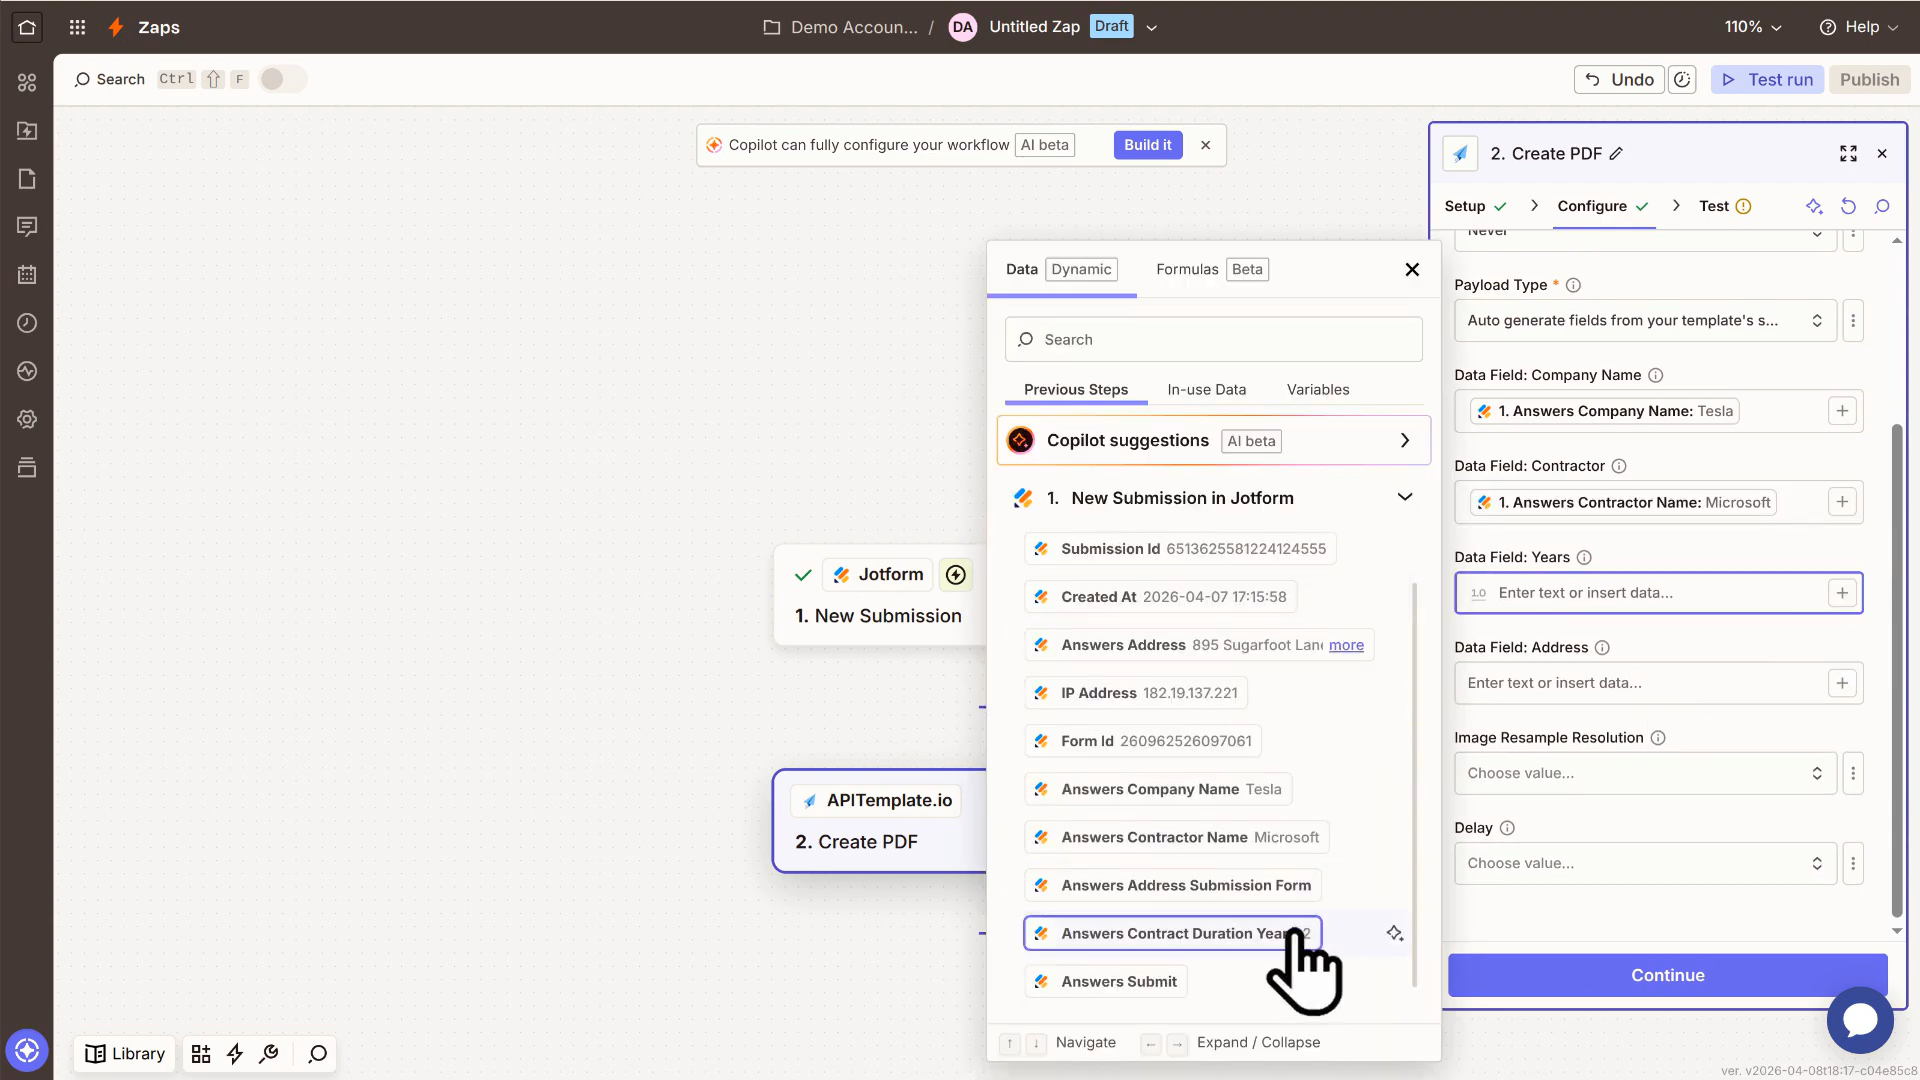
- Select your template from the dropdown list
- The easiest option is Auto-generate fields from the template’s sample data schema.Choose
Auto-generate fields...
There are three ways to build the payload data:
- Dictionary — Simple flat data with key-value pairs.
- Auto-generate fields (Preferred) — Builds the payload using your template's sample data schema.
- JSON — For more complex or nested data structures.
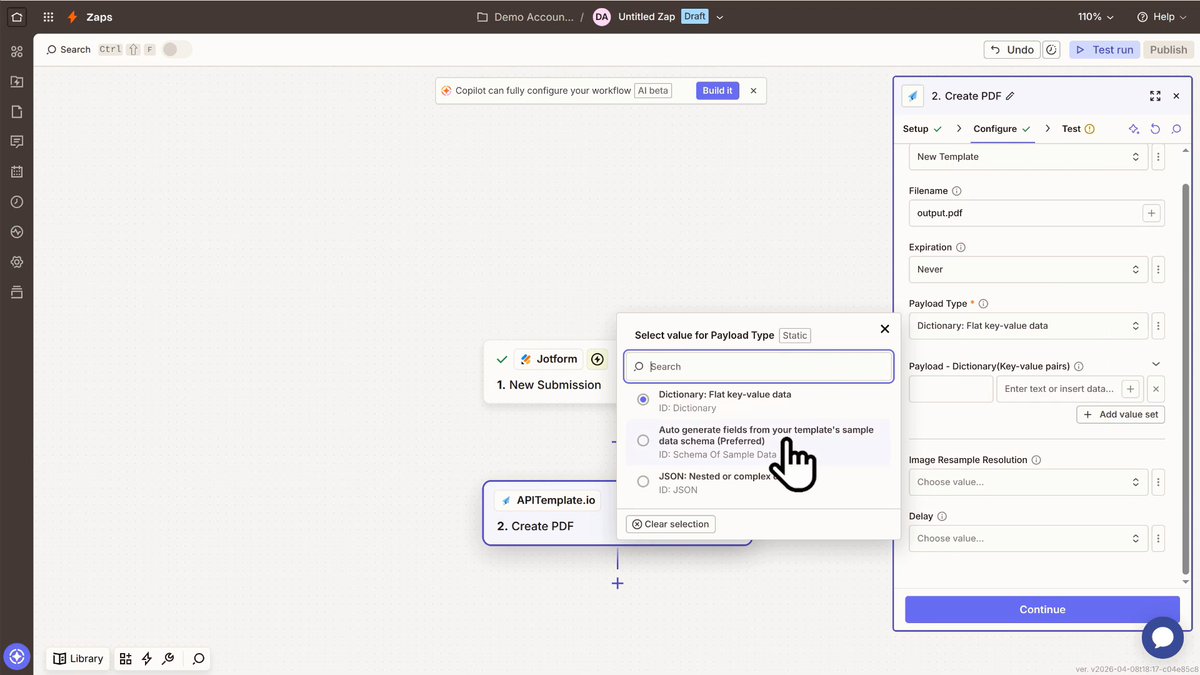
- Once selected, you’ll see all the data fields from your template. Then simply map each one to the corresponding field.
Step 4: Test and publish
- Click Test & Review to generate a test PDF
- The response includes a
download_url: use this in subsequent Zap steps to email the PDF, upload it to cloud storage, etc.
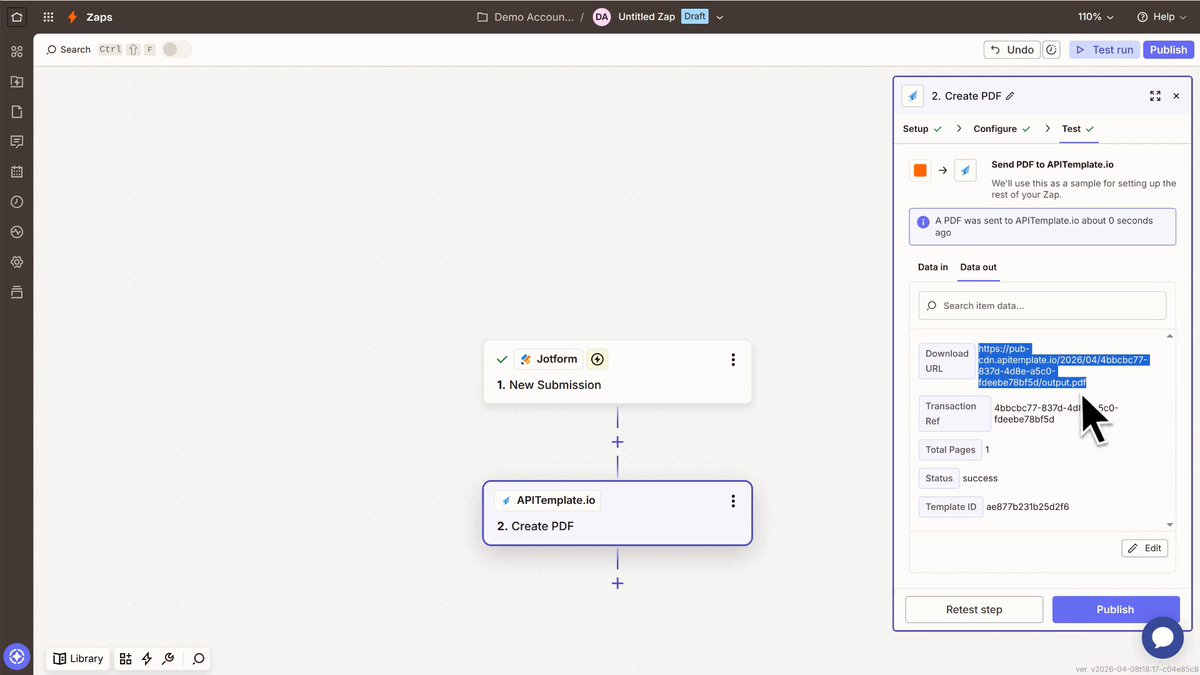
The generated PDF:

Once verified, turn on your Zap to automate PDF generation.
Section 2: Automate Image Generation
This section walks through connecting Google Sheets and APITemplate.io in Zapier to automatically generate images whenever a spreadsheet row is added or updated.
Step 1: Sign up for APITemplate.io
You need an account on APITemplate.io: sign up at app.apitemplate.io
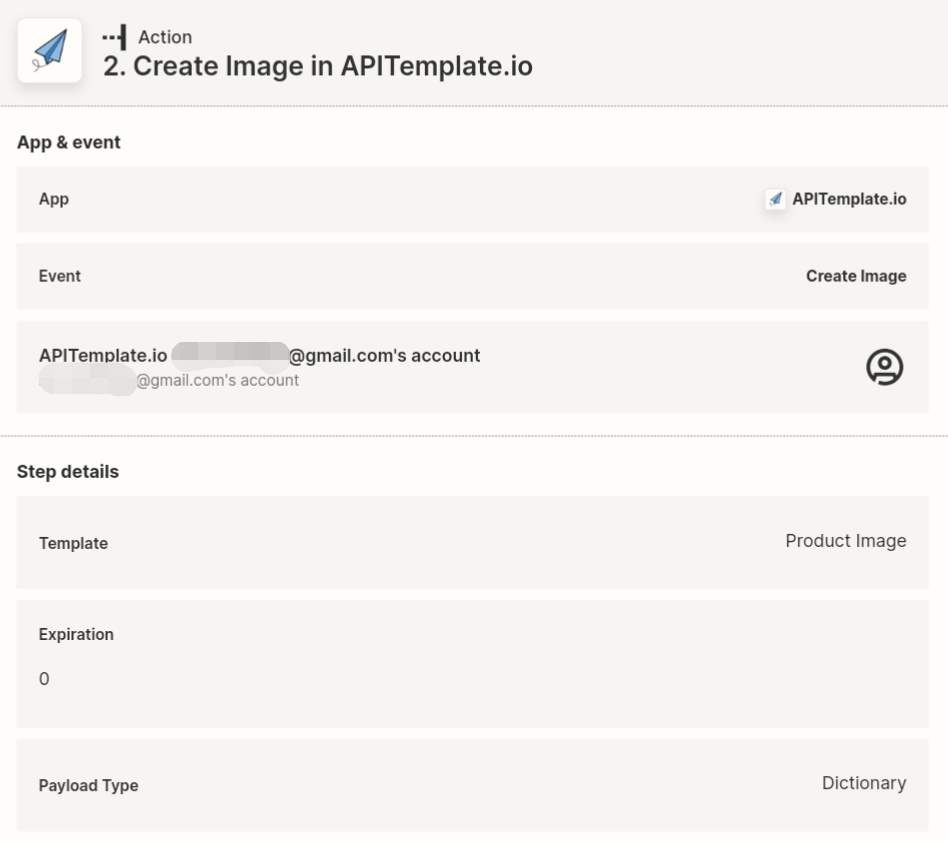
Step 2: Configure the action in Zapier
In the APITemplate.io action step, select the event Create Image, then choose your template, expiration, and payload type:
There are two payload types:
- Dictionary (key-value pairs): a flat set of simple key-value pairs, suitable for most use cases
- JSON: hierarchical data for more complex templates
For image generation, Dictionary is the recommended payload type.
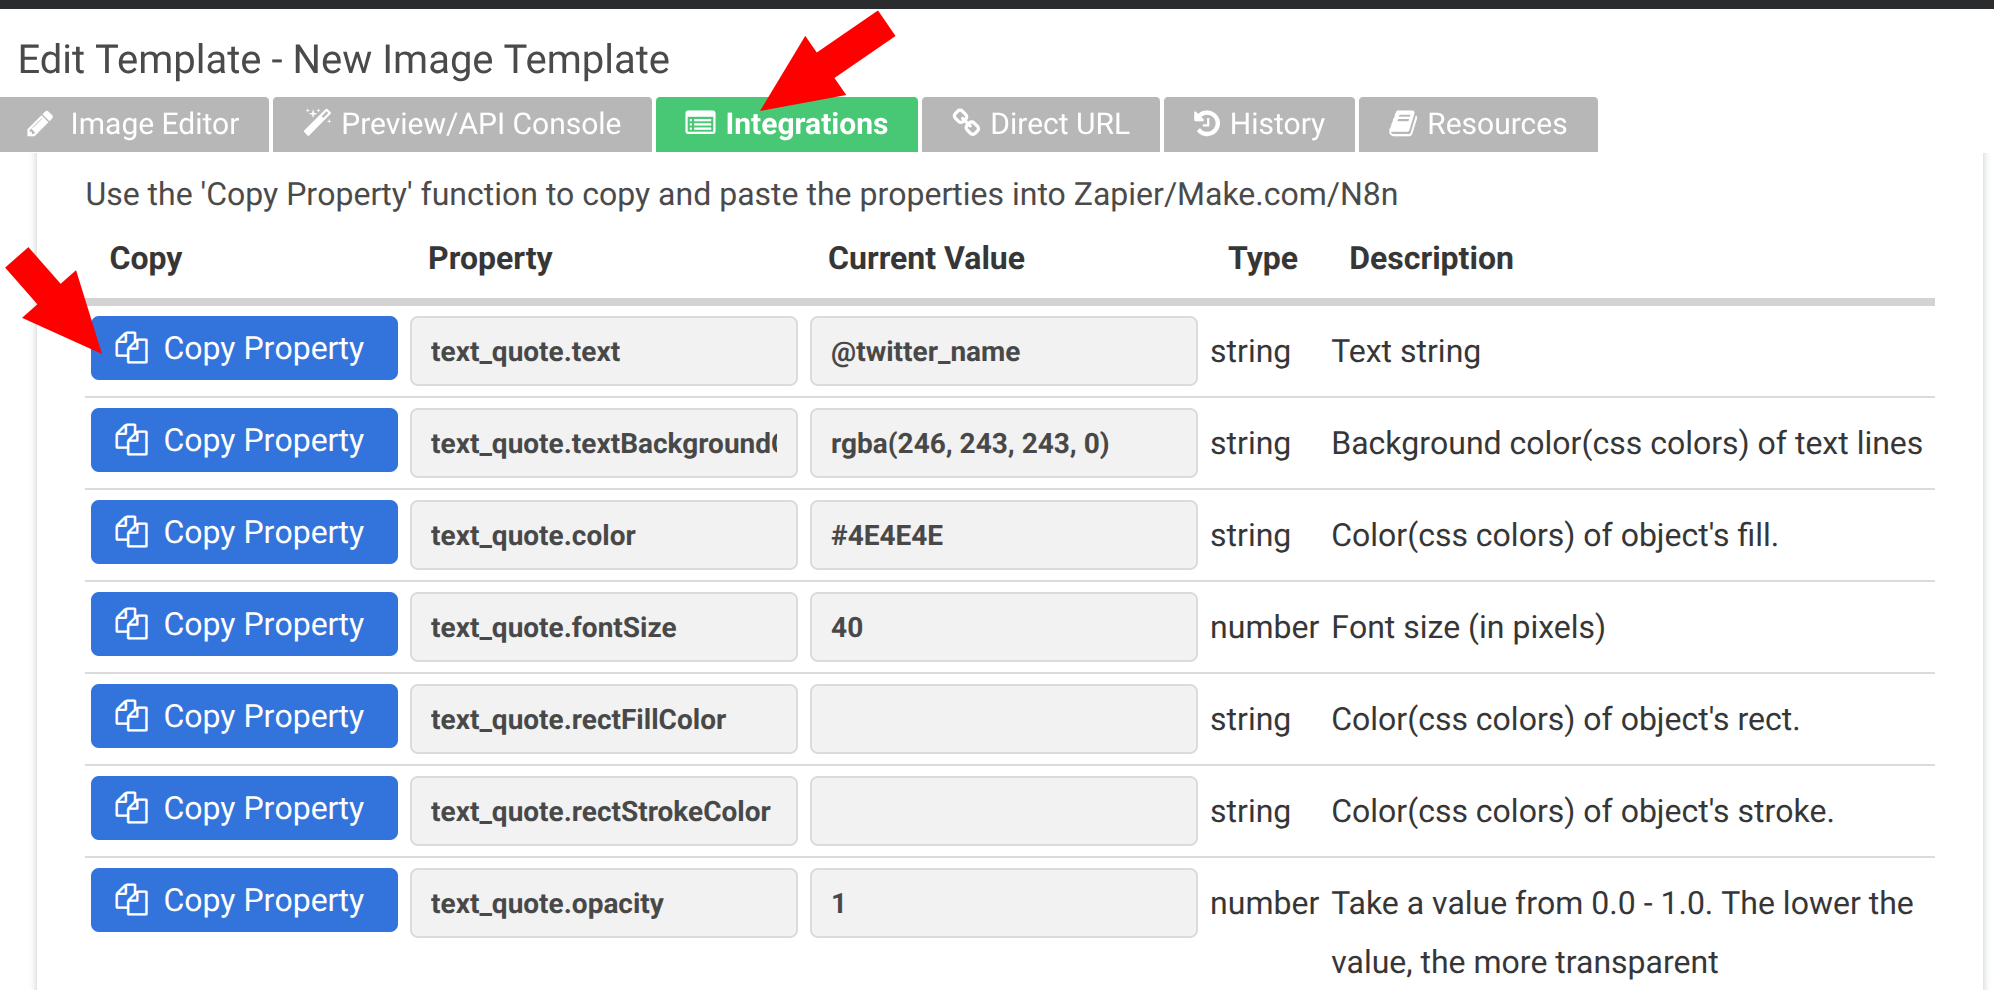
Step 3: Copy key-value pairs from the Image Template Editor
To get the property keys for your template:
- Open the Image Editor in APITemplate.io
- Navigate to the Integrations tab
- Copy the properties of the visual elements you want to override
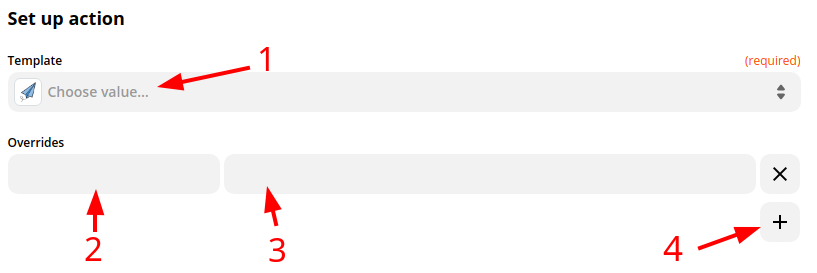
Step 4: Paste the key in Zapier
- Back in Zapier, paste the property names as keys in the Dictionary table
- Map each key's value to the corresponding column from your Google Sheets trigger data
Example workflows
- Google Sheets → Product image: new row triggers image generation for e-commerce listings
- Google Sheets → PDF invoice: new row triggers PDF generation, then email the invoice
- Typeform → Certificate PDF: form submission generates a personalized certificate
- Airtable → Social media image: new record creates a branded social media graphic
- Stripe → Receipt PDF: new payment triggers a receipt PDF
Tips
- Use Zapier's Formatter step to transform data before passing it to APITemplate.io
- Use the
download_urlfrom the APITemplate.io step in an email or file upload step - For image templates, always copy the property keys from the Integration(Ranamed from Zapier/Integromat/N8n) tab in the Image Editor to ensure the correct key names
- You can chain multiple actions after generation: for example, upload to Google Drive, then send an email notification