Have you ever found yourself needing to convert HTML into a PDF? The ability to convert HTML content into PDF format has become increasingly valuable.
Whether you’re a developer looking to streamline document generation processes or an end user seeking a reliable way to preserve and share web-based information, HTML to PDF conversion offers a rich solution with numerous benefits.
Wondering what kind of benefits? – Converting HTML to PDF allows you to create portable, consistent documents that retain the layout, styling, and formatting of the original web content. This ensures that information remains accessible and visually appealing across different devices and platforms, whether viewed online or offline.
Another benefit? – PDFs are designed for printing, hence, this makes them ideal for generating printable versions of web pages, reports, invoices, and more.
Perhaps you’re working on an application that requires you to export data in PDF format and perform web testing and automation in different cases. Well, there’s a handy tool made precisely for such tasks.
In this article, we’ll explore HTML to PDF conversion using Playwright and APITemplate.
What is Playwright?
Playwright is an open-source automation library that was founded by Microsoft. It allows you to write automated tests or perform browser automation tasks with the support of various programming languages such as JavaScript, Python, Java, and C#.
Playwright also enables developers and testers to automate interactions with web browsers such as Chromium, Firefox, and WebKit using a single API.
So, how does Playwright fit in with HTML to PDF conversion? Playwright provides a rich set of features for automating tasks. For example, you can use Playwright to navigate web pages and fill out forms.
This provides the foundation for accessing and interacting with the HTML content that needs to be converted and ensures that all relevant content is loaded before attempting to convert it to PDF.
Additionally, with playwright, you can also emulate mobile devices, intercept network requests, and run tests in a headless or headful mode.
Steps to Generate HTML-To-PDF with Playwright
Playwright is a bit similar to Puppeteer in terms of syntax due to their common goal of automating browser interactions.
Developers familiar with Puppeteer will find many familiar concepts and patterns when transitioning to Playwright, making it relatively easy to adopt for those already experienced with Puppeteer. But, it’s worth noting that Playwright offers additional capabilities and broader browser support compared to Puppeteer.
If you would like to explore using Puppeteer, you will find the following articles useful:
- 7 Tips for Generating PDFs with Puppeteer
- Web Scraping Using Puppeteer and Generate PDF Documents with APITemplate.io
Here are the steps to generate HTML to PDF with Playwright:
Step 1. Install Playwright
You can install via your preferred programming language (refer to the docs) or you can install using the VS code extension. I will briefly walk through the installation using VS code.
Using VS Code To install using VisualStudio IDE, go to the VS code marketplace and install the extension. After installation, enter Ctrl+Shift+p to open your command terminal, and choose Install Playwright. Then, select and install the browsers you need.
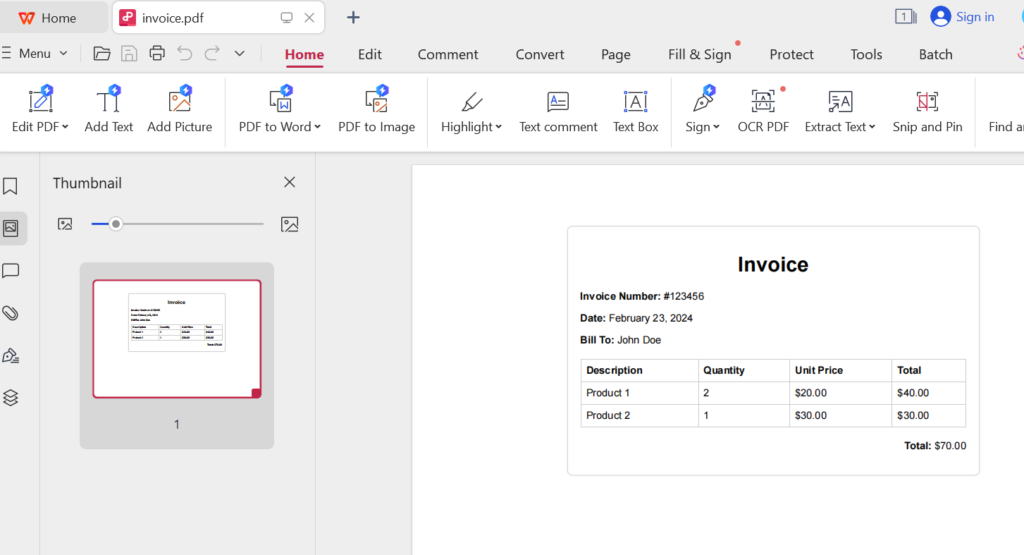
Step 2. Prepare HTML file
Create an HTML file and save it in your preferred folder. Make sure to copy the address of the HTML file location. Here is an example of a simple HTML file
<!DOCTYPE html>
<html lang="en">
<head>
    <meta charset="UTF-8">
    <meta name="viewport" content="width=device-width, initial-scale=1.0">
    <title>Invoice</title>
    <style>
        body {
            font-family: Arial, sans-serif;
            margin: 0;
            padding: 20px;
        }
        .container {
            max-width: 600px;
            margin: 0 auto;
            border: 1px solid #ccc;
            padding: 20px;
            border-radius: 8px;
        }
        h1, h2 {
            text-align: center;
        }
        table {
            width: 100%;
            border-collapse: collapse;
            margin-top: 20px;
        }
        th, td {
            border: 1px solid #ccc;
            padding: 8px;
            text-align: left;
        }
        .total {
            margin-top: 20px;
            text-align: right;
        }
    </style>
</head>
<body>
    <div class="container">
        <h1>Invoice</h1>
        <p><strong>Invoice Number:</strong> #123456</p>
        <p><strong>Date:</strong> February 23, 2024</p>
        <p><strong>Bill To:</strong> John Doe</p>
        <table>
            <thead>
                <tr>
                    <th>Description</th>
                    <th>Quantity</th>
                    <th>Unit Price</th>
                    <th>Total</th>
                </tr>
            </thead>
            <tbody>
                <tr>
                    <td>Product 1</td>
                    <td>2</td>
                    <td>$20.00</td>
                    <td>$40.00</td>
                </tr>
                <tr>
                    <td>Product 2</td>
                    <td>1</td>
                    <td>$30.00</td>
                    <td>$30.00</td>
                </tr>
            </tbody>
        </table>
        <div class="total">
            <p><strong>Total:</strong> $70.00</p>
        </div>
    </div>
</body>
</html>
Step 3. Prepare source code
We need to create a file to run our source code. Go to the folder where you installed Playwright and create a new file under the tests folder. You can also customize the HTML content, file path, and other options according to your requirements.
i. Generate PDF from HTML using Play Wright using JavaScript
Create a TypeScript file called “test-1.spec.ts” and copy the following code snippet into it:
import { test, expect } from '@playwright/test';

test('check HTML document', async ({ page }) => {
    await page.goto('file:///C:/Users/ASUS/Documents/index.html');

    await expect(page).toHaveTitle('PDF Example');

    const heading = await page.$('h1');
    expect(heading).not.toBeNull();

    const paragraph = await page.$('p');
    expect(paragraph).not.toBeNull();

    await page.pdf({path: 'output.pdf', format: 'A4'});
});
Now, let’s breakdown each line of code:
import { test, expect } from '@playwright/test';This line imports the test and expect functions from the @playwright/test module. These functions are used for defining tests and making assertions within the tests, respectively.
test('check HTML document', async ({ page }) => {
    await page.goto('file:///C:/Users/ASUS/Documents/index.html');
This line defines a test case with the name “check HTML document”. The test case is defined as an asynchronous function that takes an object destructured to extract the page object. It instructs the browser to navigate to a local HTML file located at the specified file path.
await expect(page).toHaveTitle('PDF Example');This line makes an assertion using the expect function. It checks that the title of the current web page, accessed through the page object, is equal to “PDF Example”.
const heading = await page.$('h1');
expect(heading).not.toBeNull();
This line selects the first h1 element on the page using the page.$() method and assigns it to the variable heading. It makes an assertion that verifies whether the heading variable is not null. If the <h1> element exists on the page, the assertion passes, otherwise, it fails.
const paragraph = await page.$('p');
expect(paragraph).not.toBeNull();
This line selects the first
element on the page using the page.$() method and assigns it to the variable paragraph. It makes a similar assertion to the previous one, checking whether the paragraph variable is not null.
await page.pdf({path: 'output.pdf', format: 'A4'});This line generates a PDF of the current page using the page.pdf() method. It specifies the path where the PDF will be saved (output.pdf) and the format of the PDF (A4).
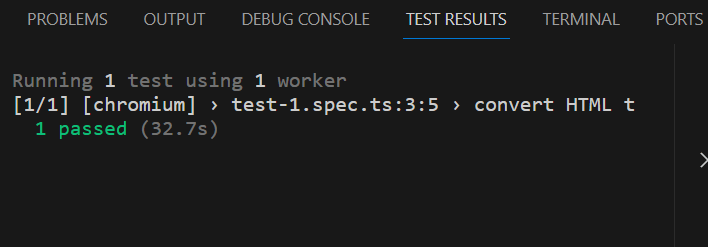
Run the test by clicking on the green triangle. Go back to the folder you created, you should see an output.pdf file.

Note: The PDF file does not display on your browser because the pdf() method runs only in headless mode. Headless mode means that the browser runs without a graphical user interface (GUI). This is useful for automated testing and performing browser actions in the background without needing to display the browser window
ii. Generate PDF from HTML using Play Wright using Python
Create a new folder called “python_playwright” (or whatever you prefer). Go to your terminal, and inside that folder install playwright for python using the following commands:
pip install pytest-playwrightAfter that, install the required browsers (chromium, webkit, or firefox). I’d be installing only chromium browser for this example. You can do this by issuing the following command:
python -m playwright install chromiumCreate a file and copy the following code
from playwright.sync_api import sync_playwright
with sync_playwright() as p:
browser = p.chromium.launch(headless=True)
context = browser.new_context()
page_pdf = context.new_page()
page_pdf.goto('html_file/invoice.html')
# Assert that the title of the document is as expected.
assert page_pdf.title() == 'Invoice'
# Assert that certain elements are present on the page.
heading = page_pdf.query_selector('h1')
assert heading is not None
paragraph = page_pdf.query_selector('p')
assert paragraph is not None
page_pdf.pdf(path='invoice.pdf', scale=1)
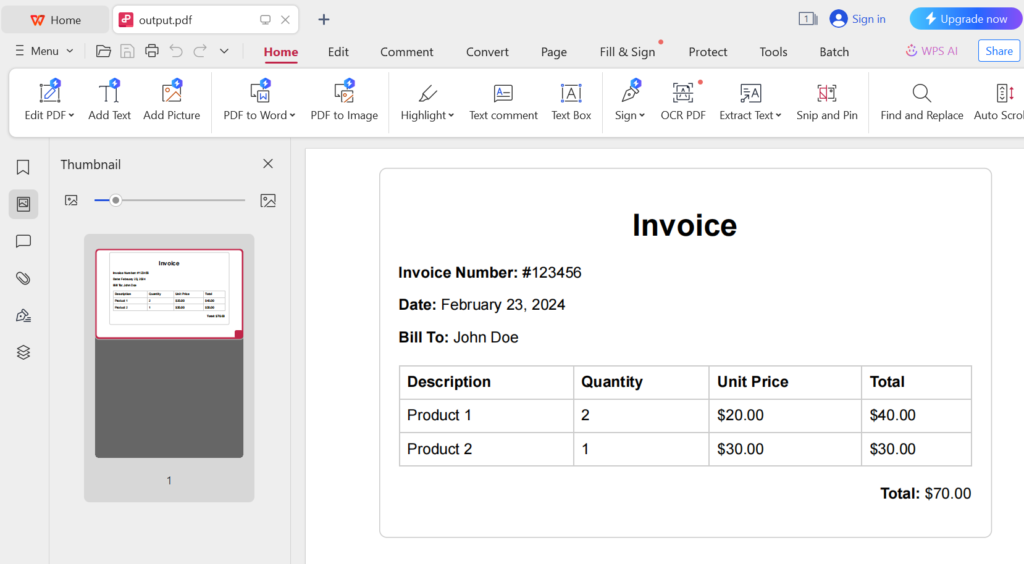
browser.close()After running your code, you should get a similar result to the image below

You should see a PDF document appearing in the folder you created.
iii. Generate PDF from HTML using Play Wright using Java
To create a PDF from HTML, we use Maven, a Java framework. If you are not familiar with Maven, please take a look at the documentation on how to get started. After installing maven, you need to setup Playwright in your Maven project. You can do this by adding the necessary dependencies to your pom.xml Here’s how you can do it:
Step 1. Open your pom.xml file in your Maven project.
Step 2. Add the following dependencies within the tag:
<dependencies>
	<!-- Playwright -->
	<dependency>
		<groupId>com.microsoft.playwright</groupId>
		<artifactId>playwright</artifactId>
		<version>1.41.0</version>
		<!-- Replace with the latest version -->
		<scope>test</scope>
	</dependency>
</dependencies>
Step 3. Save the pom.xml file.
Step 4. Maven will automatically download the Playwright dependency when you build your project. You can now use Playwright in your Java code.
Step 5. Create a Java file, and add the following code snippet:
    import com.microsoft.playwright.*;

    import java.nio.file.Path;
    import java.nio.file.Paths;

    public class PDFGeneration {
        public static void main(String[] args) {
            try (Playwright playwright = Playwright.create()) {
                Browser browser = playwright.chromium().launch(new BrowserType.LaunchOptions().setHeadless(true));
                BrowserContext context = browser.newContext();
                Page pagePdf = context.newPage();

                // Convert file path string to Path object
                Path filePath = Paths.get("C:/Users/ASUS/Documents/index.html");
                String fileUrl = filePath.toUri().toString();

                pagePdf.navigate(fileUrl);

                // Assert that the title of the document is as expected.
                assert pagePdf.title().equals("Invoice");

                // Assert that certain elements are present on the page.
                ElementHandle heading = pagePdf.querySelector("h1");
                assert heading != null;

                ElementHandle paragraph = pagePdf.querySelector("p");
                assert paragraph != null;

                // Specify the directory for saving the PDF file
                Path outputPath = Paths.get("C:/output.pdf");
                pagePdf.pdf(new Page.PdfOptions().setPath(outputPath).setScale(1));

                browser.close();
            }
        }
    }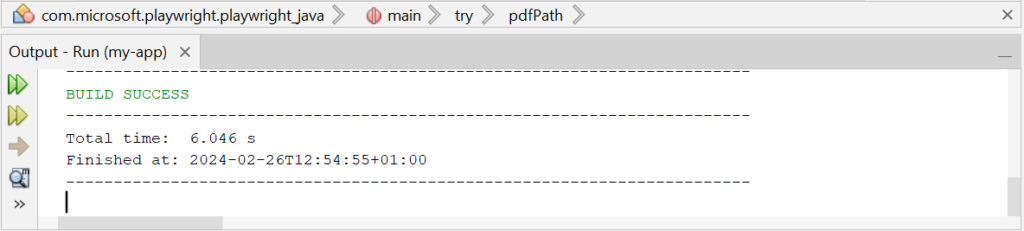
The PDF file will be saved with the name “output.pdf” in the root directory of the C: drive (C:/). You can adjust the outputPath variable to specify a different directory or filename according to your requirements.
PDF Generation with APITemplate.io
APITemplate.io stands out as a user-friendly API platform designed to streamline the process of generating REST APIs in PDF format through the utilization of pre-existing templates.
It has a range of innovative functionalities aimed at simplifying the PDF generation process, including the ability to seamlessly convert HTML content into PDF documents. Notably, users are afforded the convenience of previewing their PDF creations prior to downloading them, ensuring optimal results.
One of the key strengths of APITemplate.io lies in its diverse feature set, which includes:
- HTML to PDF Conversion: APITemplate.io excels at effortlessly converting HTML content into PDF documents, providing users with a straightforward solution for transforming web-based content into printable formats.
- Compatibility with Various Technologies: With support for CSS, JavaScript, PHP, and Python, APITemplate.io offers compatibility with a wide array of technologies, empowering users to leverage their preferred programming languages and frameworks in the PDF generation process.
- Integration Capabilities: APITemplate.io seamlessly integrates with popular automation platforms such as Zapier, Integromat, n8n, Airtable, and UiPath, as well as other No-Code platforms. This facilitates streamlined workflow automation and enhances productivity by enabling the seamless incorporation of PDF generation tasks into existing processes.
- Customization Options: Users can personalize their PDF documents by incorporating custom headers and footers, with page numbers and total page counts. This level of customization ensures that PDF outputs adhere to specific branding guidelines and aesthetic preferences.
To get started with APITemplate.io, here’s what you need to do:
Step 1. Sign up and Create a new PDF Template: To kick off this process, begin by registering on the platform (if you haven’t already). Not to worry, registration is entirely complimentary and doesn’t necessitate any credit card information. After registration, log into your account, and you’ll be redirected to your personalized dashboard, where all your workspaces reside.
Step 2. Get API Key from “API Integration”: Click on the API Integration toolbar located at the top of your dashboard, copy the default API key that has been generated for you. We would be using this API key in our code, so make sure to copy it.
Step 3. Create a new Java file and copy the following code snippet:
import java.io.IOException;
import java.io.OutputStream;
import java.net.HttpURLConnection;
import java.net.URL;
import java.nio.charset.StandardCharsets;
public class APITemplate {
public static void main(String[] args) {
String requestBody = "{\n" +
" \"body\": \"<h1>Invoice</h1><p>Date: 15/05/2022</p><p>Invoice No: 435568799</p><p>Sender Address: 3244 Jurong Drive, Falmouth Maine 1703</p><p>Sender Phone: 255-781-6789</p><p>Sender Email: hello@logos.com</p><p>Receiver Address: 2354 Lakeside Drive, New York 234562</p><p>Receiver Phone: 34333-84-223</p><p>Receiver Email: business@apitemplate.io</p><table border=1 style=\\\"width:100%\\\"><tr><th>Item</th><th>Unit</th><th>Unit Price</th><th>Total</th></tr><tr><td>Oil</td><td>1</td><td>$100</td><td>$100</td></tr><tr><td>Rice</td><td>2</td><td>$200</td><td>$400</td></tr><tr><td>Mangoes</td><td>3</td><td>$300</td><td>$900</td></tr><tr><td>Cloth</td><td>4</td><td>$400</td><td>$1600</td></tr><tr><td>Orange</td><td>7</td><td>$20</td><td>$1400</td></tr><tr><td>Mobiles</td><td>1</td><td>$500</td><td>$500</td></tr><tr><td>Bags</td><td>9</td><td>$60</td><td>$5400</td></tr><tr><td>Shoes</td><td>2</td><td>$30</td><td>$60</td></tr></table>\",\n" +
" \"css\": \"\",\n" +
" \"data\": {},\n" +
" \"settings\": {\n" +
" \"paper_size\": \"A4\",\n" +
" \"orientation\": \"1\",\n" +
" \"margin_top\": \"40\",\n" +
" \"margin_right\": \"10\",\n" +
" \"margin_bottom\": \"40\",\n" +
" \"margin_left\": \"10\",\n" +
" \"print_background\": \"1\"\n" +
" }\n" +
"}";
try {
URL url = new URL("https://rest.apitemplate.io/v2/create-pdf-from-html");
HttpURLConnection connection = (HttpURLConnection) url.openConnection();
connection.setRequestMethod("POST");
connection.setRequestProperty("X-API-KEY", "4258OTUxMDo2NTUwOnhhaTg0NmNneWtUMTRpRmU");
connection.setRequestProperty("Content-Type", "application/json");
connection.setDoOutput(true);
try (OutputStream outputStream = connection.getOutputStream()) {
byte[] input = requestBody.getBytes(StandardCharsets.UTF_8);
outputStream.write(input, 0, input.length);
}
int responseCode = connection.getResponseCode();
if (responseCode == HttpURLConnection.HTTP_OK) {
// Reading response
byte[] responseBody = connection.getInputStream().readAllBytes();
System.out.println("PDF generated successfully: " + new String(responseBody, StandardCharsets.UTF_8));
} else {
System.err.println("Error: " + connection.getResponseMessage());
}
} catch (IOException e) {
e.printStackTrace();
System.err.println("Error: " + e.getMessage());
}
}
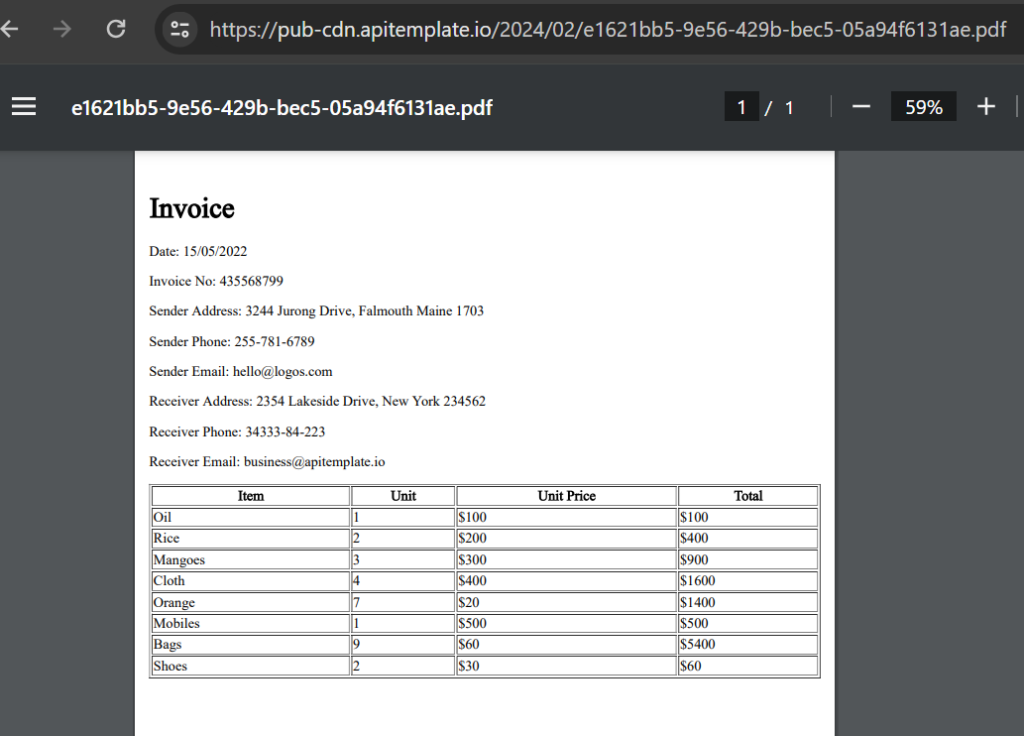
}The following code converts the HTML document into a PDF using APITemplate.io. You should get similar results to the screenshot below. Copy the download_url and paste in your browser.

Conclusion
Want to explore various ways of converting HTML to PDF in Java? Check out our article for a detailed exploration of various techniques.
Get started with automating your PDF generation by signing up for a free account with us today.