Learn how to use Puppeteer to scrape data from websites and automate PDF creation with APITemplate. This guide shows how to turn extracted data into structured, visually appealing documents using reusable templates and simple API integration.

This article explores web scraping using Puppeteer to gather data from the books.toscrape.com website using Node.js. It then details how to use APITemplate to convert this data into attractive PDF documents effortlessly, using reusable templates without the need for coding.
What is APITemplate?
This platform revolutionizes content creation by providing a user-friendly platform that requires no coding for generating PDF documents, social media images, and banners from reusable templates. With an easy-to-use template editor, you can effortlessly design polished PDFs and customize content with features like HTML to PDF conversion, WYSIWYG functionality, and support for custom CSS and JavaScript.
The platform supports seamless integration with popular tools such as Zapier, Airtable, Make.com, n8n, UiPath, and REST API, making it a versatile solution for diverse workflows. Whether you’re automating media content generation, exporting files through RESTful calls, or running parallel conversions, the entire process becomes streamlined and efficient.
With its drag-and-drop Image Editor, WYSIWYG, HTML, and Markdown template editor, the experience remains intuitive and beginner-friendly. The platform’s no-code automation approach simplifies complex tasks, allowing you to focus on creating visually appealing content. Enjoy the flexibility of choosing file formats for both PDF and image outputs, and preview your creations instantly with the side-by-side preview panel.
In essence, this solution empowers users to bring creative visions to life effortlessly, providing a comprehensive way to create efficient, visually stunning content without the need for extensive coding.
Setting Up the Platform
Here’s a step-by-step guide to creating a free account on APITemplate and creating a new PDF template:
Begin by visiting the APITemplate website and clicking on the “Sign Up” button at the top right corner. Follow the prompts to create your account, providing your email address and choosing a secure password.
Once registered, you’ll be directed to your dashboard – the control center for managing templates and using APITemplate features.
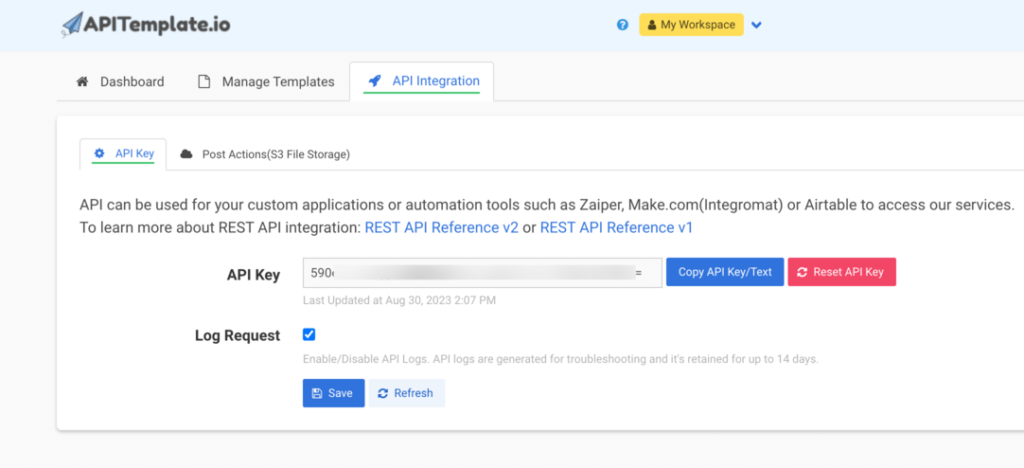
Head to the “API Integration” tab in the navigation bar. Copy the API key provided; you’ll need this key later to seamlessly connect with the APITemplate API.
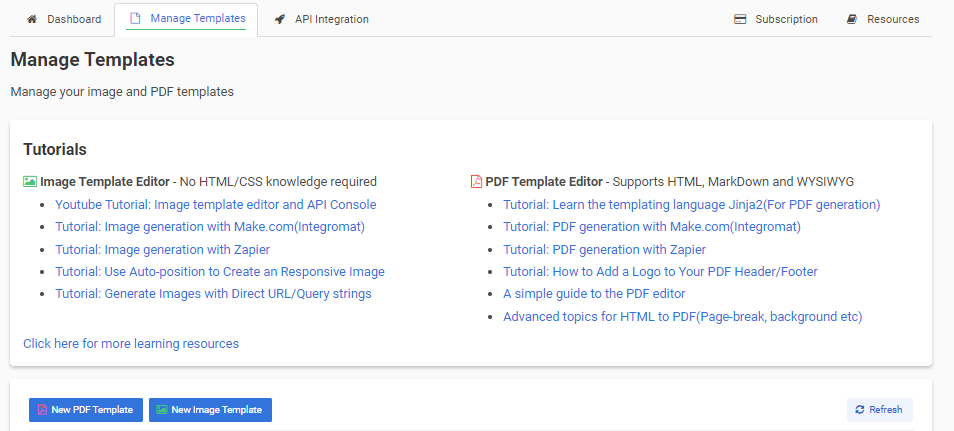
Navigate to the “Manage Templates” tab and click on “New PDF Template” Choose a suitable invoice template and click “Create“
Tailor your template by clicking “Edit” next to the template name. Add custom HTML code to adjust the layout and fields to your preferences.
<div class="morgan">

        <table class="table">
            <tr>
                <th class="th align-center">Book Name</th>
                <th class="th align-center">Price</th>
                <th class="th align-center">Rating</th>
                <th class="th align-center">Amount</th>
            </tr>
            {%for item in items%}
            <tr>
                <td class="td">{{item.book_name}}</td>
                <td class="td align-right">{{item.book_price}}</td>
                <td class="td align-center">{{item.star}}</td>
                <td class="td td2 align-right">{{item.book_price}}</td>
            </tr>
            {%endfor%}

        </table>

        <footer>
            Thank you for your business!
        </footer>
    </div>
Sample JSON:
{
  "company_name": "My Company Name",
  "items": [
    {
      "book_name": "Lorem Ipsum Dolor sit amet",
      "book_price" : "200",
      "star": "5"
    },
    {
      "book_name": "Ipsum Dolor sit amet",
      "book_price": "300",
      "star": "2"
    }
  ]
}
Infuse your template with personal touches to enhance its visual appeal and align it with your branding. Once satisfied, save your customizations. Your template is now ready for use.
With these simple steps, you’re all set to make the most of APITemplate, seamlessly merging creativity with efficiency in your content creation endeavors.
What is Puppeteer?
Puppeteer is a powerful, open-source Node.js library developed by Google that provides a high-level API for controlling headless browsers or browsers in a non-graphical interface. Essentially, it allows developers to automate the interaction between a browser and a website, enabling tasks such as web scraping, taking screenshots, generating PDFs, and testing web pages.
One of Puppeteer’s key features is its ability to control the headless version of the Chromium browser, which is the open-source project behind Google Chrome. This headless mode means that the browser operates without a graphical user interface, making it ideal for automated tasks where visual rendering is unnecessary.
With Puppeteer, developers can navigate web pages, interact with elements, capture screenshots or generate PDFs of web pages, and handle events on the page, all programmatically. Its flexibility and ease of use make it a popular choice for various web automation tasks, from data extraction to automated testing.
Whether you’re a developer looking to automate browser actions or a tester aiming to streamline your testing processes, Puppeteer provides a robust solution with a straightforward API and comprehensive documentation, making it an invaluable tool in the world of web development and automation.
Getting Started
Step 1. Scraping Data With Puppeteer
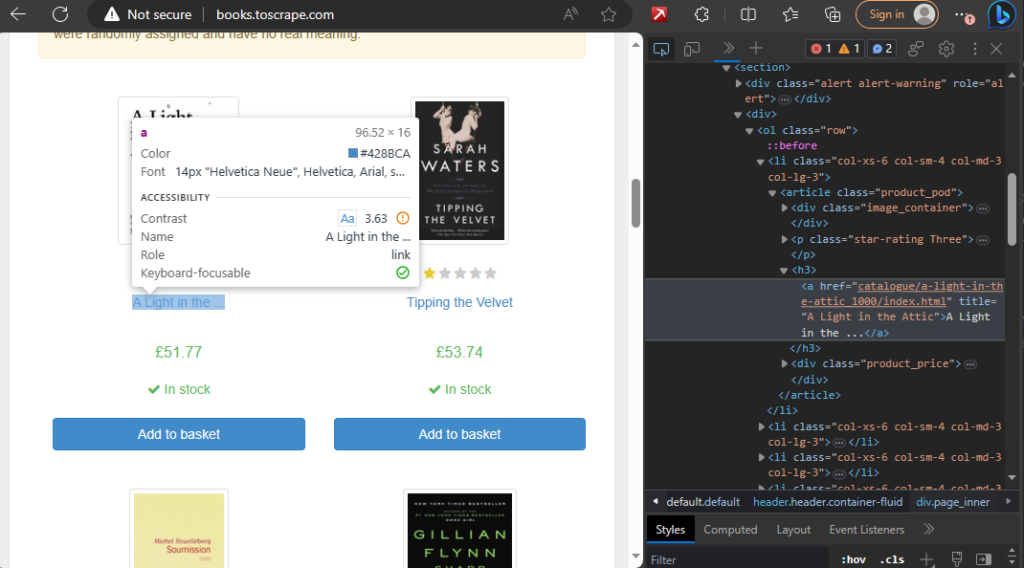
Let’s take a closer look at the process of scraping data from http://books.toscrape.com/ using Puppeteer. The decision to scrape this particular site is based on its simplicity and consistency. The clear HTML structure and straightforward navigation make it an ideal playground for understanding the fundamentals of web scraping.
Before running the code, visit the http://books.toscrape.com/ website, right-click on the elements you want to scrape (e.g., book names, prices), and inspect them. Identify unique identifiers such as class names or HTML tags that will guide Puppeteer in locating and extracting the desired information.
Here’s the full scraping code:
const puppeteer = require('puppeteer');

async function scrapeBooks() {
  const browser = await puppeteer.launch();
  const page = await browser.newPage();

  const baseUrl = 'http://books.toscrape.com/';
  let currentPage = 1;
  const totalPagesToScrape = 2;
  const bookList = [];

  while (currentPage <= totalPagesToScrape) {
    // Navigate to the current page
    await page.goto(`${baseUrl}catalogue/page-${currentPage}.html`);
    // Wait for the book elements to load
    await page.waitForSelector('.product_pod');

    const books = await page.evaluate(() => {
      const bookNodes = document.querySelectorAll('.product_pod');
      const bookList = [];

      bookNodes.forEach((bookNode) => {
        const book_name = bookNode.querySelector('h3 a').getAttribute('title');
        const book_price = bookNode.querySelector('.price_color').innerText;
        const star = bookNode.querySelector('p[class^="star-rating"]').classList[1];

        bookList.push({
          book_name,
          book_price,
          star,
        });
      });

      return bookList;
    });

    bookList.push(...books);

    // Move to the next page
    currentPage++;
  }

  // Close the browser
  await browser.close();

  return bookList;
}

(async () => {
  const bookData = await scrapeBooks();
  console.log(bookData);
})();
This comprehensive script fetches book data from multiple pages of the http://books.toscrape.com/ website, providing a foundation for the subsequent steps in our automated process.
Now, let’s break down the entire code, explaining each line of code step by step.
// Import the Puppeteer module
const puppeteer = require('puppeteer');
Explanation: In this line, we are importing the Puppeteer module, which is a powerful Node.js library developed by Google for automating browser interactions.
// Define an asynchronous function named 'scrapeBooks'
async function scrapeBooks() {
}
Explanation: We define an asynchronous function named scrapeBooks. The use of async indicates that this function will perform asynchronous operations, such as waiting for page loads.
  // Launch a new Puppeteer browser instance
  const browser = await puppeteer.launch();
Explanation: This line initiates a new Puppeteer browser instance, which allows us to manipulate browser behavior programmatically.
  // Create a new page within the browser
  const page = await browser.newPage();
Explanation: We create a new page within the browser. This page object will be used to interact with the loaded web pages.
  // Set the base URL for the scraping
  const baseUrl = '<http://books.toscrape.com/>';
Explanation: We define the base URL of the website we want to scrape. In this case, it’s http://books.toscrape.com/.
  // Initialize variables for pagination and data storage
  let currentPage = 1;
  const totalPagesToScrape = 2;
  const bookList = [];
Explanation: We set up variables to manage the pagination process and to store the scraped data. currentPage keeps track of the page being scraped, totalPagesToScrape specifies the number of pages to scrape, and bookList is an array to hold the extracted book data.
  // Loop through pages for scraping
  while (currentPage <= totalPagesToScrape) {
Explanation: This initiates a loop that continues until the specified number of pages (totalPagesToScrape) is reached.
    // Navigate to the current page
    await page.goto(`${baseUrl}catalogue/page-${currentPage}.html`);
Explanation: This line uses Puppeteer’s page.goto() function to navigate to the current page based on the constructed URL.
    // Wait for the book elements to load on the page
    await page.waitForSelector('.product_pod');
Explanation: We use page.waitForSelector() to ensure that the book elements on the page, identified by the CSS class .product_pod, are fully loaded before proceeding with data extraction.
    // Extract book details using page.evaluate()
    const books = await page.evaluate(() => {
      const bookNodes = document.querySelectorAll('.product_pod');
      const bookList = [];

      bookNodes.forEach((bookNode) => {
        const book_name = bookNode.querySelector('h3 a').getAttribute('title');
        const book_price = bookNode.querySelector('.price_color').innerText;
        const star = bookNode.querySelector('p[class^="star-rating"]').classList[1];

        bookList.push({
          book_name,
          book_price,
          star,
        });
      });

      return bookList;
    });
Explanation: This block uses page.evaluate() to execute custom code within the context of the page. It extracts book details (name, price, and star rating) by querying the relevant HTML elements and constructs an array of book objects.
    // Append the extracted books to the overall book list
    bookList.push(...books);

    // Move to the next page
    currentPage++;
  }
Explanation: The extracted books are added to the bookList array, and we increment currentPage to move to the next page in the loop.
  // Close the Puppeteer browser
  await browser.close();
Explanation: After scraping is complete, we close the Puppeteer browser to free up system resources.
  // Return the compiled book list
  return bookList;
}
Explanation: The function concludes by returning the compiled bookList containing all the extracted book data.
// Execute the scraping function and log the result
(async () => {
  const bookData = await scrapeBooks();
  console.log(bookData);
})();
Explanation: Finally, we use an Immediately Invoked Function Expression (IIFE) to execute the scrapeBooks function asynchronously. The resulting book data is then logged to the console.
This detailed breakdown provides a comprehensive understanding of each line of code in the Puppeteer scraping process.
Step 2. Creating PDF
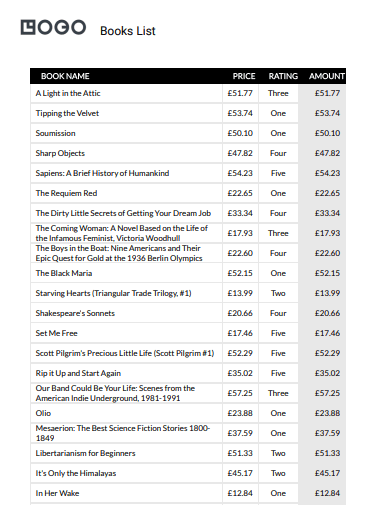
Now that we have successfully scraped valuable book data from http://books.toscrape.com/ using Puppeteer, let’s leverage the power of APITemplate to transform this information into visually appealing PDFs.
// Define the API URL for APITemplate.io
const apiURL = '<https://rest.apitemplate.io/v2/create-pdf?template_id=TEMPLATE_ID>';
Explanation: We set up a constant variable apiURL to store the endpoint for APITemplate’s API, specifying the template ID to be used for creating PDFs.
// Provide your unique API key for authentication
const apiKey = 'YOUR_API_KEY';
Explanation: We define another constant variable apiKey, containing your unique API key. This key serves as authentication for secure communication between your application and the APITemplate API.
// Prepare the request data containing company name and book data
const requestData = {
  "company_name": "Books List",
  "items": bookData,
};
Explanation: We structure the data that we want to send to APITemplate. This includes a company name (“Books List”) and the book data obtained from the previous scraping process.
// Log the prepared request data to the console
console.log(requestData);
Explanation: For debugging purposes, we log the prepared request data to the console, providing visibility into the information being sent to APITemplate.
// Make an HTTP POST request to APITemplate.io using the custom httpPost function
try {
  const resp = await httpPost(apiURL, JSON.stringify(requestData), apiKey);
  const parsedResp = JSON.parse(resp);
  console.log(parsedResp);
} catch (error) {
  console.error('Error:', error.message);
}
Explanation: We use a try...catch block to handle the HTTP POST request to APITemplate. The httpPost function is employed to send the request, passing the API URL, stringified request data, and API key. Upon success, the response is logged and parsed; any errors are caught and logged for effective debugging.
// Define the httpPost function for making HTTP POST requests
async function httpPost(url_api, data, apiKey) {
  // Extract the protocol (https or http) and relevant module (https or http) based on the API URL
  const uri = new URL(url_api);
  const fx = uri.protocol === 'https:' ? https : http;

  // Define options for the HTTP POST request
  const opts = {
    method: 'POST',
    hostname: uri.hostname,
    port: uri.port,
    path: `${uri.pathname}${uri.search == null ? '' : uri.search}`,
    protocol: uri.protocol,
    headers: {
      'Content-Type': 'application/json',
      'Content-Length': Buffer.byteLength(data),
      "X-API-KEY": apiKey
    }
  };

  // Return a Promise to handle the HTTP request
  return new Promise((resolve, reject) => {
    const req = fx.request(opts, (res) => {
      res.setEncoding('utf8');
      let responseBody = '';

      // Collect response data
      res.on('data', (chunk) => responseBody += chunk);

      // Resolve the Promise with the collected response data when the response ends
      res.on('end', () => resolve(responseBody));
    });

    // Handle errors
    req.on('error', (err) => reject(err));

    // Write the request data and end the request
    req.write(data)
    req.end();
  });
}
Explanation: We define the httpPost function, responsible for making HTTP POST requests. This function dynamically determines whether to use the ‘https’ or ‘http’ module based on the provided API URL. It constructs the options for the HTTP request, including headers such as ‘Content-Type’, ‘Content-Length’, and ‘X-API-KEY’. The function returns a Promise to manage the asynchronous nature of HTTP requests.
Full Code:
const puppeteer = require('puppeteer');
const https = require('https');
const http = require('http');
const { URL } = require('url');

async function scrapeBooks() {
  const browser = await puppeteer.launch();
  const page = await browser.newPage();

  const baseUrl = 'http://books.toscrape.com/';
  let currentPage = 1;
  const totalPagesToScrape = 2;
  const bookList = [];

  while (currentPage <= totalPagesToScrape) {
    await page.goto(`${baseUrl}catalogue/page-${currentPage}.html`);
    await page.waitForSelector('.product_pod');

    const books = await page.evaluate(() => {
      const bookNodes = document.querySelectorAll('.product_pod');
      const bookList = [];

      bookNodes.forEach((bookNode) => {
        const book_name = bookNode.querySelector('h3 a').getAttribute('title');
        const book_price = bookNode.querySelector('.price_color').innerText;
        const star = bookNode.querySelector('p[class^="star-rating"]').classList[1];

        bookList.push({
          book_name,
          book_price,
          star,
        });
      });

      return bookList;
    });

    bookList.push(...books);

    // Move to the next page
    currentPage++;
  }

  await browser.close();

  return bookList;
}

(async () => {
  const bookData = await scrapeBooks();

  const apiURL = 'https://rest.apitemplate.io/v2/create-pdf?template_id=53377b2300c0d71c';
  const apiKey = '66e2OTM0Nzo2Mzg2OksyTWdZbGdCaG5rcEVqcEg';

  const requestData = {
    "company_name": "Books List",
    "items": bookData,
  };

  console.log(requestData)

  try {
    const resp = await httpPost(apiURL, JSON.stringify(requestData), apiKey);
    const parsedResp = JSON.parse(resp);
    console.log(parsedResp);
  } catch (error) {
    console.error('Error:', error.message);
  }
})();

async function httpPost(url_api, data, apiKey) {
  const uri = new URL(url_api);
  const fx = uri.protocol === 'https:' ? https : http;
  const opts = {
    method: 'POST',
    hostname: uri.hostname,
    port: uri.port,
    path: `${uri.pathname}${uri.search == null ? '' : uri.search}`,
    protocol: uri.protocol,
    headers: {
      'Content-Type': 'application/json',
      'Content-Length': Buffer.byteLength(data),
      "X-API-KEY": apiKey
    }
  };

  return new Promise((resolve, reject) => {
    const req = fx.request(opts, (res) => {
      res.setEncoding('utf8');
      let responseBody = '';
      res.on('data', (chunk) => responseBody += chunk);
      res.on('end', () => resolve(responseBody));
    });

    req.on('error', (err) => reject(err));
    req.write(data)
    req.end();
  });
}
Conclusion
In summary, the collaboration between Puppeteer and APITemplate transforms web scraping into an efficient content generation powerhouse.
From navigating the web with Puppeteer to dynamically creating polished PDFs with APITemplate, this tandem provides a versatile solution for automating tasks and producing visually compelling content.
Sign up for a free account with us now and start automating your PDF generation.