1. Introduction
Imagine you had to go through hundreds of pages on a website to collect information or test if different features on a website work correctly, this would take a lot of time and effort if done by hand. That’s where web automation comes in.
Web automation involve using tools to perform tasks on websites automatically rather than manually. Not all web automation tasks are the same. Some may involve collecting specific data from websites (web scraping), while others focus on testing website functionality (web testing).

For example, some tools may be better for gathering large amounts of data, while others are designed to run complex interactions within a website as if they were a real user. Two of the most popular tools for web automation and testing are Selenium and Puppeteer.
Selenium is a tool used for web testing, works across different browsers, and simulate actions a user might take on a website, such as clicking buttons or filling out forms. Puppeteer on the other hand, is used for browser automation. It was designed by Google, so it works mainly with Chrome and is often used for web scraping.
In this article, we will take a look at an in-depth comparison between these two heavyweights- Selenium and Puppeteer. Let’s dive right in.
2. Selenium: The Cross-Browser Automation Champion
Overview of Selenium
Selenium is a popular tool for testing and automating tasks in web browsers. It was created to help testers automatically perform actions on websites, like clicking buttons, entering text, and navigating pages.
It’s been around since the early 2000s and has evolved a lot, becoming one of the most widely used tools in web testing.

One of Selenium’s biggest strengths is that it works on multiple browsers, including Chrome, Firefox, Safari, and Edge. This means you can write one test and run it across different browsers, making sure your website works well for all users.
Selenium also supports several programming languages, including Java, Python, JavaScript, C#, Kotlin, and Ruby and has a large community of users and contributors, which means there are plenty of resources, tutorials, and help available online.
It can also be combined with popular testing frameworks like JUnit and TestNG. These frameworks add structure to your tests leveling up your application, and making them easier to manage and run efficiently.
We are going to be using Python for the Selenium setup so make sure you have that installed. Here’s what you need to do:
- Install Selenium: To install Selenium, use the following command. Make sure you have Pip installed
py -m pip install -U selenium  #Windows installation

python -m pip install -U selenium #Linux and MacOS installation
2. Download Web Driver: Download the required web driver for your browser and specify the PATH in your script. You can find the required driver for your browser here.
3. Create a Python Script: This is where all your codes will be tested using Selenium.
Pros and Cons of Selenium
Selenium is known for its flexibility across multiple browsers and languages, making it a popular tool in cross-browser testing. However, it has a few limitations, such as setup complexity and slightly lower speed in Chrome-focused tasks.
Here’s a quick look at the pros and cons of Selenium to help understand its strengths and limitations in web automation.
| Pros | Cons |
| Selenium supports various browsers, such as, Chrome, Firefox, Safari, and Microsoft Edge. | N/A |
| It also supports multiple languages like Java, Python, Kotlin, Ruby, JavaScript, and C# | N/A |
| It integrates well with testing frameworks (e.g., JUnit, TestNG), allowing thorough test strategies and efficient reporting/debugging workflows. | It requires a more complex setup, needing drivers and configurations specific to each browser, which can be time-consuming, especially for beginners. |
| Selenium performs well for cross-browser compatibility, ensuring a consistent experience across different environments. | It is slightly slower than Puppeteer for Chrome-only tasks, as Puppeteer is optimized specifically for Chrome/Chromium, making it more streamlined in those cases. |
3. Puppeteer: Chrome’s Perfect Automation Partner
Overview of Puppeteer
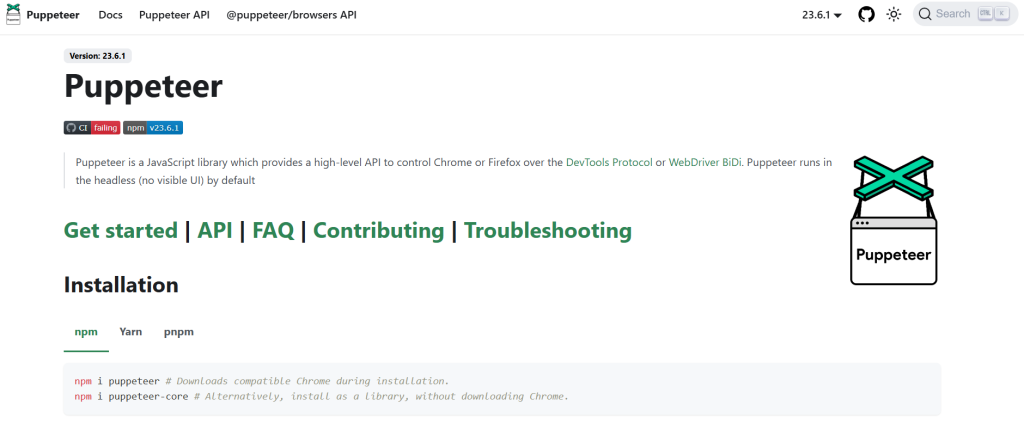
Puppeteer is a tool developed by Google for automating tasks in web browsers. It’s popular for tasks like web scraping and generating screenshots or PDFs of web pages.

Unlike some other tools, Puppeteer is specifically designed to work with Chrome and Chromium. It offers experimental support for Firefox, but Chrome is its primary focus, which ensures high compatibility and performance on Chrome-based browsers.
Puppeteer is written in JavaScript and supports JavaScript and TypeScript only. This makes it an excellent choice for developers working in the Node.js ecosystem but limits options for those who prefer other programming languages.
It is an excellent choice if you need reliable automation for Chrome or Chromium, especially for tasks that can run without a browser window or require precise rendering, like capturing screenshots or scraping data.
Here’s how you can get started with Puppeteer:
- Install Puppeteer: You can install puppeteer using the following command:
npm install puppeteer2. Create your JavaScript file: Remember, Puppeteer uses only JavaScript/TypeScript programming language. So, create a .js file for your task.
Pros and Cons of Puppeteer
Puppeteer is a fast, efficient tool for Chrome-based automation, great for tasks like web scraping. Since it’s specifically designed for Chrome/Chromium, it’s easy to use and runs smoothly in headless mode, which saves resources.
However, there are a few disadvantages that might limit the use of Puppeteer, let’s take a look at them:
| Pros | Cons |
| It is lightweight and fast with a simple setup. | It lacks versatility for cross-browser testing. |
| It is easy to use for JavaScript/TypeScript developers. | It only supports JavaScript/TypeScript, limiting language flexibility. |
| It is optimized for Chrome, making it ideal for Chrome-only tasks, web scraping, and rendering web pages accurately. | It is limited to Chrome/Chromium. |
| It has a community for support and resources. | It has a smaller ecosystem than Selenium, meaning fewer resources for extensive testing setups. |
Articles for Puppeteer
The following are our articles about Puppeteer:
- Web Scraping Using Puppeteer and Generate PDF Documents with APITemplate
- Generate PDF From HTML using Puppeteer Sharp with C# (Dotnet Core)
- 7 Tips for Generating PDFs with Puppeteer
- Convert HTML to PDF in Node.js with 4 Popular Libraries
4. Key Differences Between Selenium and Puppeteer
Selenium and Puppeteer are popular tools in web automation and testing. While both tools enable developers to automate tasks in browsers, they each have unique strengths suited to different needs.
Selenium is known for its versatility across multiple browsers and programming languages, making it a popular choice for cross-browser testing.
Puppeteer, on the other hand, is a streamlined option designed by Google for Chrome/Chromium, offering faster performance for tasks within Chrome.
Here’s a quick look at the key differences between Selenium and Puppeteer:
| Feature | Selenium | Puppeteer |
|---|---|---|
| Browser Support | Supports multiple browsers: Chrome, Firefox, Safari, Edge, etc. | Primarily supports Chrome/Chromium (limited Firefox support available) |
| Language Support | Supports multiple languages: Java, Python, JavaScript, C#, Ruby, etc. | Supports JavaScript/TypeScript only. |
| Ease of Use and Setup | Requires additional setup (drivers, configuration). | Simpler setup for JavaScript developers. |
| Headless vs Headful Mode | Can run in both headless and headful modes across supported browsers | Designed for headless mode; headful mode also available |
| Speed and Performance | Broader browser support may introduce overhead | Generally faster in Chrome due to tight integration with Chromium |
| Community and Ecosystem | Established, large community with extensive documentation and resources. | Growing community, younger ecosystem |
5. The Use Cases of Selenium and Puppeteer
Selenium is a great tool when you need to test how a website works on different browsers (like Chrome, Firefox, Safari, and Edge). If you’re building a website or app and want to make sure users have a good experience no matter which browser they use, Selenium helps by automating these tests.
For example, it can click buttons, fill out forms, or check if pages load correctly in each browser. Selenium also works well with testing tools (like JUnit and TestNG) that help organize tests and show detailed results. This makes it very popular for larger projects where cross-browser compatibility is essential.
On the other hand, Puppeteer is perfect for tasks focused on Chrome, especially when speed is important. It’s often used for web scraping, which is collecting data from websites automatically.
Puppeteer can also generate PDFs and screenshots of web pages, which is helpful if you need snapshots of how a page looks at a certain moment. Since Puppeteer is designed to run in the background (headless mode) without opening a browser window, it’s very fast and efficient for these Chrome-only tasks. This makes it a top choice for simple, fast tasks in Chrome that don’t require cross-browser support.
Now, let’s see how Selenium and Puppeteer can be used to perform some tasks.
i. Cross-browser testing with Selenium and Puppeteer
- Selenium: You can set up tests to verify that a login button works across different browsers. Copy and paste the following code to your python script. Then, run the code.
from selenium import webdriver
driver = webdriver.Chrome()

driver.get("https://app.apitemplate.io/accounts/login/")
driver.find_element(By.ID, "login").click()
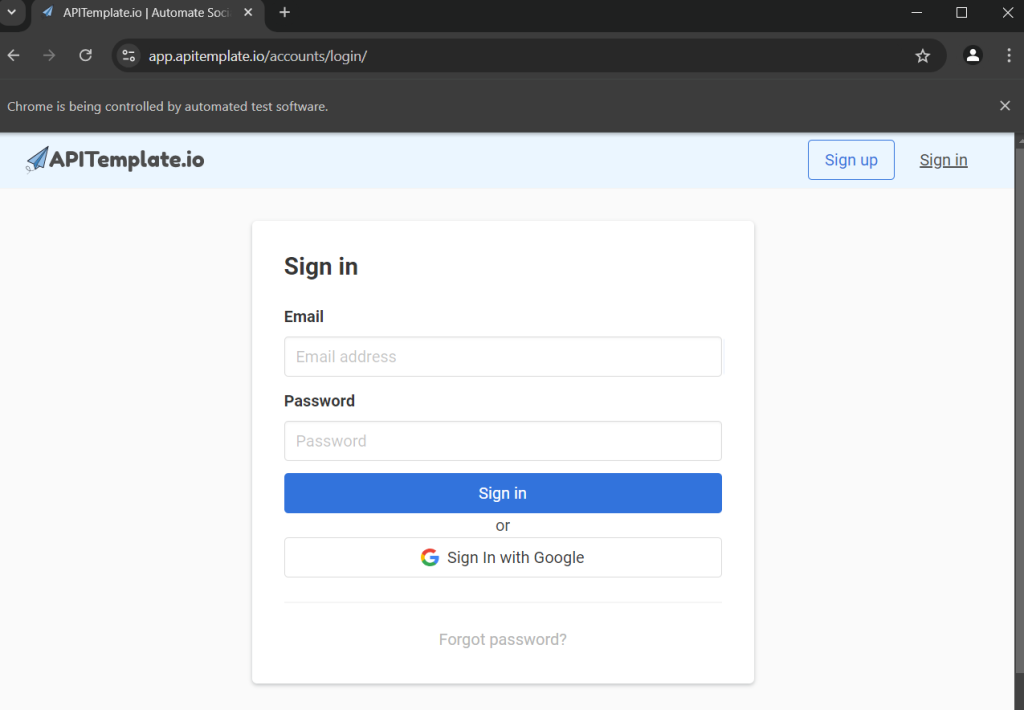
This should open a browser tab that tests the login button of APITemplate.io in the chrome browser.

2. Puppeteer: Puppeteer mainly works with Chrome but can perform similar actions in Chrome-based browsers. Let’s test if the login button is clickable with Puppeteer by running the following code:
const puppeteer = require('puppeteer');

(async () => {
  const browser = await puppeteer.launch();
  const page = await browser.newPage();
  await page.goto('https://app.apitemplate.io/accounts/login/');
  await page.click('.is-fullwidth');
  console.log("Clicked login button");
  await browser.close();
})();
If the link is clickable, you would get the output “Clicked login button”.

ii. Web Scraping with Selenium and Puppeteer
Let’s try scraping headers from APITemplate.io with Selenium and Puppeteer:
- Selenium: To scrape headers from
apitemplate.iowith Selenium, you can locate heading tags like<h1>,<h2>, etc. Here’s how you could set up the code:
from selenium import webdriver
from selenium.webdriver.common.by import By
import time

# Initialize Chrome driver
driver = webdriver.Chrome()
driver.get("https://apitemplate.io")

time.sleep(2)  # Wait for the page to load

# Find and print headers (H1, H2, etc.)
headers = driver.find_elements(By.TAG_NAME, "h1") + driver.find_elements(By.TAG_NAME, "h2")
for header in headers:
    print(header.text)

driver.quit()
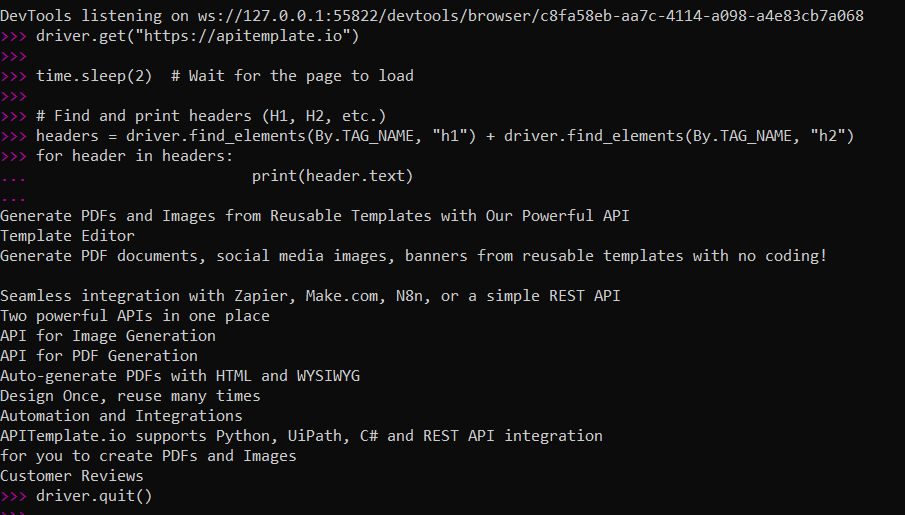
The code searches for <h1> and <h2> tags on the page, printing their text content. Here’s what the output looks like:

2. Puppeteer: You can also scrape headers from apitemplate.io using Puppeteer targeting the heading elements like <h1>, <h2>, etc. Here’s an example of how you might do that:
const puppeteer = require('puppeteer');

(async () => {
  const browser = await puppeteer.launch({ headless: false }); // Set headless: true to run in headless mode
  const page = await browser.newPage();

  try {
    await page.goto('https://apitemplate.io', { waitUntil: 'networkidle2', timeout: 60000 });

    // Example of scraping headers (h1, h2, etc.)
    const headers = await page.$$eval('h1, h2, h3', elements => elements.map(el => el.textContent));
    console.log(headers);
  } catch (error) {
    console.error('Error navigating to the page:', error);
  } finally {
    await browser.close();
  }
})();
This should also generate an output like this:

iii. Puppeteer for PDF Generation
You can use puppeteer for PDF generation by running the following code:
const puppeteer = require('puppeteer');
const path = require('path');

(async () => {
  try {
    const browser = await puppeteer.launch({ headless: true });
    const page = await browser.newPage();

    await page.goto('https://en.wikipedia.org/wiki/Penguin', { waitUntil: 'networkidle2' });

    const pdfPath = path.join(__dirname, 'output.pdf'); // Path to save the PDF
    await page.pdf({
      path: pdfPath,
      format: 'A4',
      printBackground: true // Include background graphics
    });

    console.log('PDF generated successfully! You can find it at:', pdfPath);
    await browser.close();
  } catch (error) {
    console.error('Error generating PDF:', error);
  }
})();
This will generate the APITemplate.io website as a PDF

If you are interested and need more in-depth details on how to generate PDFs and perform web scraping using Puppeteer, check out out tutorial.
6. Which Browser Automation Tool Is Right For You?
When choosing between Selenium and Puppeteer, consider the following criteria based on your project needs:
- Browser Support: If you need to test across multiple browsers, Selenium is the better choice.
- Performance: For fast automation tasks specifically in Chrome, Puppeteer excels.
- Programming Language: If you prefer using JavaScript, Puppeteer is suitable. However, if you want flexibility with other languages, Selenium is the way to go.
7. APITemplate.io for PDF Generation
APITemplate.io simplifies PDF and image generation through customizable templates. It integrates seamlessly with tools like Puppeteer, which is especially powerful for HTML-to-PDF conversions.
With Puppeteer’s ability to accurately render web pages in a headless Chrome environment, APITemplate.io allows users to easily automate PDF creation based on web content. This integration is ideal for applications like generating invoices, reports, or other documents directly from a website’s HTML.
With APITemplate.io’s customizable HTML templates, you can seamlessly use Puppeteer for web scraping and create high-quality PDFs from web content.
To learn more about this process and get a step-by-step guide on integrating Puppeteer with APITemplate.io for web scraping and PDF generation, check out the complete tutorial here.
8. Conclusion
Selenium and Puppeteer serve different needs in browser automation. Selenium is ideal for projects requiring multi-browser support and flexibility with various programming languages. On the contrary, Puppeteer shines in Chrome-specific tasks and offers faster performance, especially for JavaScript users.
The choice between them ultimately depends on your project’s specific requirements, such as browser compatibility, programming language preferences, and ease of use.
If you’re looking for a robust solution for HTML to PDF generation, consider signing up for APITemplate.io. It integrates seamlessly with Puppeteer, and makes PDF and Image document creation easy. Happy reading!


