Introduction
![]()
Human attention is a scarce commodity when it comes to marketing. To leverage this limited resource you have to tailor the content to your users to capture their attention.
Personalized images in your email campaigns allow you to give each recipient their own unique image with which they feel a positive connection. A dynamic personalized image can be
- A happy birthday email contains a photo of the recipient and a message
- A greeting card contains the name of the recipient
- A welcome email with the recipient’s first name
- Product recommendations with a dynamic QR Code, barcode, or even chart
- An image showing the recipient’s photo
- etc
With APITemplate Direct URL, you can create dynamic images with an URL link and the link can be embedded into your email template. The personalized images will be instantly generated when the mail is opened by your users.
TR; LD;
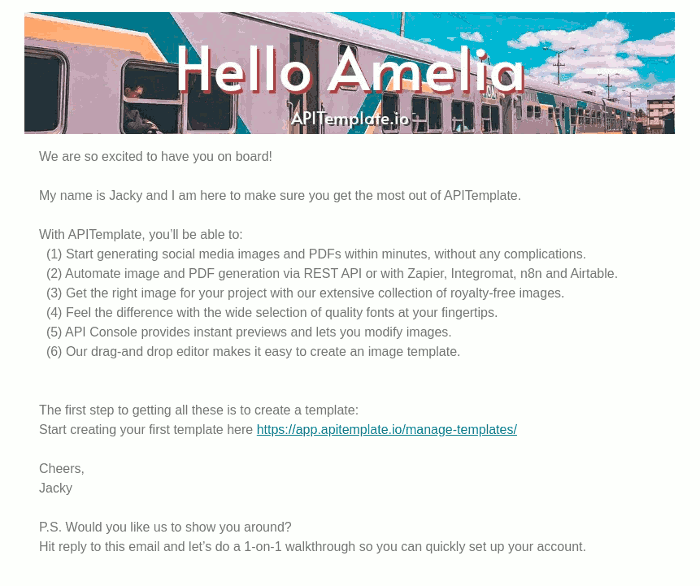
In this tutorial, we are going to create an image template, then add a Direct URL into your Mailchimp email template with a code block. The Direct URL will generate a personalized image contains the recipient’s name. The following is a personalized image we generate for Summer and Elon Musk.


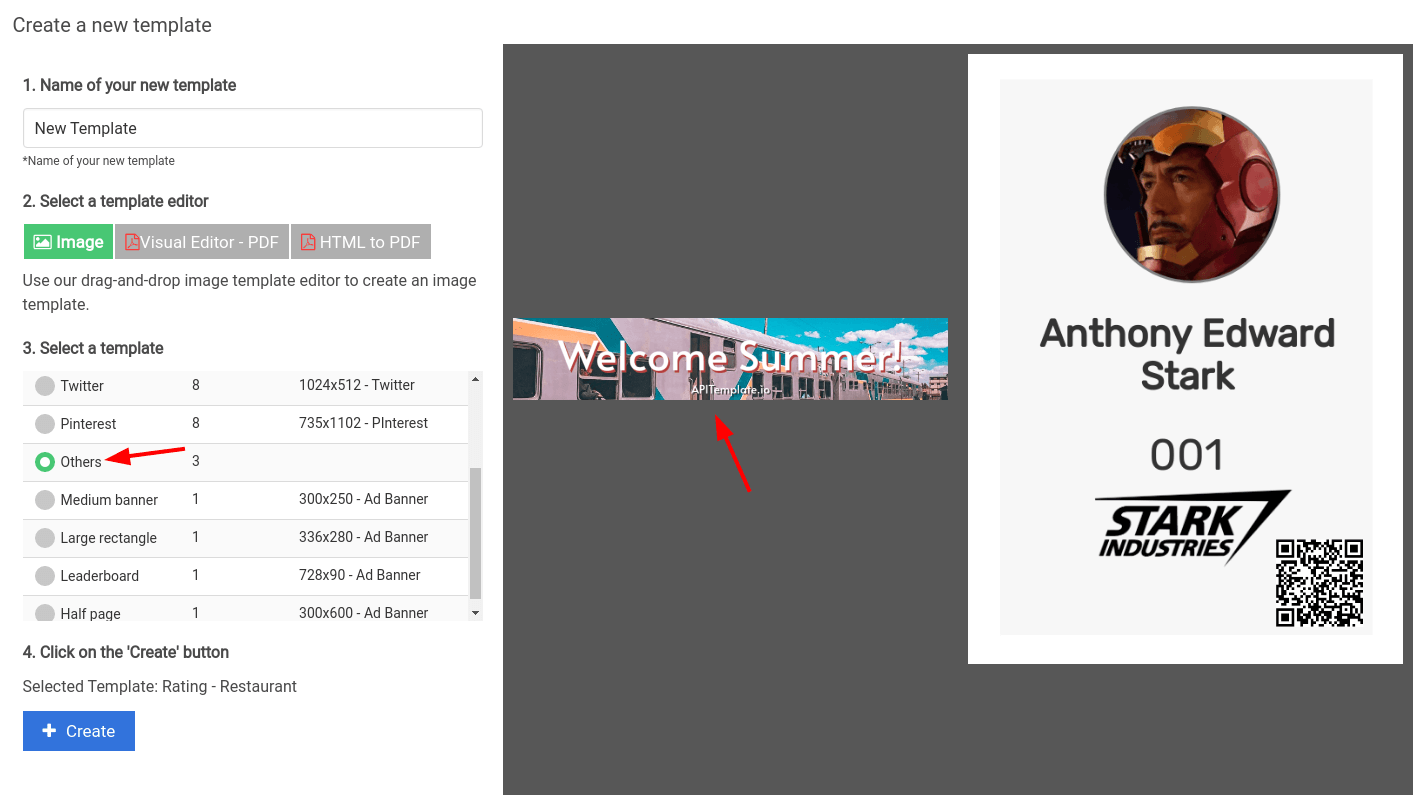
Create an APITemplate image template
(i) Click on New Template and select Email Header in Others
(ii) After a new template is created, click on Launch Image Editor
(iii) In the image editor, click on the Direct URL tab
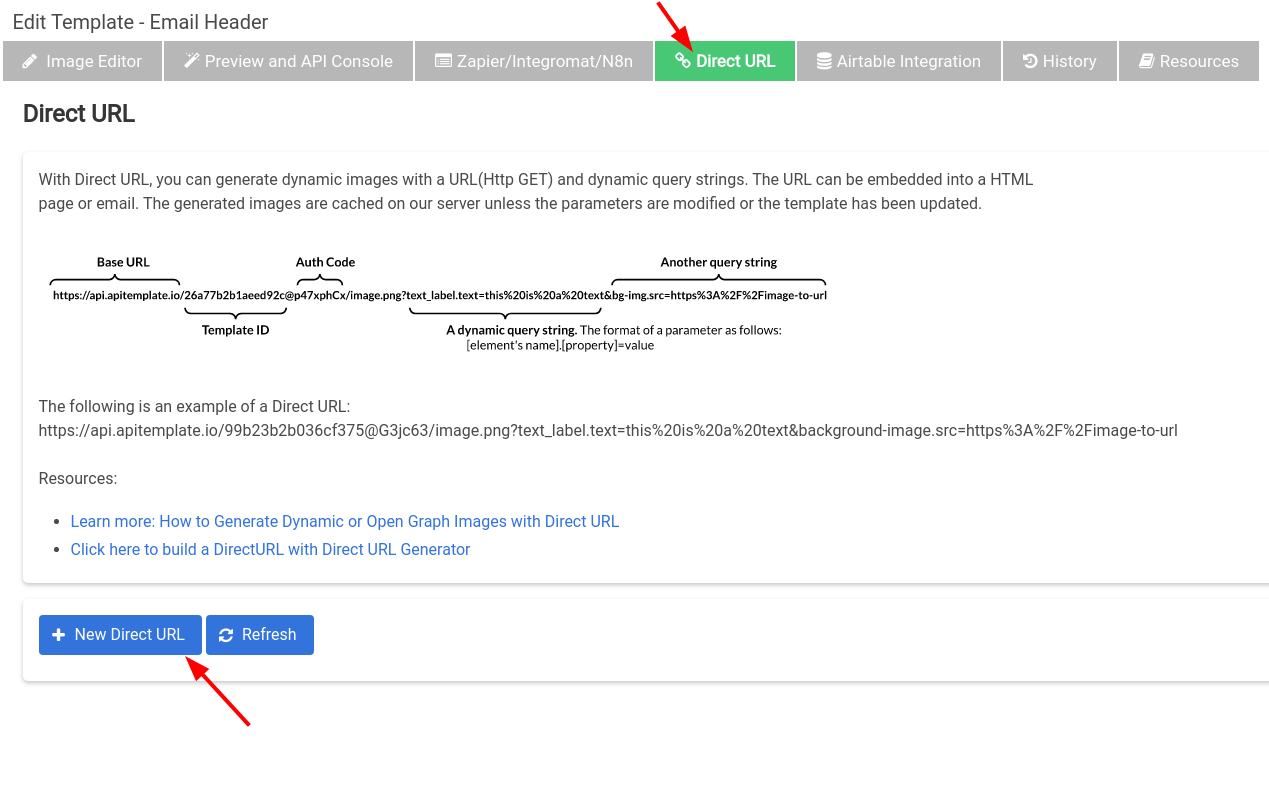
(iv) You may update the settings such as Quota, hourly rate limit, or expiry date.

(v) Copy the Base URL
https://api.apitemplate.io/b8277b2b10ef6024@SX4dUGmm/image.png?
The text property of text_name is the dynamic text element that we want to modify. We need to append the following query string to the Base URL to override the text
text_name.text
You can learn more about Direct URL here
The HTML Code Block for MailChimp
Now we are putting them all together, the Base URL and the property that we want to modify in a query string. We will greet the recipient by his/her first name, the following is the complete HTML code and the URL to be embedded into MailChimp:
Copy the HTML code snippet and we will use it in a step in the next section.
Use MailChimp Code block to Insert Personalized Images
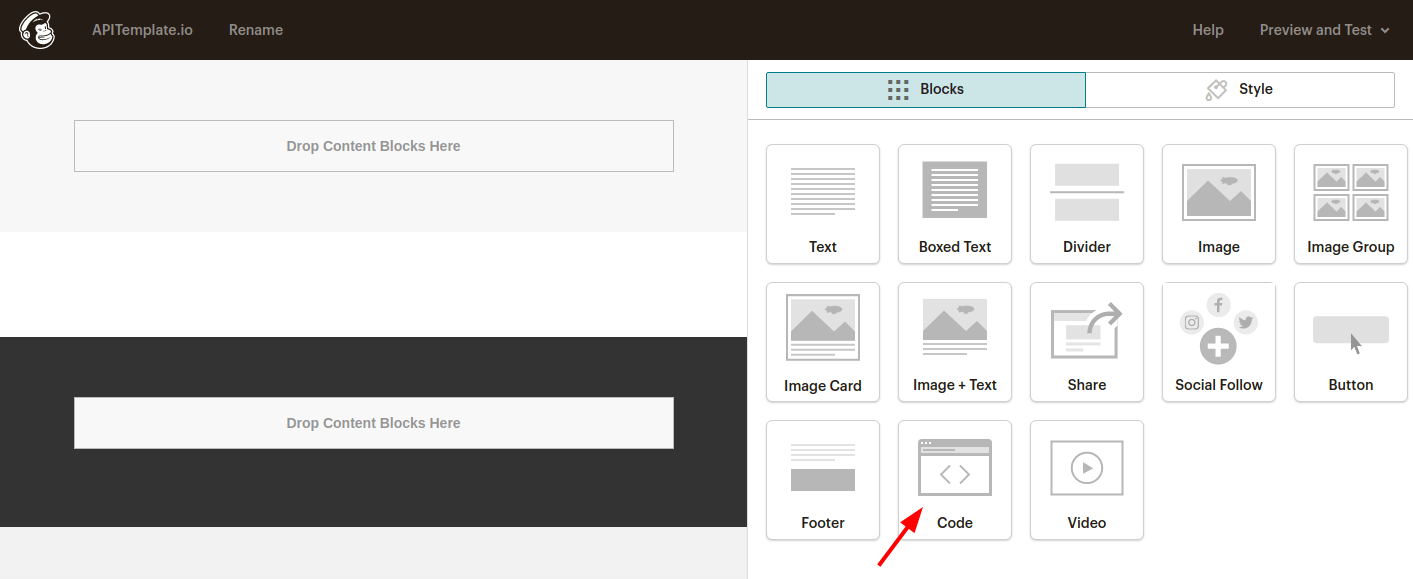
(i) To add a dynamic image to your email campaign, click on the Email Templates. You can start with a blank email template or create a new template from the default templates.
(ii) Then, drag the Code block that available on the right side of your screen and drop it in the email template.
(iii) Paste the copied HTML code snippet in your email HTML editor.
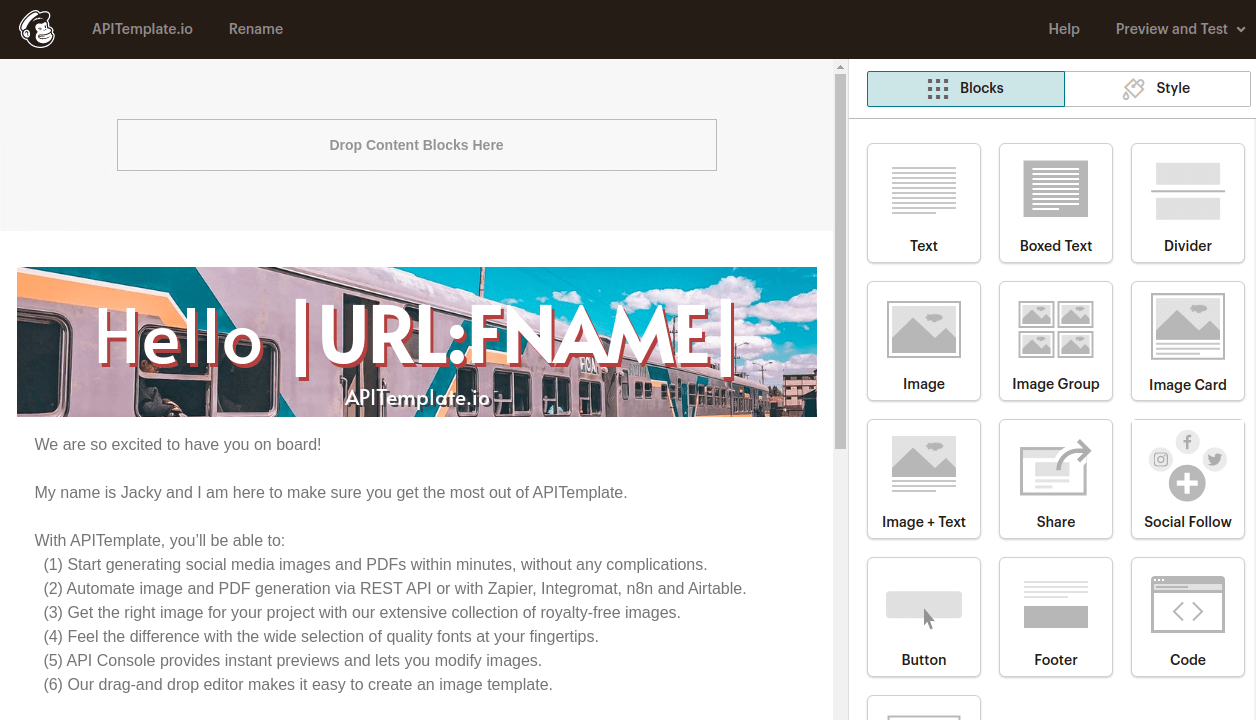
(iv) Then you will see the image appears in the designer and you can save the email template and use it for your campaign.
The final step is to create a campaign and use the email template.
The following is an email that sent to Amelia. The email header contains a personalized image with the first name of the recipient.
Conclusion
In this tutorial, we have created an awesome MailChimp email template with a personalized dynamic image. You can now use the same method to create birthday cards, greeting cards, and emails filled with dynamic content.