If you’ve ever needed to create a bunch of PDFs, like invoices, reports, or forms, you might think it requires a lot of coding and technical know-how. But with ToolJet and Apitemplate, you can do it easily without being a developer.
ToolJet is a low-code solution that allows you to create apps using a simple drag-and-drop interface. You don’t need to know a lot about coding, it makes it easy for anyone to set up apps to handle tasks like collecting data, connecting to a database, or showing charts and graphs.

Now, let’s talk about Apitemplate. This tool focuses on generating PDFs and Images from reusable templates. Normally, if you wanted to create a PDF automatically (like for an invoice or report), you’d have to write code to format the document and put all the information in the right place. But this platform removes that hard work. It provides pre-designed templates that you can customize, and then automatically fills them with data from your application.
In this article, we’ll create a PDF document using ToolJet and this solution. Let’s get into the details.
1. Overview
i. ToolJet
ToolJet is a platform that helps you build apps and tools easily, even if you don’t know how to code. It’s open-source, meaning anyone can use it and even customize it if needed.
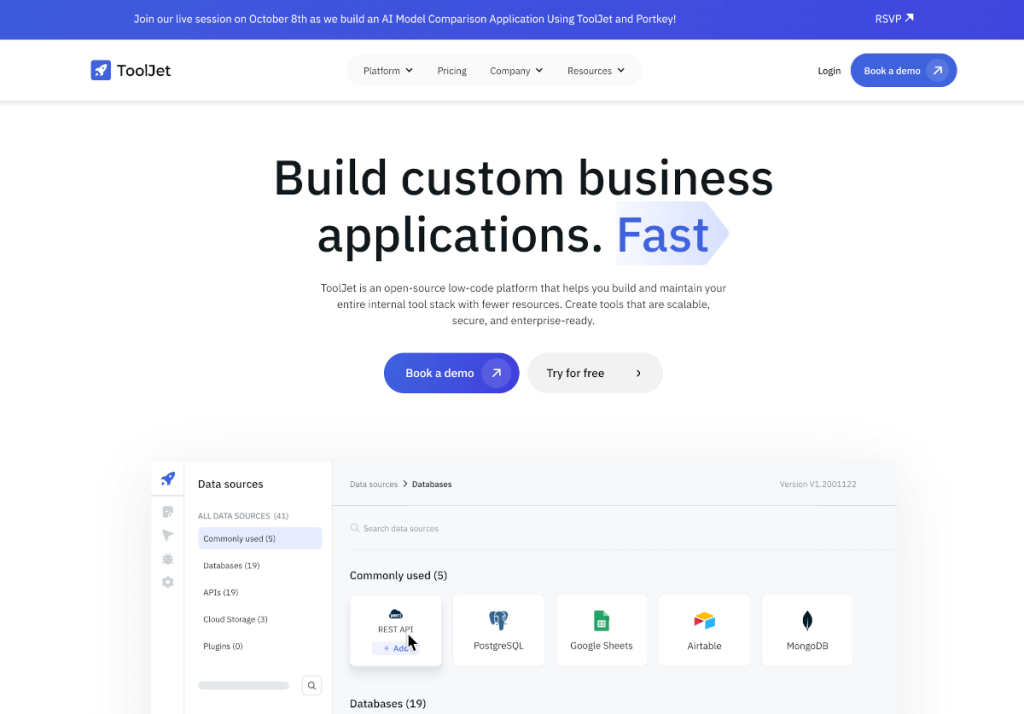
You can create things like dashboards (which show data in a clear way), forms (where people enter information), and workflows (automated tasks). The best part is you don’t need to write much code—just use the drag-and-drop feature to connect different parts like databases and APIs.
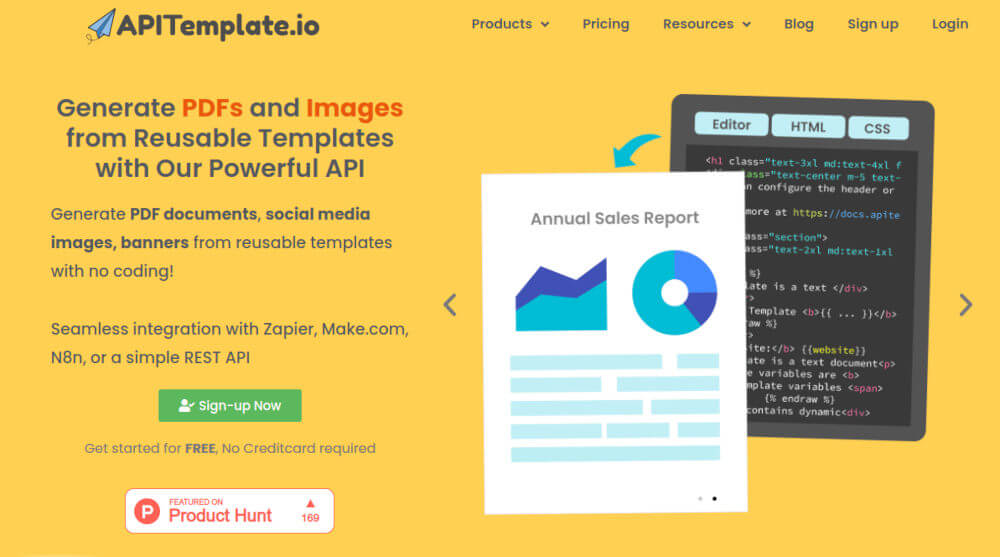
ii. APITemplate
APITemplate is a cloud-based service that helps businesses automatically create PDFs and images, like invoices or reports, using customizable templates. You can design your own template or use one that’s pre-made, and the platform will fill it with the data you give it.
When you use both together, it’s like having an automated system for creating custom PDFs. ToolJet collects and processes the data (like names, addresses, or order details) and sends that data to APITemplate, which turns it into a nicely formatted PDF. This is perfect for businesses because it automates tasks that would normally take a lot of time, like creating invoices, sales reports, or contracts.
Here’s what you can do with both tools:
- Collect data with forms in ToolJet.
- Format or adjust the data using JavaScript (if needed).
- Generate PDFs automatically by sending the data to APITemplate, which creates the document for you
✔ Works with API & no-code workflows
✔ No rendering issues
2. Creating PDF Document with APITemplate
APITemplate is an easy-to-use platform designed to make generating PDFs and images easy. It comes with customizable templates that you can use right away or customize to fit your needs by taking advantage of our WYSIWYG (What-You-See-Is-What-You-Get) editor and support for HTML and CSS.
This editor makes it super easy for you to customize your templates so you don’t have to worry about manually designing each document. Here’s how you can create PDF documents:
i. Sign Up
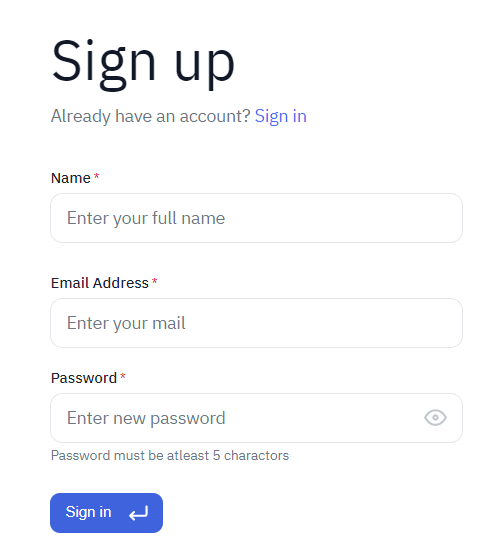
If you already have an APITemplate account, great! You can skip ahead to the next step. But if you’re new here, don’t worry-it’s easy to get started. Just go to apitemplate, and click the big “Sign Up” button at the top of the page.
Follow the instructions to complete the sign-up process. You can choose a free account, which gives you access to all the pre-designed templates without requiring any payment details.
If you want extra features or more advanced options, you can also choose a paid plan that comes with premium tools to level up your creativity.
ii. Login to Your APITemplate Account
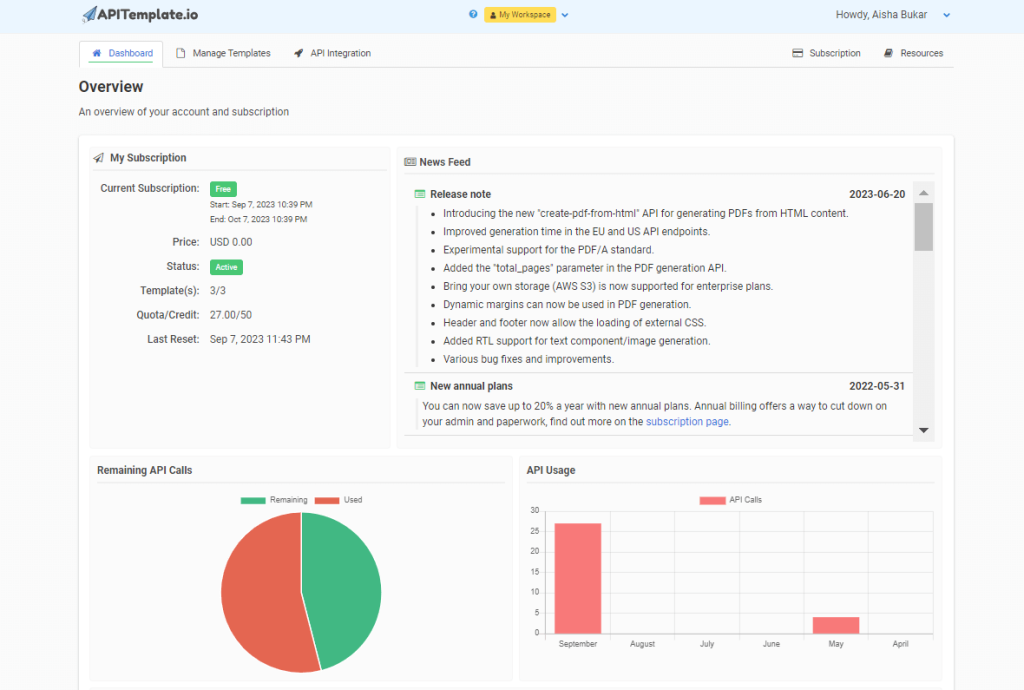
Once you’ve signed up, the next step is logging into your APITemplate account using the details you registered with. After logging in, you’ll be taken straight to your dashboard.
The dashboard gives you a clear overview of your account, including your current subscriptions and how much you’ve used the platform so far. You’ll also find information about new features, special offers, and helpful support and documentation to guide you as you get started. Pretty cool, right? Everything you need is right there.
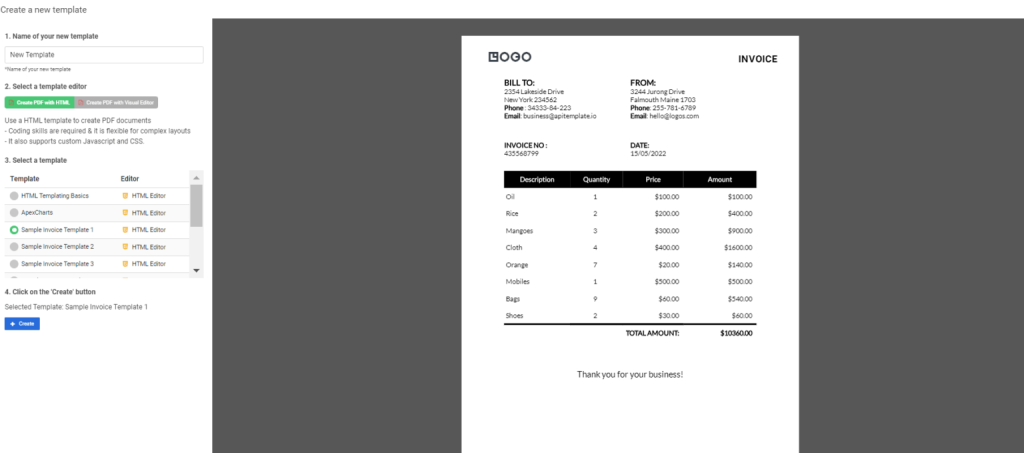
Now, let’s dive into the main task, which is creating your PDF invoice. Here’s how to do it in just a few easy steps. Start by clicking on the “New PDF Template” button. This will take you to a page where you can choose from a variety of ready-to-use templates. Here’s what you need to do next:
- Step 1: Name Your Template
Give your template a name of your choice. You can either come up with something unique or stick with the default name, it’s totally up to you. - Step 2: Choose a Template Editor
You have two options here- If you’re comfortable with coding and want a more customized design, you can create the PDF using HTML. But if you prefer a simple, code-free approach, select “Create PDF with Visual Editor”—this is a super easy WYSIWYG editor (What You See Is What You Get). It’s perfect for beginners! If you’re unfamiliar with it, APITemplate has a tutorial to guide you. For this tutorial, though, we’ll go with the HTML template editor option. - Step 3: Select a Template
For this example, we’ll use the ‘Sample Invoice Template 1’. It’s a great starting point for creating invoices. - Step 4: Create Your Template
Finally, click on the Create button to finish the process. That’s it, your PDF invoice is now ready!
iii. How to get API Integration Key
Your API key is essential when integrating the PDF invoice with ToolJet, so it’s important to copy it now. To do this, click on the API Integration tab at the top of the page. Once you’re there, you’ll see your API key, simply copy it to your clipboard. You’ll need it for the next steps.

3. Setting up Tooljet for PDF Generation
Now that we’ve got our PDF templates ready in APITemplate, the next step is configuring ToolJet to connect everything and automate PDF generation. Here’s a simple guide to help you set up ToolJet for this process:
i. How to Configure Data Source
Before generating PDFs, you’ll need to configure a data source in ToolJet. This data could be anything, from user input to information fetched from a database. Here’s a step-by-step process on how to do this:
- Open Dashboard: If you haven’t signed up for account yet, go ahead and do that now. If you’re already registered, simply log in and head straight to your dashboard.
2. Add a New Data Source: You can add a data source by navigating to the Data Sources section in the left sidebar and then choose the type of data source you’ll like to use (e.g., MySQL, PostgreSQL) or an API. However, for this article, we will be using the sample PostgreSQL database available in ToolJet and set up REST API to connect APITemplate.
3. Configure Connection: To set up your REST API, go to data source, search for REST API and enter the necessary details, such as your base URL and API Key to connect your data source. The base URL for APITemplate is stated below and the API Key can be gotten from your APITemplate (which we copied earlier). Here’s a preview of what your API connection should look like:
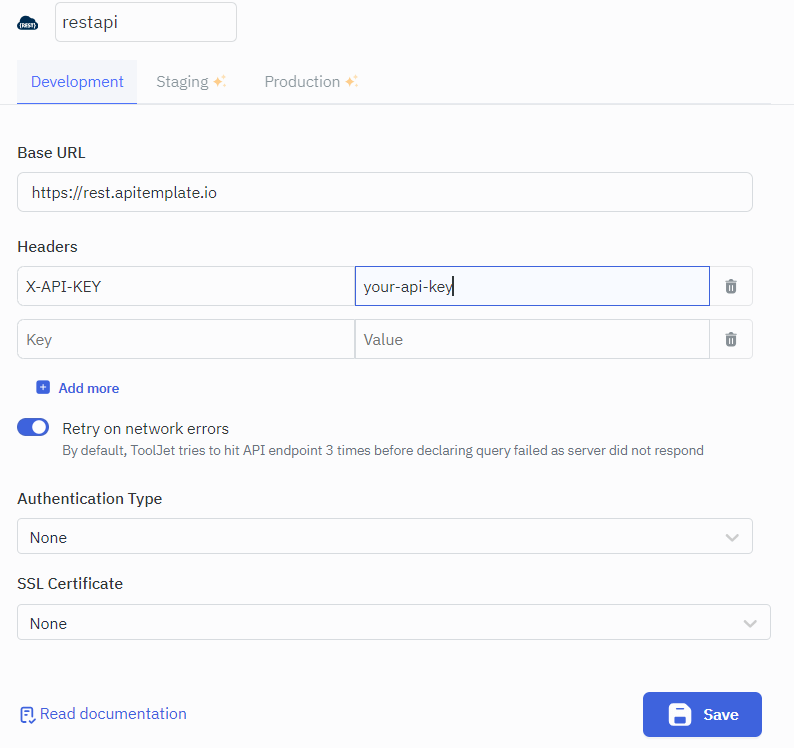
The base URL allows you to integrate APITemplate as an external service in your ToolJet app. This API will help us fetch the data from the PDF we created earlier in our APITemplate account.
4. Test Connection: Once configured, save your connection details and head over to the next steps.
4. Building The Interface In ToolJet
Now that your data source is set up, it’s time to create the user interface where you can trigger PDF generation and display data. Here’s how you can build your app and add essential elements like tables and buttons.
i. How to create an app
Creating an app in ToolJet essentially gives you a customizable platform where you can combine various components like tables, buttons, forms, and more, to perform specific tasks. It allows you to build a user interface (UI) where users can interact with data, trigger actions (like generating PDFs), and view results.
You can connect your app to various data sources (like databases, APIs, or CSV files) to display or manipulate data within the app. For instance, you can pull data from a database and show it in a table.
Also, adding components like buttons allows you set up workflows where actions like sending a request to an API (e.g., creating a PDF) happen with a single click. It’s a drag-and-drop process, so even non-developers can create functional apps easily. Here’s a simple three step process of creating an app:
- Create a New App: Click on “Create New App” from the dashboard.
- Name Your App: Give your app a meaningful name that suits your project.
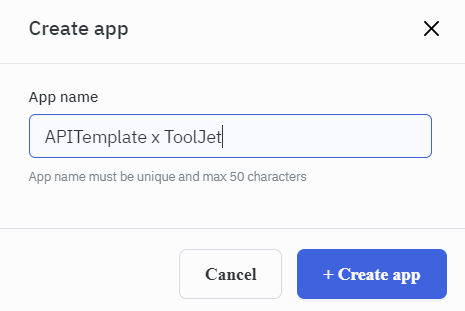
Now you have a blank app where you can start adding interactive elements.
ii. How to Configure Database
On the bottom left corner of your app’s interface, navigate to the default SMPL_query_1. We need to create a sample invoice data for our template. Go to the SQL interface, clear the default query, then paste the following data:
create table invoice_data(
invoice_no varchar(10),
item_name VARCHAR(50),
unit INT,
unit_price INT,
total INT
);
insert into invoice_data(invoice_no, item_name, unit, unit_price, total)
VALUES ('INV001','Oil', 1, 100, 100),
('INV001','Rice',2, 200, 400),
('INV001','Mangoes', 3, 300, 900),
('INV002','Cloth', 4, 400, 1600),
('INV002','Orange', 7, 20, 140),
('INV001','Mobiles', 1, 500, 500),
('INV002','Bags', 9, 60, 540),
('INV001','Shoes', 2, 30, 60);
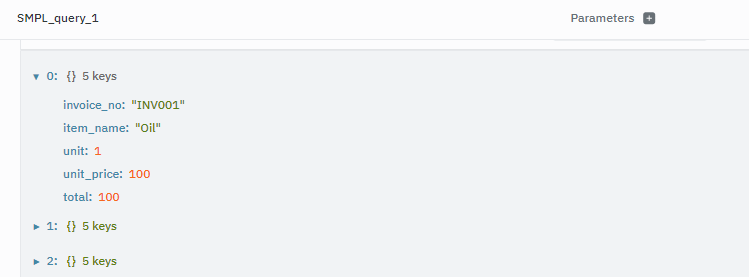
select * FROM invoice_data;
Click on the Run button to make sure it works. You should get an output like this
iii. How to add interactive elements
Adding elements like tables, buttons, and other components provides several key benefits, such as helping you neatly display large amounts of data, automate processes like sending an API request , and giving users control over what actions they want to perform.
It also enhances user experience and makes your app more friendly. Here’s how you can add elements like tables and buttons to your app:
- How to add tables: To add tables onto your app interface, here’s what you need to do:
- From the left sidebar, drag and drop the Table component onto the canvas.
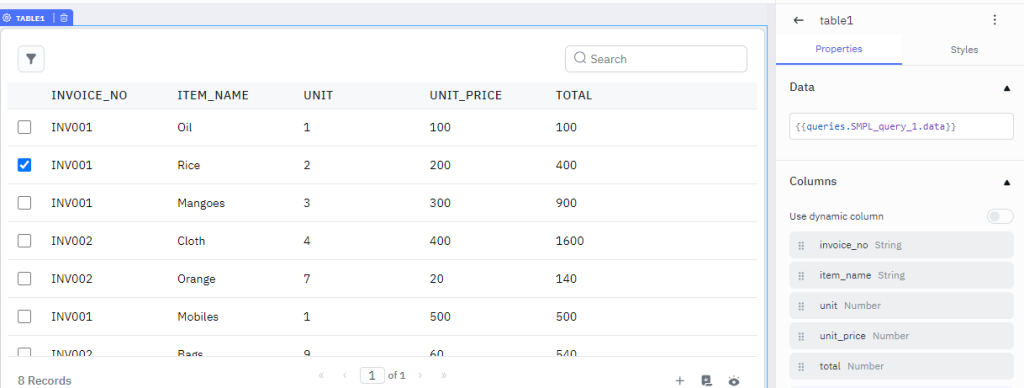
- Use the Properties Panel on the right to configure your table. You can bind data to the table by connecting it to your data source or API (set up earlier). To add the invoice data we just created, edit the Data section and add the following query:
{{queries.SMPL_query_1.data}}Your table data immediately changes to the data you created. Here’s a preview of what it looks like:
Let’s repeat the process all over again to add another table data. Go back to your default SMPL_query_1, hover on it and make a duplicate query.
Go to the query you just duplicated, edit and add the following query to the SQL interface:
create TABLE invoice_header(
date date,
invoice_no varchar(10),
sender_address1 varchar(30),
sender_address2 VARCHAR(30),
sender_phone varchar(30),
sender_email VARCHAR(30),
rece_addess1 VARCHAR(30),
rece_addess2 VARCHAR(30),
rece_phone VARCHAR(30),
rece_email varchar(30),
total varchar(10),
footer_email VARCHAR(30)
);
insert into invoice_header(date, invoice_no,
sender_address1,sender_address2,sender_phone,sender_email,
rece_addess1,rece_addess2,rece_phone,rece_email,total, footer_email)
values ('2023-09-19', 'INV001','3244 Jurong Drive','Falmouth Maine 1703',
'255-781-6789','hello@logos.com', '2354 Lakeside Drive','New York 234562',
'34333-84-223','business@apitemplate.io','total','hello@logos.com');
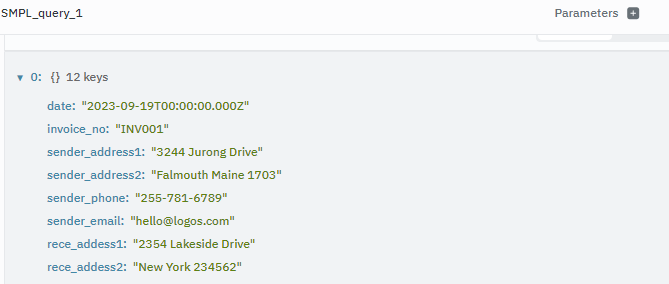
select * FROM invoice_header;
Click on the run button to make sure it works.
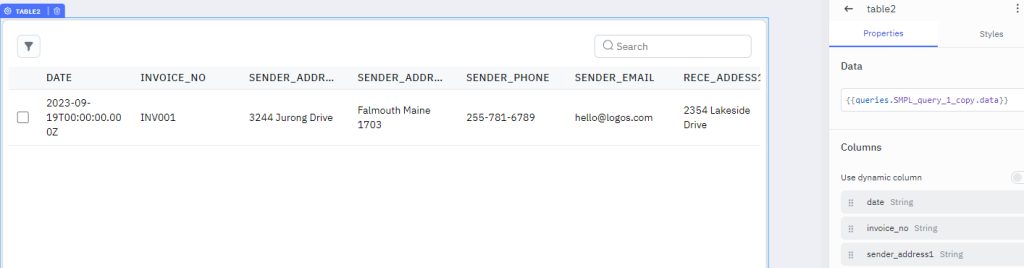
Drag a table component on the left side of your app. Edit the properties section and add the following query:
{{queries.SMPL_query_1_copy.data}}
Your table component should reflect the newly created data.
2. How to add buttons: To add a button, you need to configure an event handler. In this case, we need to set up our REST API properly, so when the button is clicked, it automatically downloads the PDF template. Here’s what you need to do:
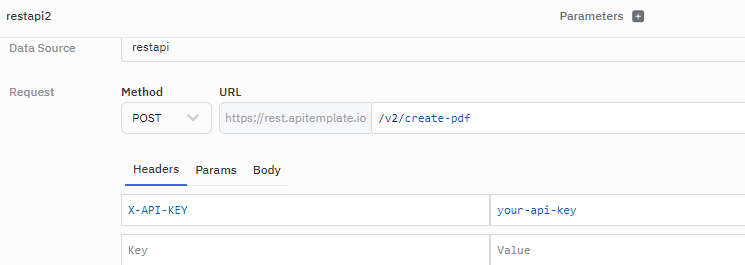
On the bottom left corner of your app’s interface, navigate to the “Add” button and choose the REST API created earlier. You need to provide an endpoint for your API. In this case, the endpoint to create a PDF in APITemplate is /v2/create-pdf
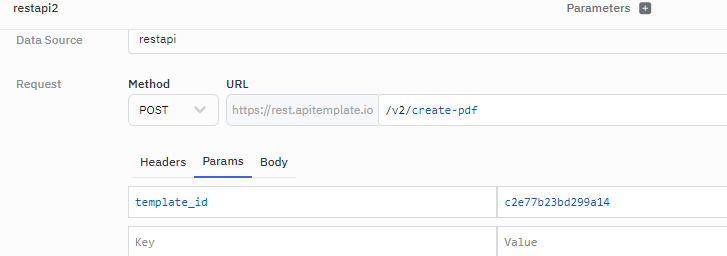
The next step will be to pass in a parameter. In this case, we will need to pass in our template ID as the parameter, so it knows exactly where to display the data. Your template ID can be found in your APITemplate ‘Manage Templates’ page after logging into your account.
We also need to pass the data from ToolJet, which will be sent to our PDF template in JSON format.
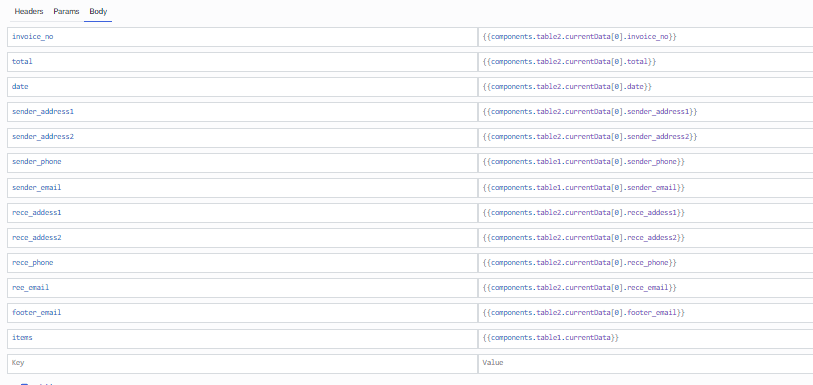
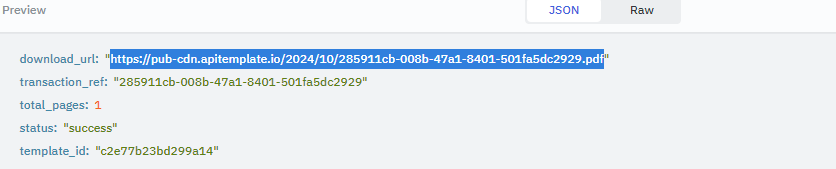
Run to make sure it works. You should get a download URL to the PDF document. Here’s a preview of what it looks like:
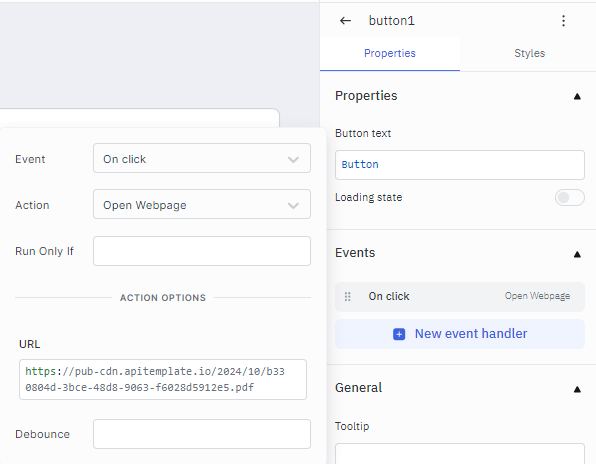
To add a button, drag the Button component from the right-side panel. Click on the button and open the Properties panel on the right. Under ‘New Event Handler,’ select ‘Event,’ choose ‘on-click,’ and then select ‘Action’ as ‘Open Webpage.’ Paste the download URL in the field provided. Now, whenever the button is clicked, it will direct users to the download link.
3. Add PDF component: We can also add a PDF component to view the document directly within our app. Simply search for the PDF component in the right-hand panel, then drag and drop it onto your app’s interface. Next, paste the download URL into the ‘File URL’ section

You can also click on the Download PDF button. This automatically downloads the PDF to your device.
5. Why Use Tooljet with API Template for PDF Generation?
When you combine ToolJet and apitemplate, you get a simple way to build an app that can generate PDFs whenever you need them. Here’s a basic rundown:
- Build with ToolJet: You can use it to create your app, adding in all the parts you need without writing much code. Just like the example we used, you could configure a table and connect your app to a database to pull in information.
- Generate PDF Once you have your app set up in ToolJet, you can integrate it with apitemplate to create PDFs using pre-designed templates.
- Easy Integration: ToolJet has built-in features that make it easy to connect with apitemplate, so you don’t have to worry about how everything links together. It’s just a matter of setting up the connection, and then your PDFs are created at the click of a button.
It is similar to Retool, both being low-code platforms. We also have a tutorial on generating PDFs using Retool and APITemplate. While ToolJet and Retool are quite similar in their PDF generation capabilities, they share a common limitation: you can’t style the generated PDFs directly within the tools. The good news is, with APITemplate, you can fully customize your PDFs using HTML and CSS.
6. Conclusion
Using ToolJet with APITemplate is a great way to generate PDF documents without needing to know much coding. This combination makes it easy for businesses and individuals to create documents like invoices, reports, and certificates quickly, saving time and effort.
With ToolJet’s easy-to-use interface and the flexibility of APITemplate for customizing PDFs, you can design professional-looking documents in no time. The steps we’ve covered in this guide show just how simple it is to create an app, connect to an API, and personalize your PDF templates.
As more businesses go digital, tools like ToolJet and APITemplate are perfect for helping non-technical users automate tasks and create documents more efficiently. These platforms make it easy to handle everyday business needs without getting bogged down in complicated development work. Thanks for reading!